Google sign-in, bot protection and analytics
Add Google sign-in, a bot check on your forms and Google Analytics, then read the Security Monitor and the rate limits.
Updated 9 Oct 2026 · written for Launch Lab 2.9.0
On this page
Open Integrations under Tools in the admin sidebar. Each outside service the site can use has a card here. This guide covers two of them, Google sign-in and Bot protection (Cloudflare Turnstile), then the Google Analytics field on Site Settings, the Security Monitor and the limits the site puts on its own forms. All of it is optional.
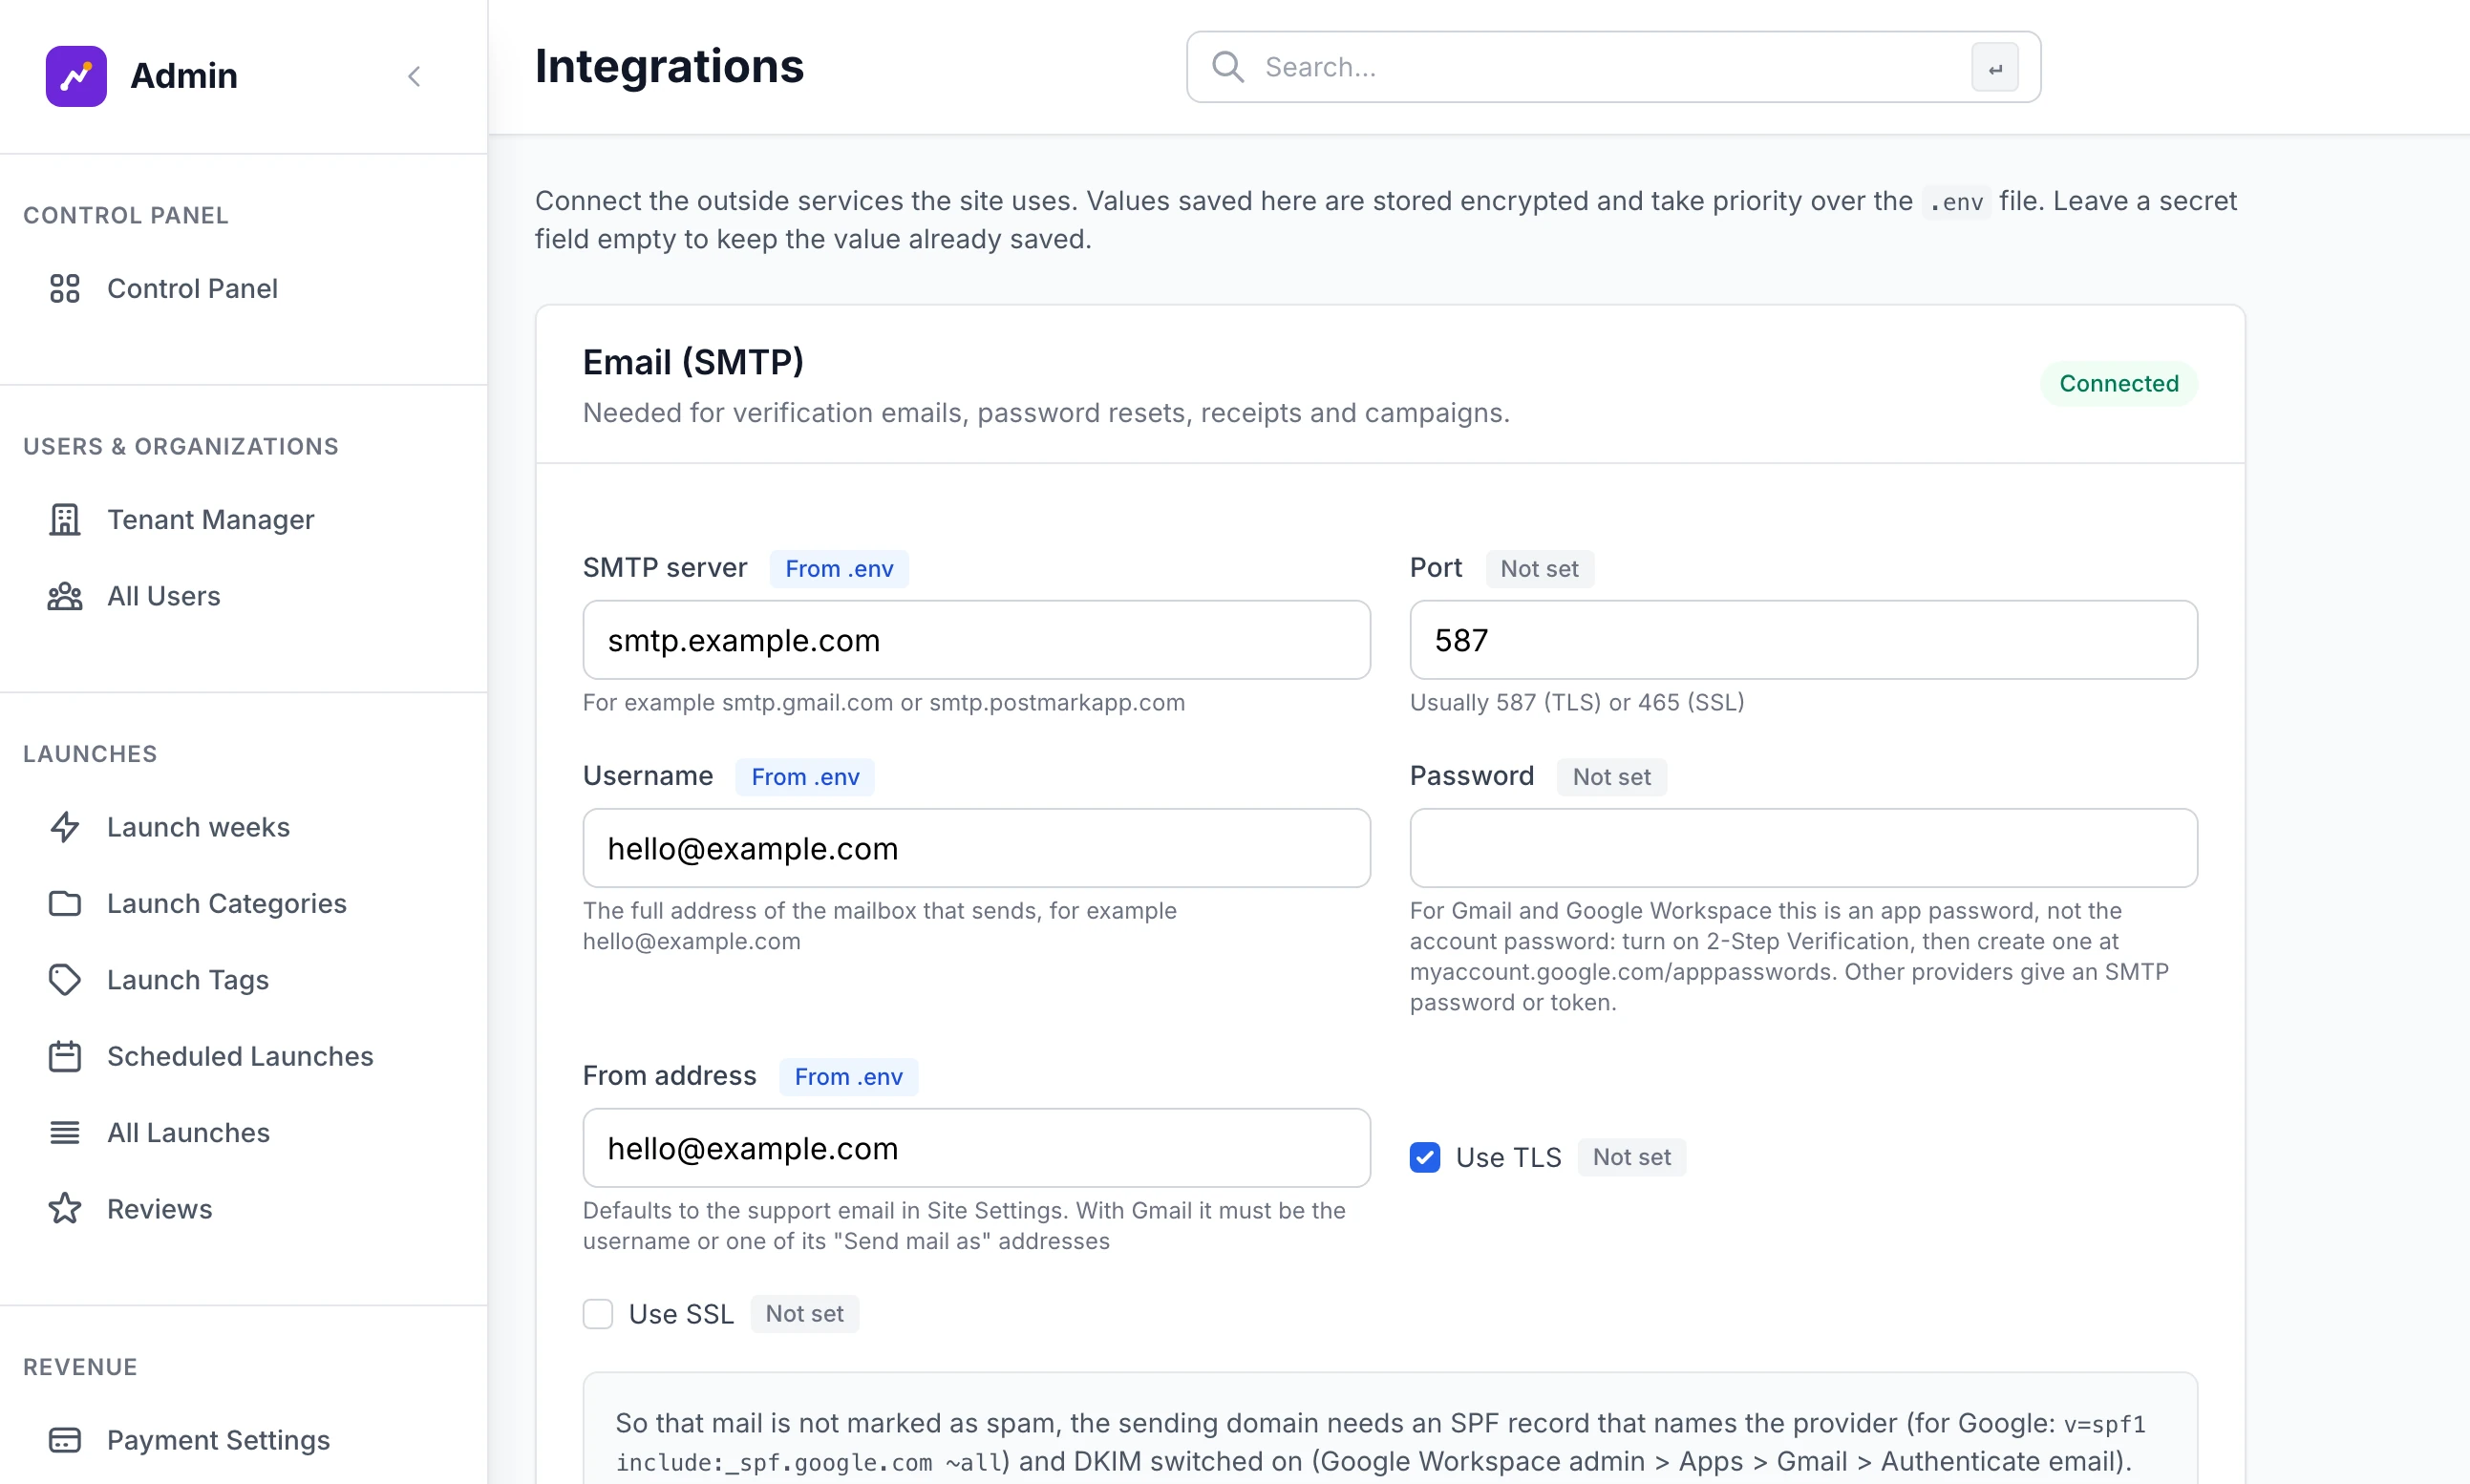
Every card works the same way. Its badge reads Connected or Not connected. To save it you type your password into Your password, to confirm and click Save: without the password you see "Enter your account password to save credentials." A secret field left empty keeps the value already saved, and Clear saved values (use .env) removes what the card saved.
This guide says "listing" and "maker": your site uses its own words for both.
Google sign-in#
With both values saved, the sign-in page shows Continue with Google above the email form and the sign-up page shows Sign up with Google.
Step 1: Copy the redirect address from the card
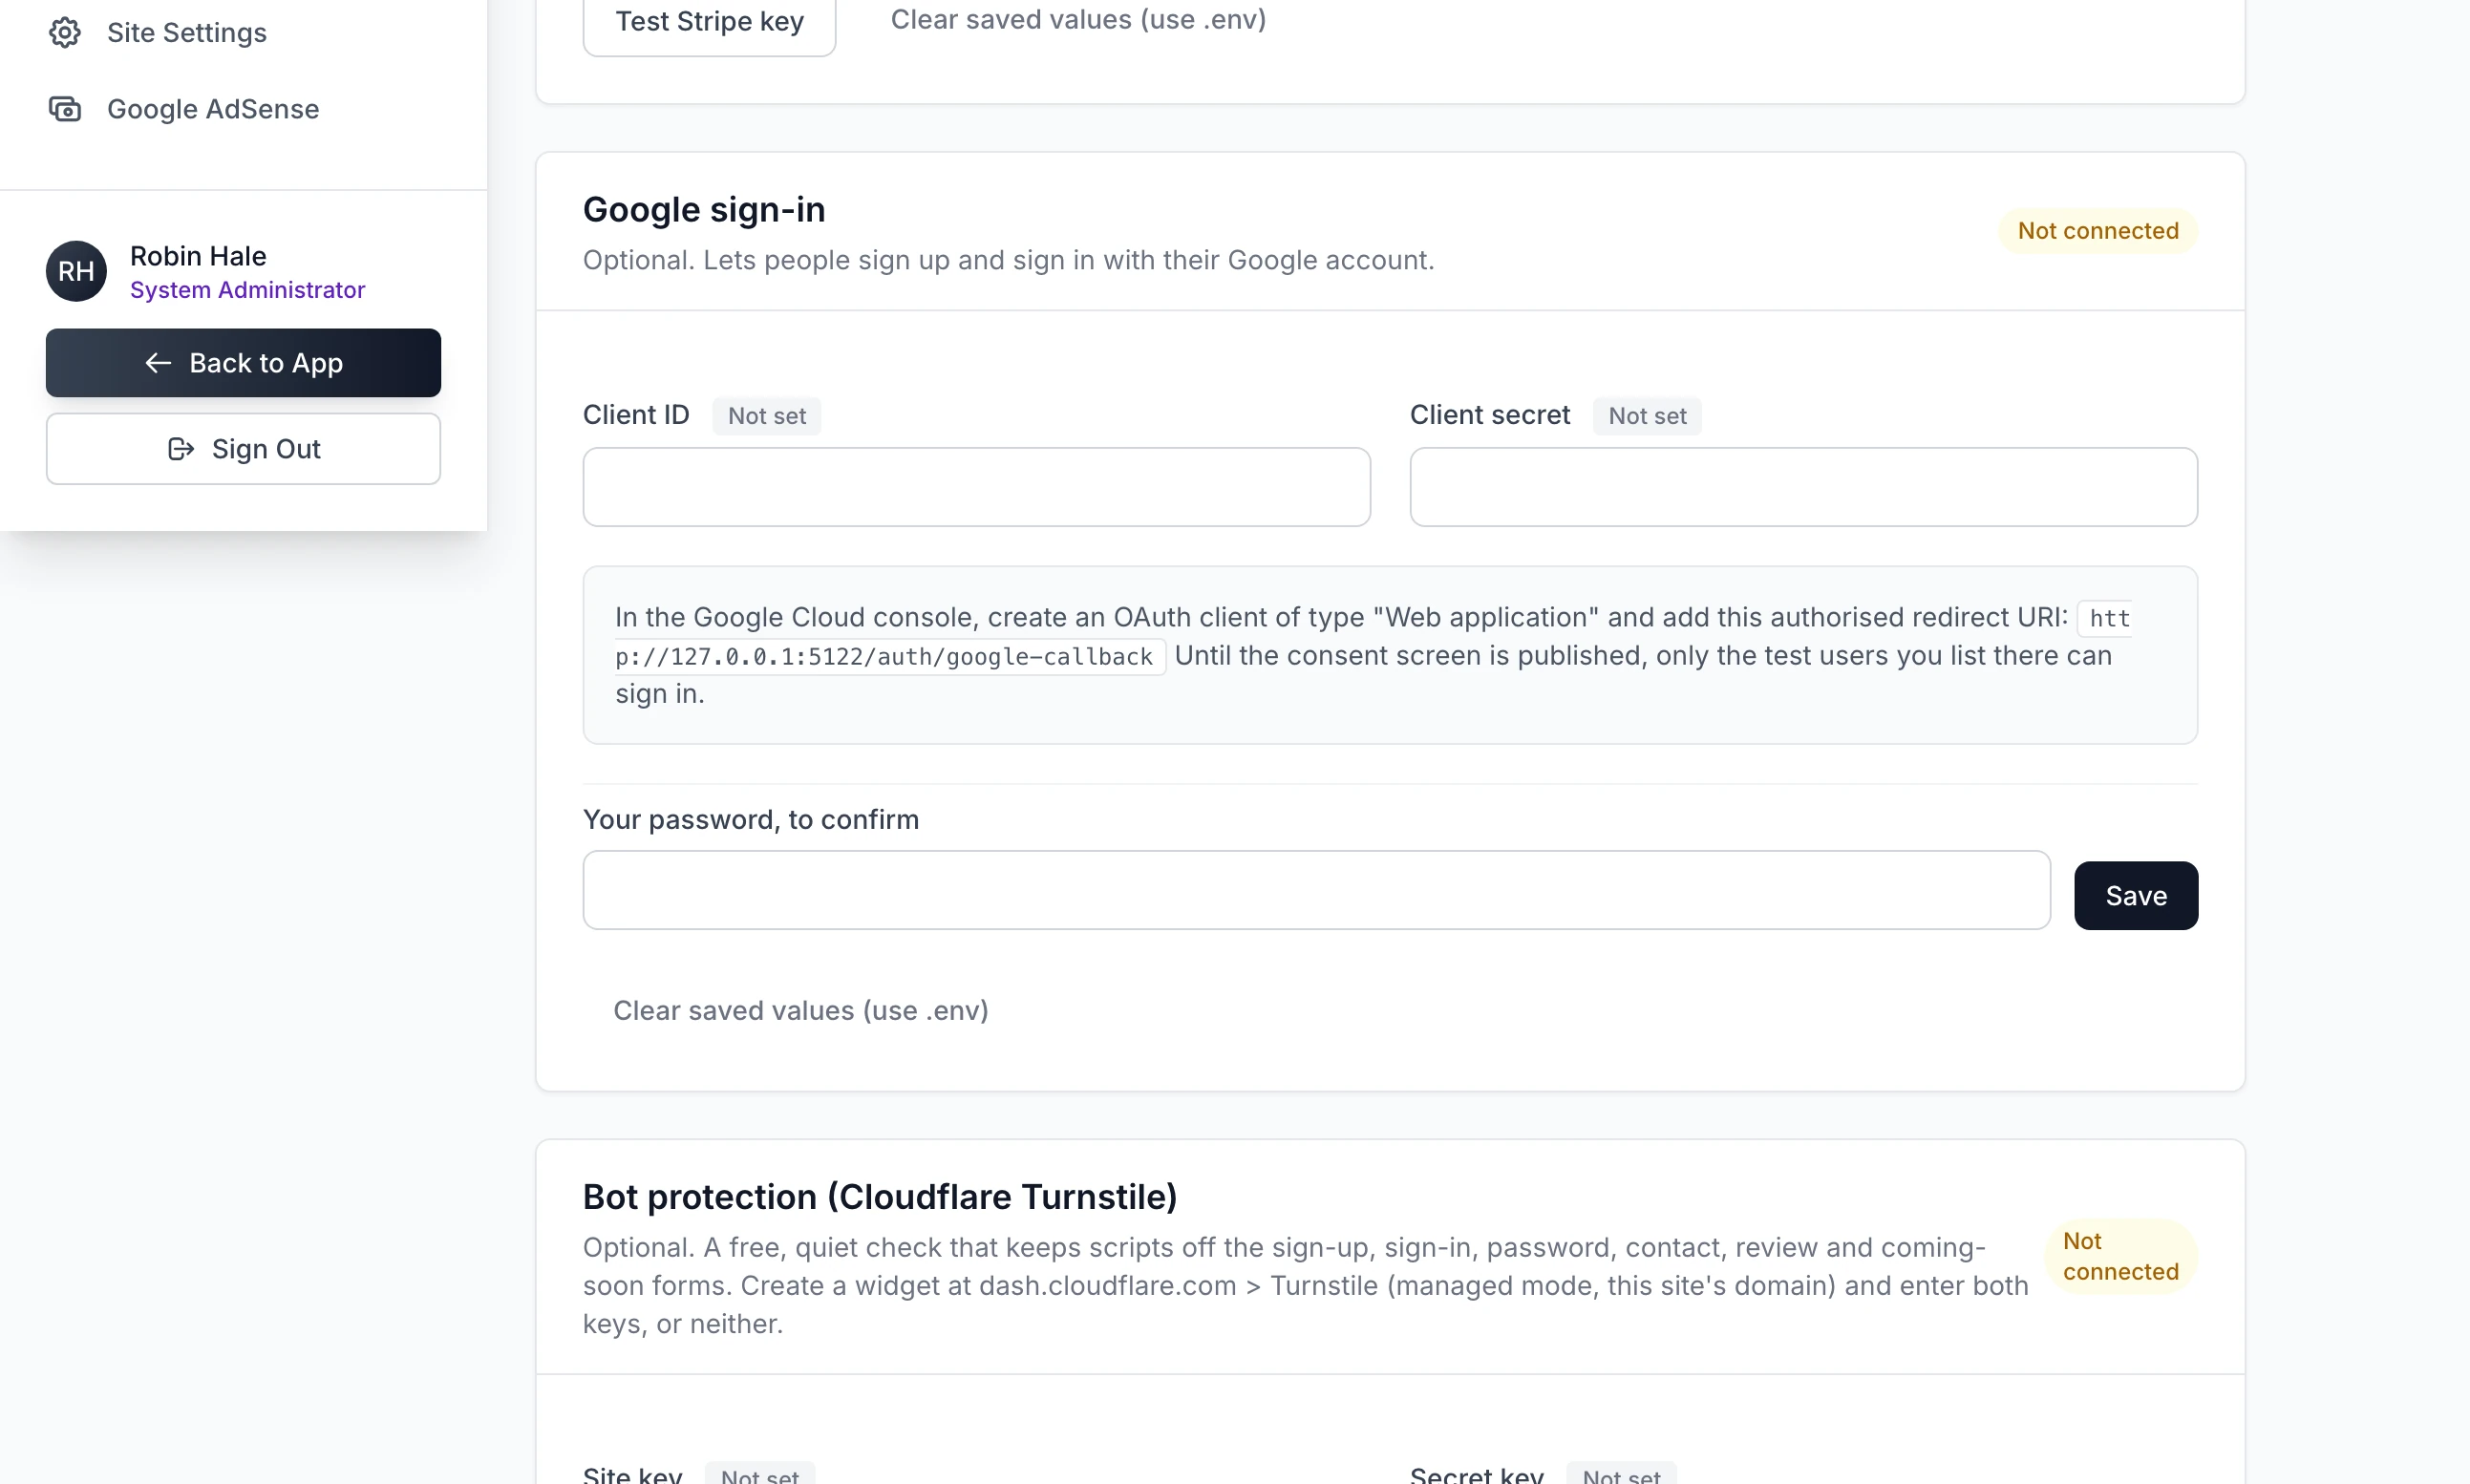
Scroll to the Google sign-in card. The grey note in it shows the address Google must send people back to. It is your site's address followed by
/auth/google-callback:Authorised redirect URIhttps://your-domain.com/auth/google-callbackOn your own computer the card shows the address in your browser, for example
http://127.0.0.1:5000/auth/google-callback, and Google accepts that for testing.Step 2: Set up the consent screen in Google
In the Google Cloud Console, choose or create a project. Under APIs & Services, configure the OAuth consent screen: the name people see when they are asked to continue and your support email. Google will not create a client until this is done. The card warns: "Until the consent screen is published, only the test users you list there can sign in."
Step 3: Create the OAuth client
Under APIs & Services, Credentials, click Create credentials and choose OAuth client ID. Set the application type to Web application. Under Authorised redirect URIs, add the address from the card, exactly as shown.
Step 4: Copy the two values
Google shows a client ID, which ends in
.apps.googleusercontent.com, and a client secret, which starts withGOCSPX-.Step 5: Paste them into the card
Paste them into Client ID and Client secret, type your password and click Save. You see "Google sign-in settings saved." and the badge changes to Connected. There is no test button on this card.
Step 6: Try it
Open the sign-in page in a private window. The Google button appears within a minute of saving.
What a new person gets#
Someone with no account here lands on a page headed "Nearly there". It asks for a Username and an Account name, both filled in from their Google details, and a tick to agree to your terms and privacy policy. Create my account makes an account that is active and verified at once, because Google has already checked the address. It has no password and takes their Google photo as its profile picture. They get the welcome email and you get the new-user email.
They have 15 minutes to finish that page. After that they see "That took a little too long. Start again with the Google button."
When the email already has an account#
| The address belongs to | What happens |
|---|---|
| An account that has verified its email | The Google account is linked to it and the person is signed in. The password still works, so they can use either. |
| An account that never clicked its verification link | It is linked, marked verified and signed in. Its old password is removed, so whoever typed that address at sign-up without owning it cannot get in. |
| A suspended or inactive account | It stays shut. They see "Your account is inactive. Please contact support." |
An account that joined with Google can add a password later from its profile, with Add a password. Until it has one, anything that asks for a password asks for the person's email address instead. On this page, an admin who signs in with Google sees Type your email address to confirm.
Bot protection#
Cloudflare Turnstile is a free check that a form is being filled in by a person and not a script. It shows as a small box on the form.
Step 1: Add a widget in Cloudflare
Sign in to the Cloudflare dashboard, open Turnstile and click Add widget. Give it your site's domain and choose the Managed mode. Cloudflare then shows a site key and a secret key.
Step 2: Paste both keys into the card
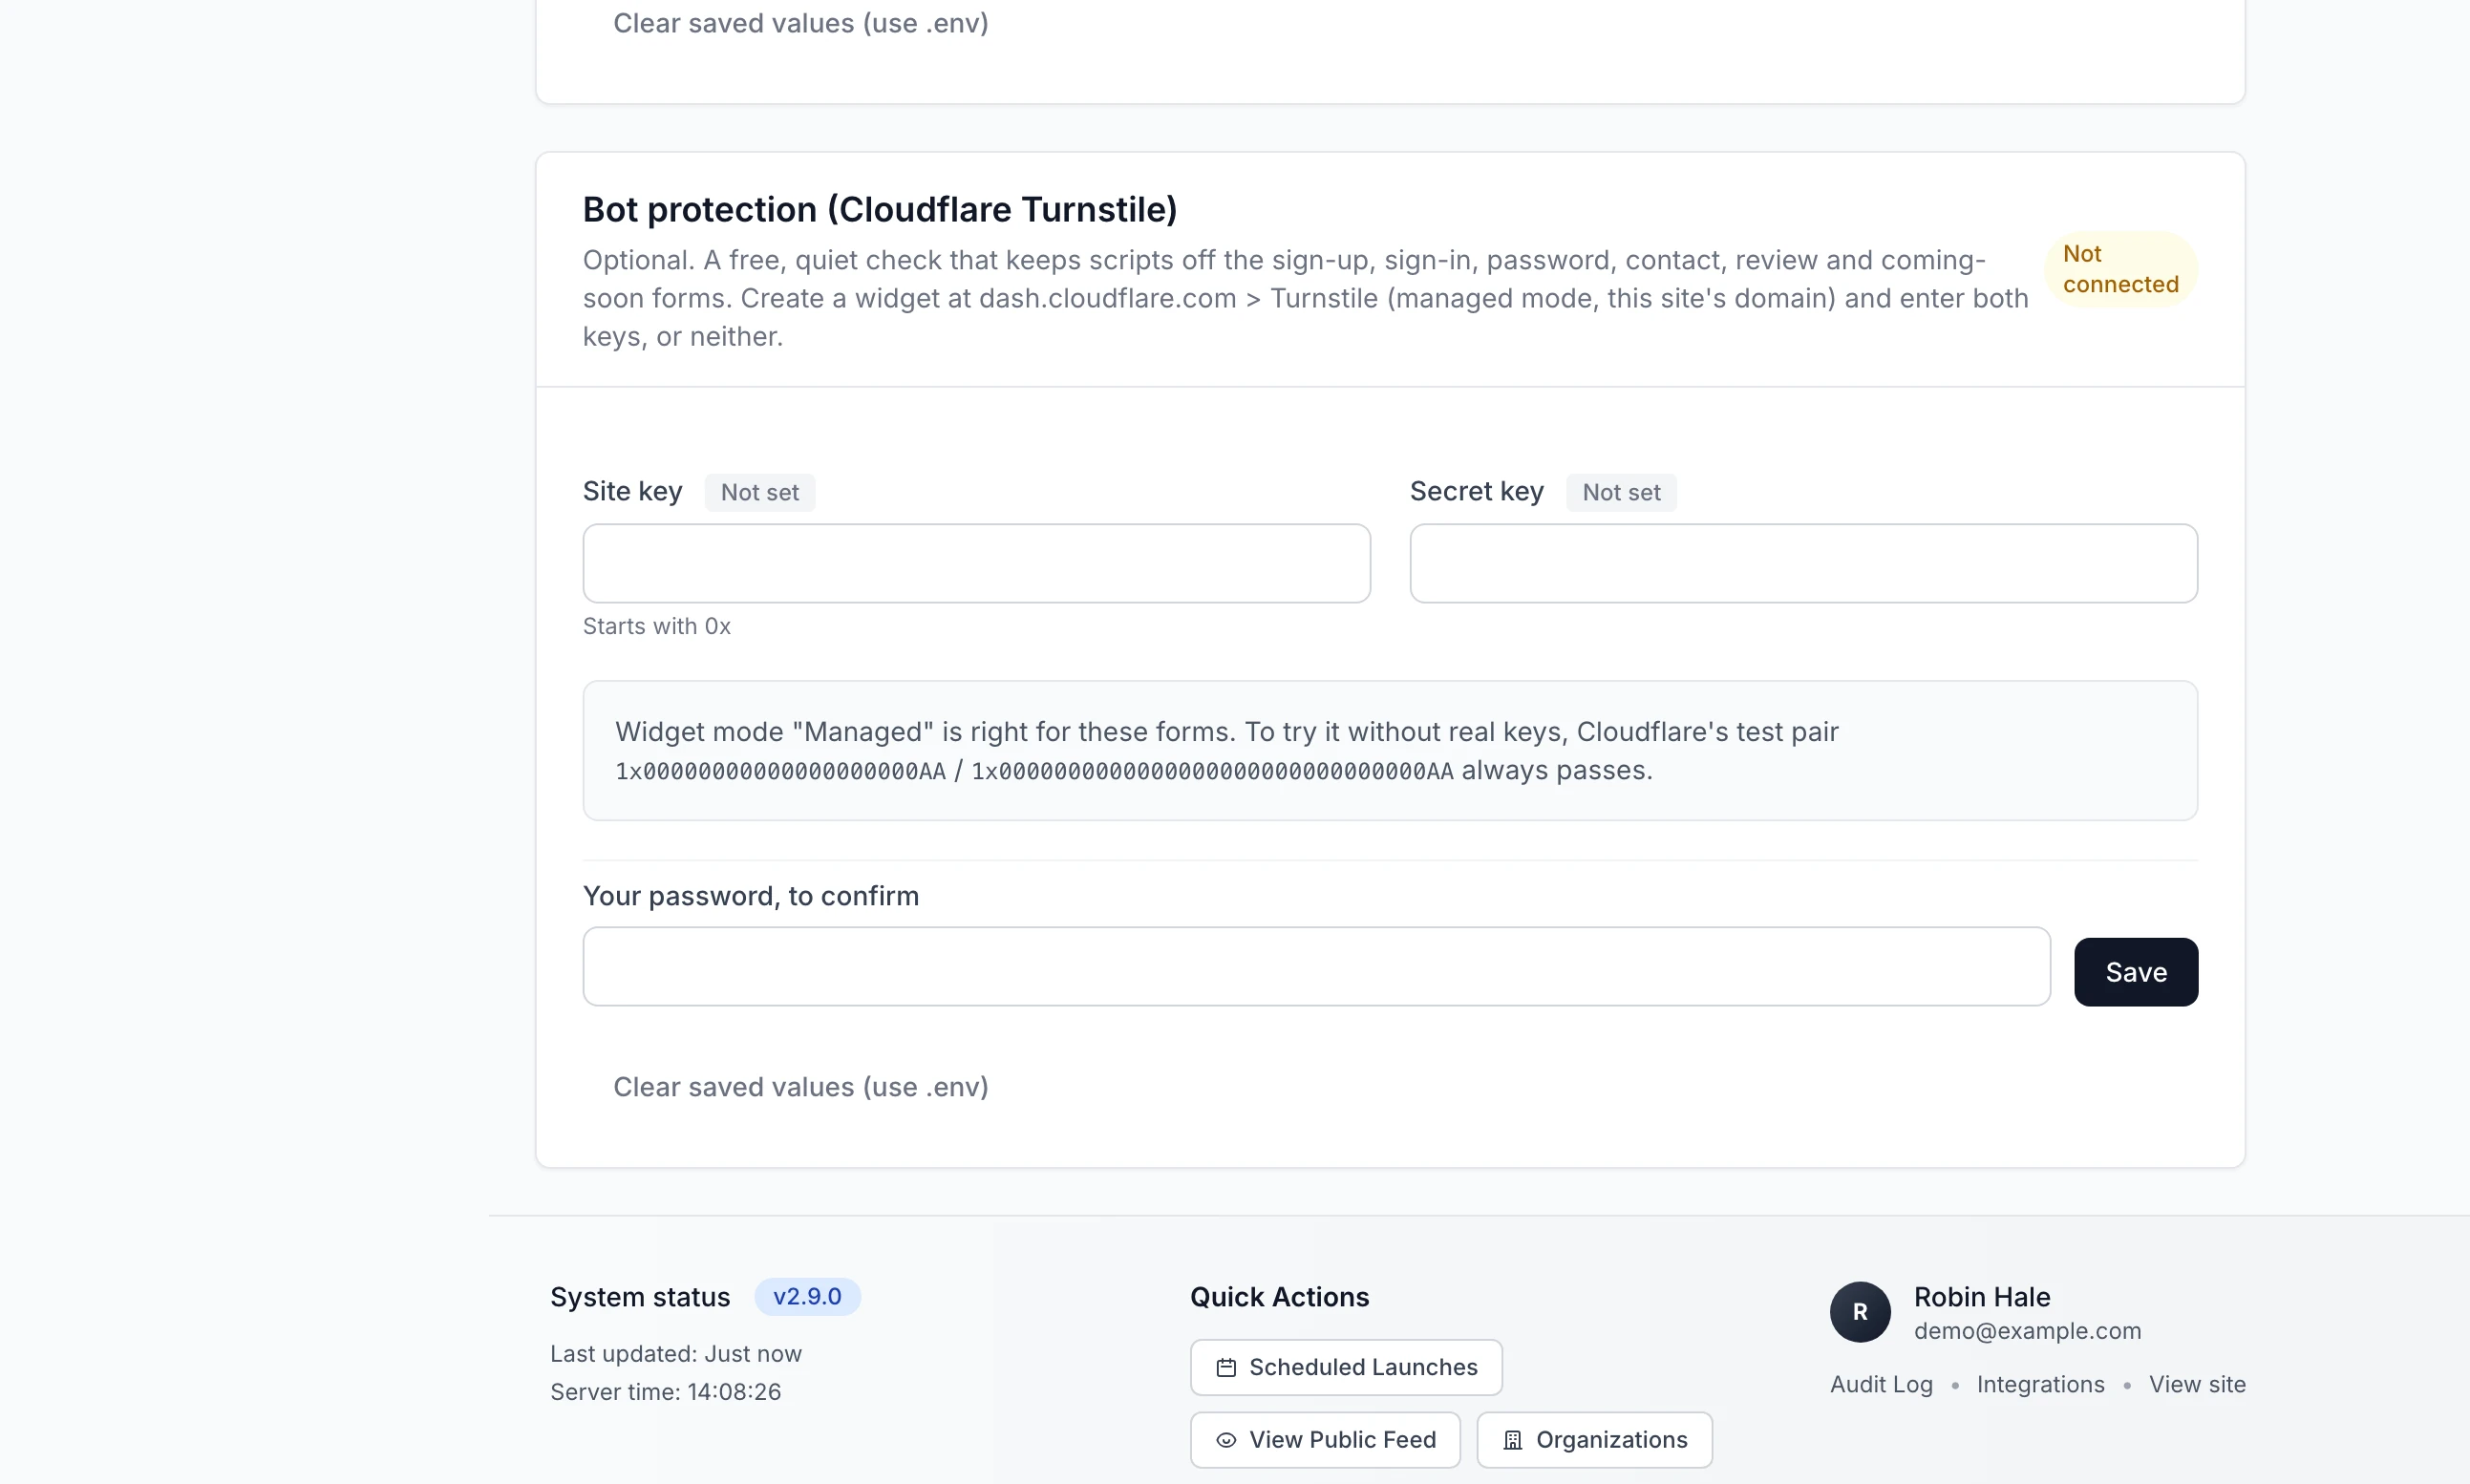
On Integrations, scroll to Bot protection (Cloudflare Turnstile). Paste the keys into Site key and Secret key. The card says the site key starts with
0x. Enter both or neither: with one key missing, nothing is checked.Step 3: Save
Type your password and click Save. You see "Bot protection (Cloudflare Turnstile) settings saved." There is no test button.
Step 4: Check a form
Open the sign-in page in a private window. The Turnstile box is above the Sign in button.
Which forms it guards#
| Form | If Cloudflare cannot be reached |
|---|---|
| Create an account | The form is refused |
| Write a review on a listing | The form is refused |
| Sign in | The person is let through |
| Forgot password | The person is let through |
| Contact | The person is let through |
| The email box on the coming-soon page | See the warning below |
A check that fails shows "The bot check did not pass. Please try again." with a new box, because each pass can be used once.
The second column is what "fails closed" means. Your site asks Cloudflare whether each check was real and waits up to five seconds for the answer. If none comes, the two forms that create something public refuse, with "The bot check is not available right now. Please try again in a few minutes." The others let the person through, so that a fault at Cloudflare cannot lock anyone out of their account. Signing in with Google is not checked at all.
If the box has not loaded after ten seconds, usually because of a content blocker, the form says "The bot check could not load. Disable any content blocker for this page, then try again."
Try it on your own computer#
A real widget only works on the domain you gave Cloudflare. For a copy on your own computer, Cloudflare publishes test keys:
| Site key | Secret key | Result |
|---|---|---|
1x00000000000000000000AA | 1x0000000000000000000000000000000AA | Always passes |
2x00000000000000000000AB | 2x0000000000000000000000000000000AA | Always fails |
On a live site the check must have been passed on your own domain, so the test keys are for your own computer only.
Google Analytics#
Open Site Settings under Tools and choose the Analytics & Legal tab. Paste your measurement ID into Google Analytics ID and click Save settings. You see "Site settings updated successfully!".
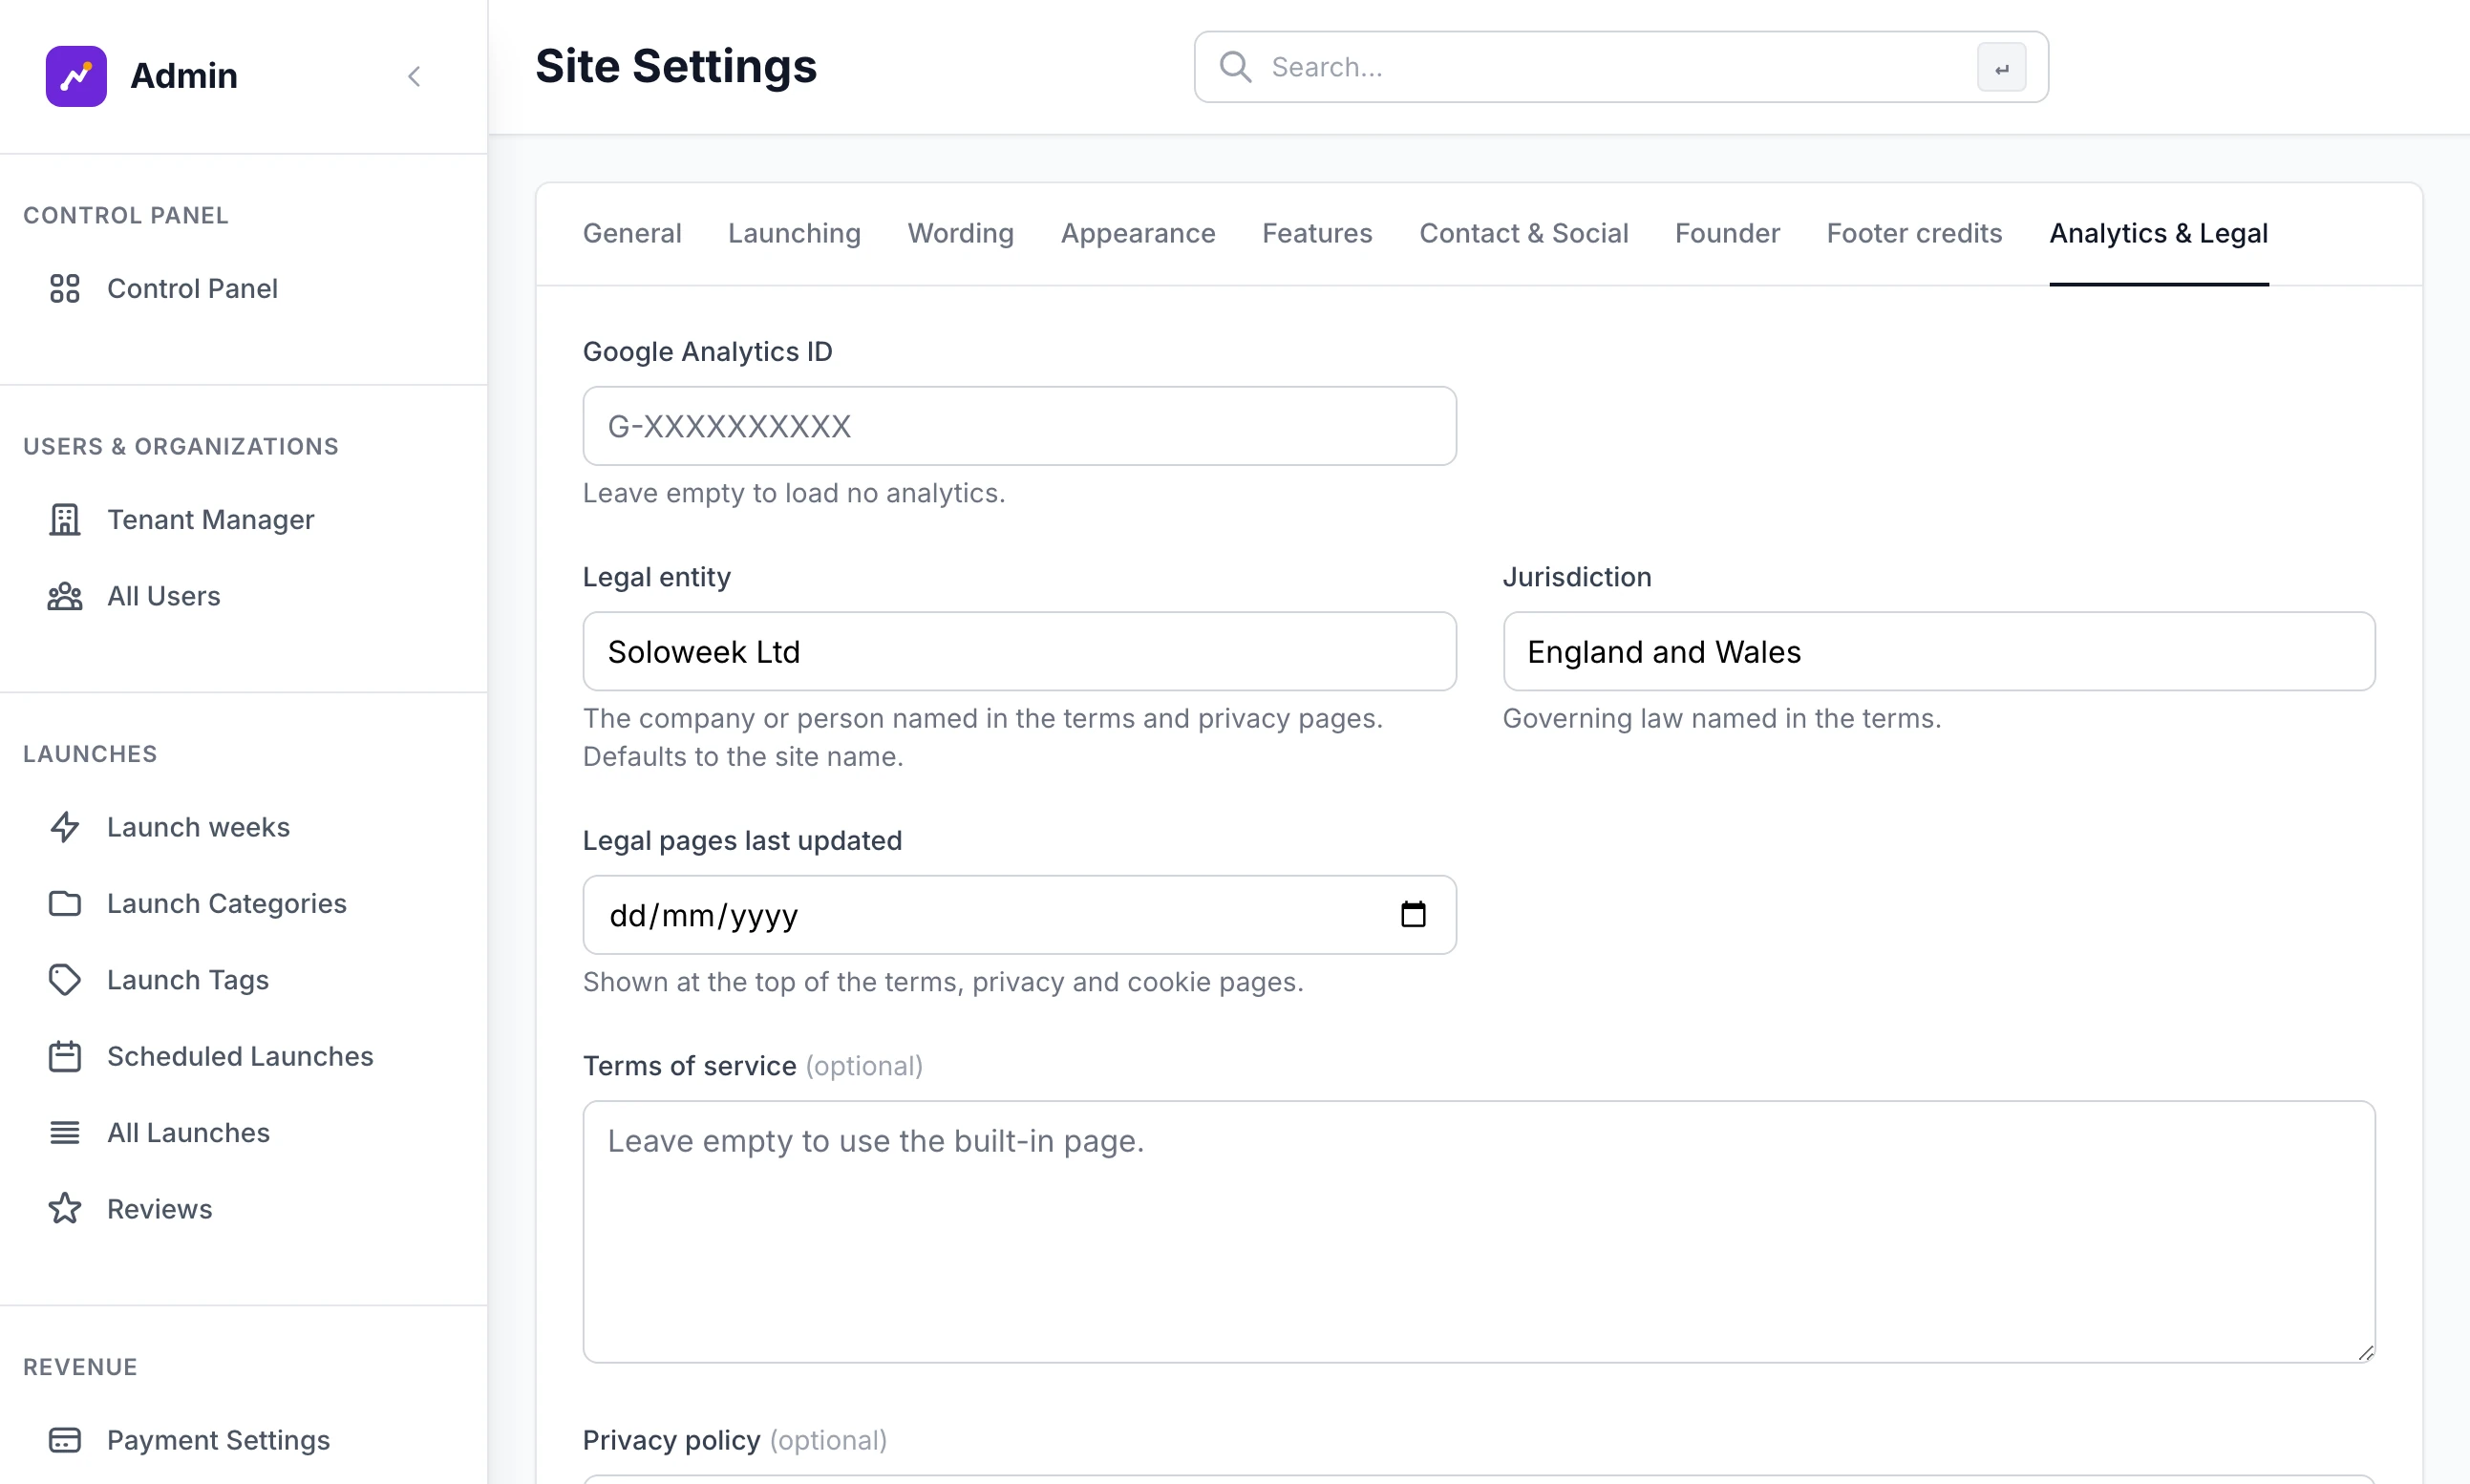
The ID starts with G-. In Google Analytics it is under Admin, Data streams, on your web stream. Anything else is refused with "Google Analytics ID should look like G-XXXXXXXXXX." With the field empty, no analytics code is loaded.
With an ID saved, Google's tag is on every public page, the maker dashboard and the admin, so your own visits are counted too. It is not on the coming-soon page.
The Security Monitor#
Open Security Monitor under Tools. Four tiles count Blocked IPs, Blocked Emails, Suspicious and Blocked Domains. A section below appears only when it has something in it.
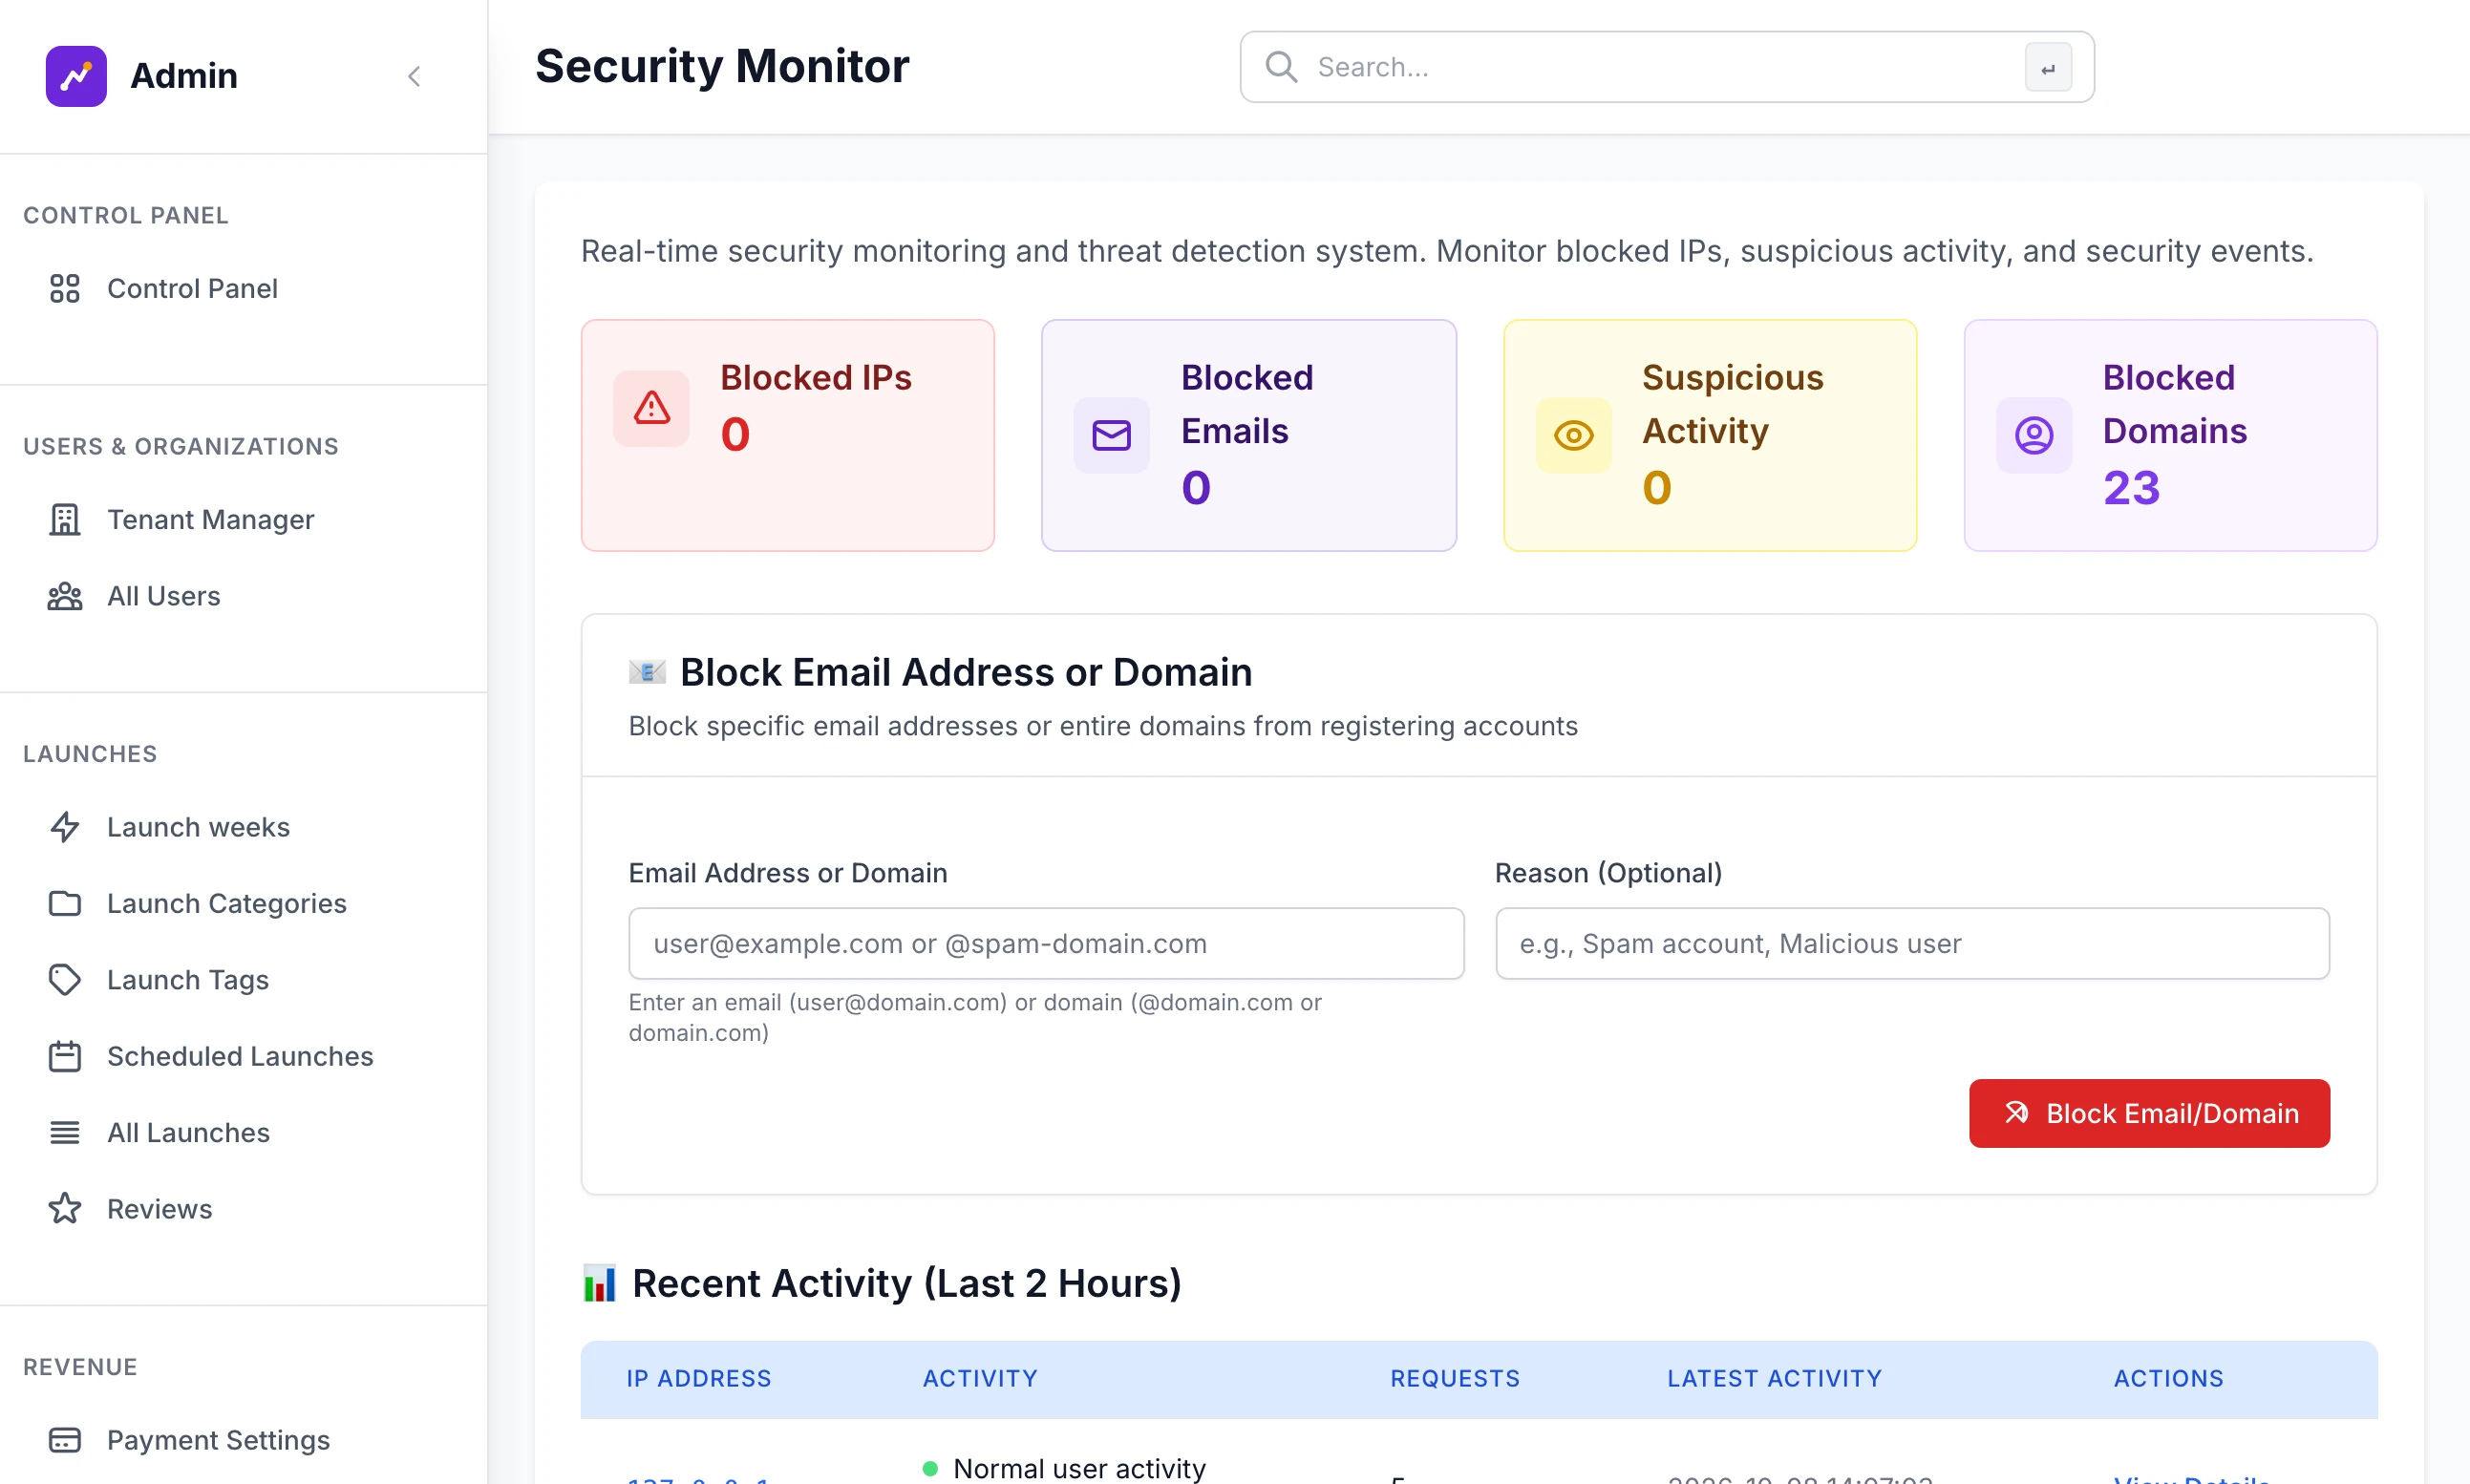
Block Email Address or Domain: type an address, or a domain with or without the
@, add a reason if you like and click Block Email/Domain. That address, or anyone at that domain, is refused on the sign-up form with "This email address is not allowed to register. Please contact support if this is an error." Accounts that already exist are not touched. A new site starts with 23 throwaway-email domains blocked, such asmailinator.com.Blocked IP Addresses: an address on this list sees a page headed "Access Blocked" in place of every page. Unblock takes it off.
Suspicious Activity: each address that went over a rate limit in the last 24 hours, with the number of times. Block blocks it. Dismiss deletes its record.
Recent Activity (Last 2 Hours): sign-ins, password reset requests and listing pages opened, by address. View Details shows everything recorded for one address.
The site blocks an address on its own in two cases. A review that matches the built-in list of abusive phrases, or is one phrase repeated over and over, is refused and its writer's address is blocked at once. An address that breaks a rate limit after more than 500 recorded events in an hour is blocked too. An address that an admin account has opened a listing, voted or written a review from in the last 30 days is never blocked. Events older than 30 days are removed by a daily background job.
Rate limits#
Each of these is counted per visitor address. Someone who goes over sees a page headed "Slow down there!" that names the limit, and their address appears under Suspicious Activity.
| What | Limit |
|---|---|
| Sign in | 30 every 10 minutes |
| Start a Google sign-in | 20 every 10 minutes |
| Create an account | 10 an hour |
| Forgot password | 5 an hour |
| Contact form | 10 an hour |
| Coming-soon email box | 10 an hour |
| Write a review | 5 an hour |
| Open a listing page | 30 a minute |
Separately, five wrong passwords in a row lock that account for 30 minutes.
The counts are kept in the memory of each worker process. A site set up with the deploy script runs two workers, so a visitor can get up to twice the number, and the counts start again when the site restarts. The .env.example file suggests RATELIMIT_STORAGE_URI=redis://host:6379 for a shared count, but the Redis client that needs is not in requirements.txt. Leave the setting as it is.
Google says "Error 400: redirect_uri_mismatch"
The address in your Google client is not the one your site sent. Copy the address from the Google sign-in card and add it under Authorised redirect URIs exactly. If the card shows the wrong address, correct Site URL on the General tab of Site Settings.
"Google sign-in did not complete. Try again, or use your email below."
The person pressed Cancel on Google's page, or Google refused the client secret. If it happens to everyone, paste the client secret again and save.
Can I sign in to the admin with Google?
Yes, if your Google account has the same email address as your admin account. The first time, the two are linked and your password goes on working.
A real visitor sees "Access Blocked"
Their address is on the block list. Find it under Blocked IP Addresses on the Security Monitor and click Unblock. The reason beside it says how it got there.
Stuck on a step? Send a message.