Campaigns and automations
Send a one-off email to the people with accounts on your site, set up emails that send themselves after sign-up or a first listing and know what the figures can and cannot tell you.
Updated 9 Oct 2026 · written for Launch Lab 2.9.0
On this page
Open Email Manager under Tools in the admin sidebar and click Campaigns. A campaign is one email that you write and send to people who have an account on your site. An automation is a campaign that sends itself to each person a set number of days after they sign up or start a listing.
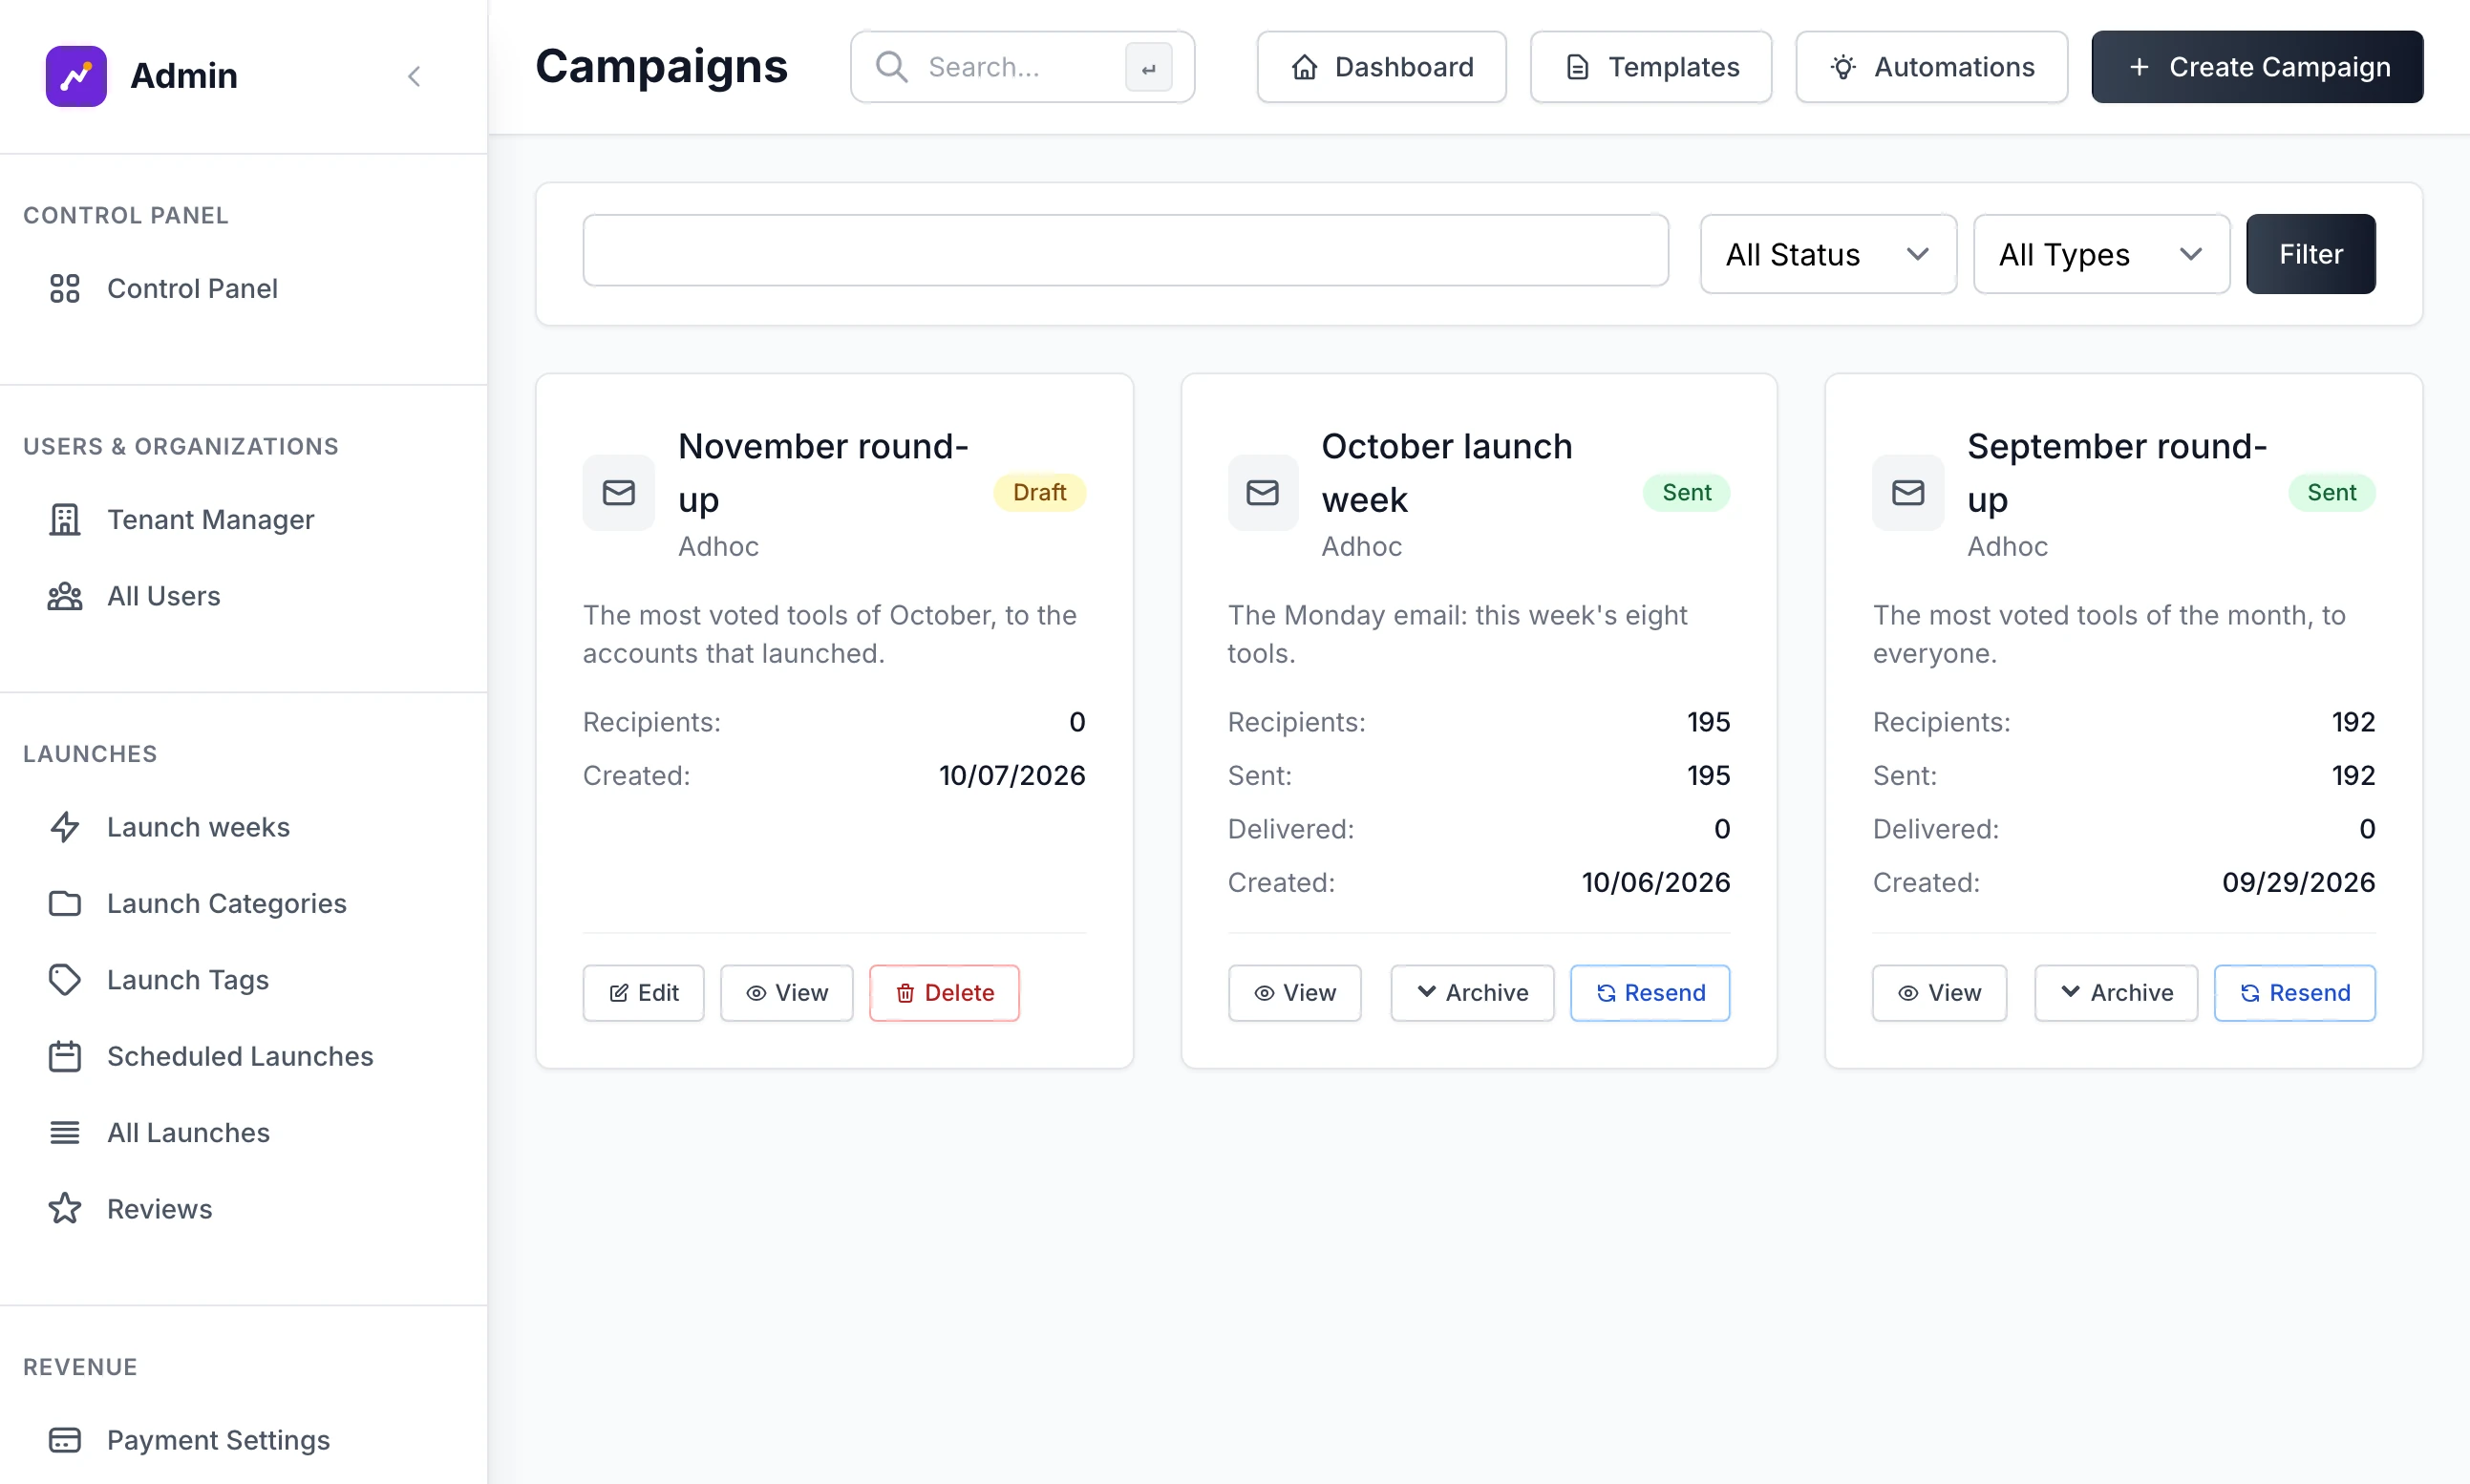
Your site uses its own words for a listing and for the person who launches it. This guide says listing and maker.
Who you can email#
A campaign goes to people who have an account and have confirmed its email address, makers and voters alike. Nobody else:
Not coming-soon sign-ups. The addresses people left while your site was closed are a list, not accounts. Download them as a CSV file and write to them from your own mailbox: see Opening day.
Not people who ticked the box on the contact form. "Subscribe to our newsletter for product updates and launch tips" adds one line to the email you receive, "This contact has opted to receive the newsletter.", and does nothing else.
Not anyone who has unsubscribed. They are skipped, and counted as skipped.
Send a campaign#
Step 1: Start it
Click Create Campaign. The form opens under a long guide, which Hide Guide folds away.
Step 2: Name it and write the subject
Campaign Name is for you alone. Email Subject is what people see in their inbox.
Step 3: Choose the audience
Tick Send to all users to reach everyone, or leave it unticked and choose under Advanced Targeting: see The audience.
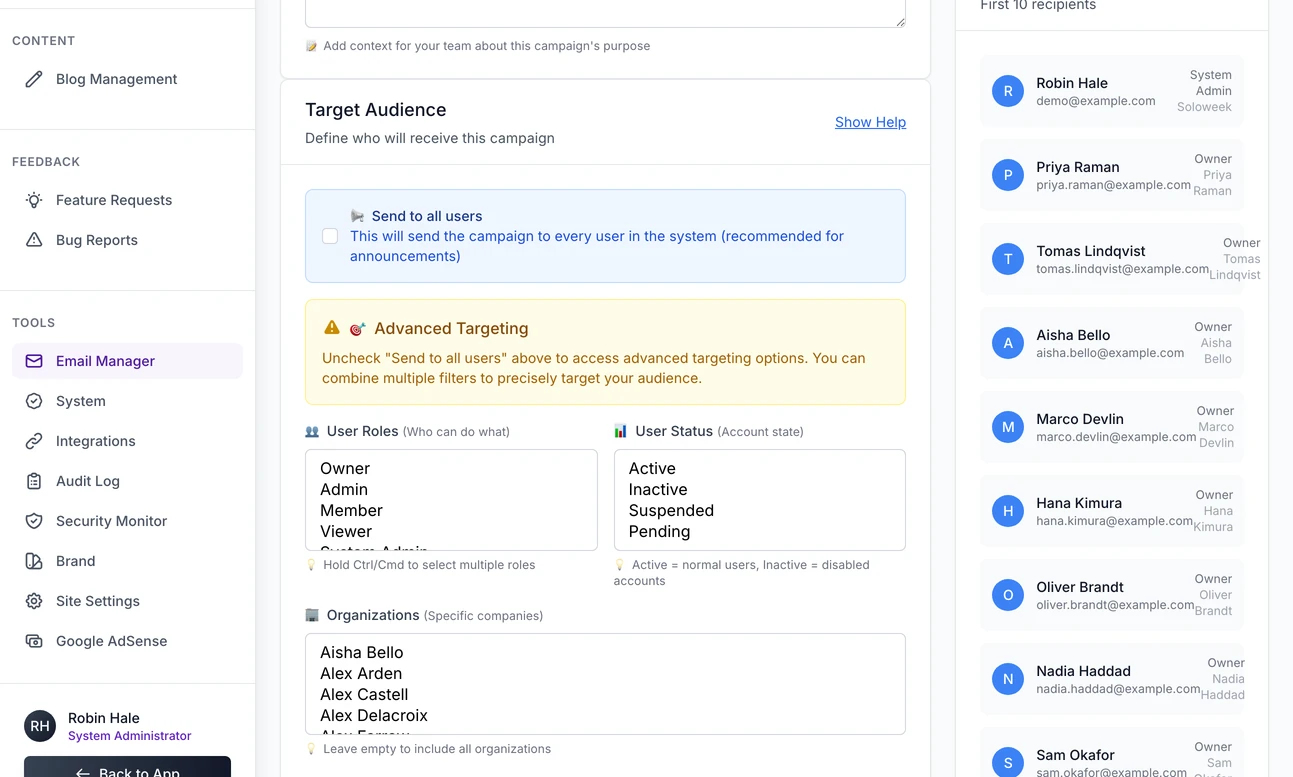
Choosing who a campaign goes to. Step 4: Write the email
Type or paste the email into HTML Content. Load brings in a template you saved earlier, and Show Help above the box offers three starters: Announcement, Welcome and Newsletter. Tokens such as
{{ user.first_name }}and{{ app_name }}are filled in for each person. The list is under the box. Preview shows the email as one of your recipients will get it.Step 5: Save it
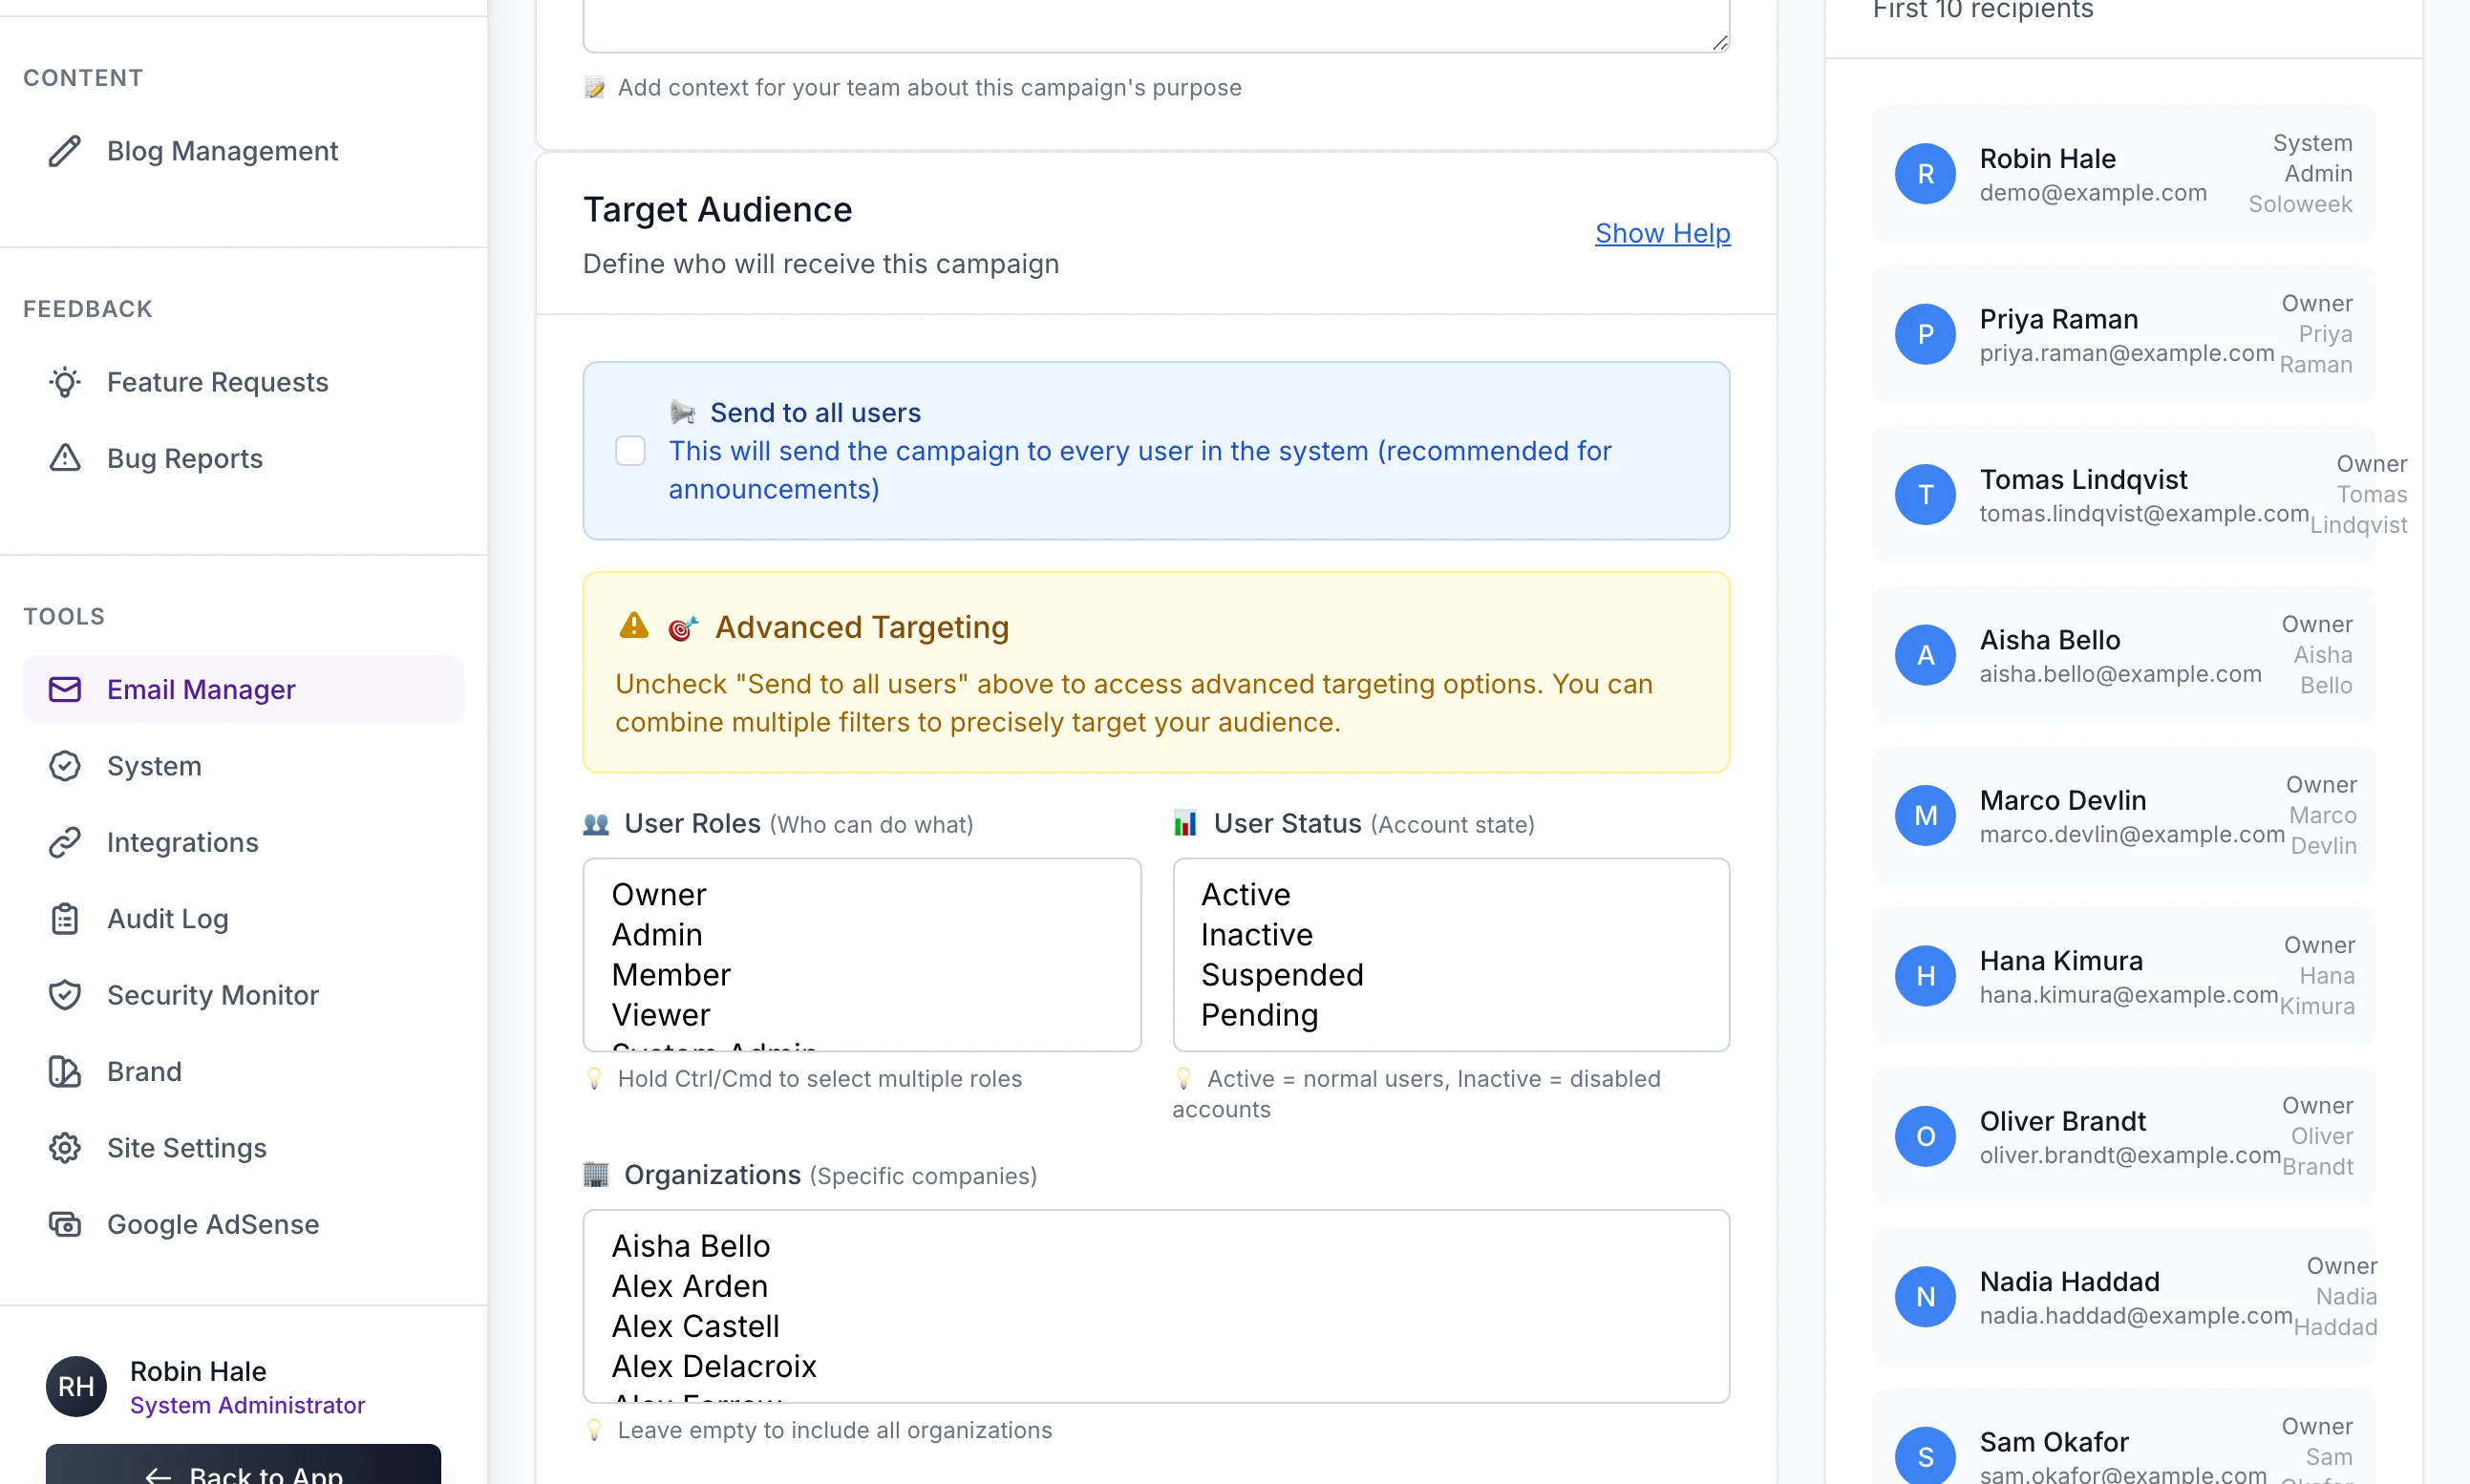
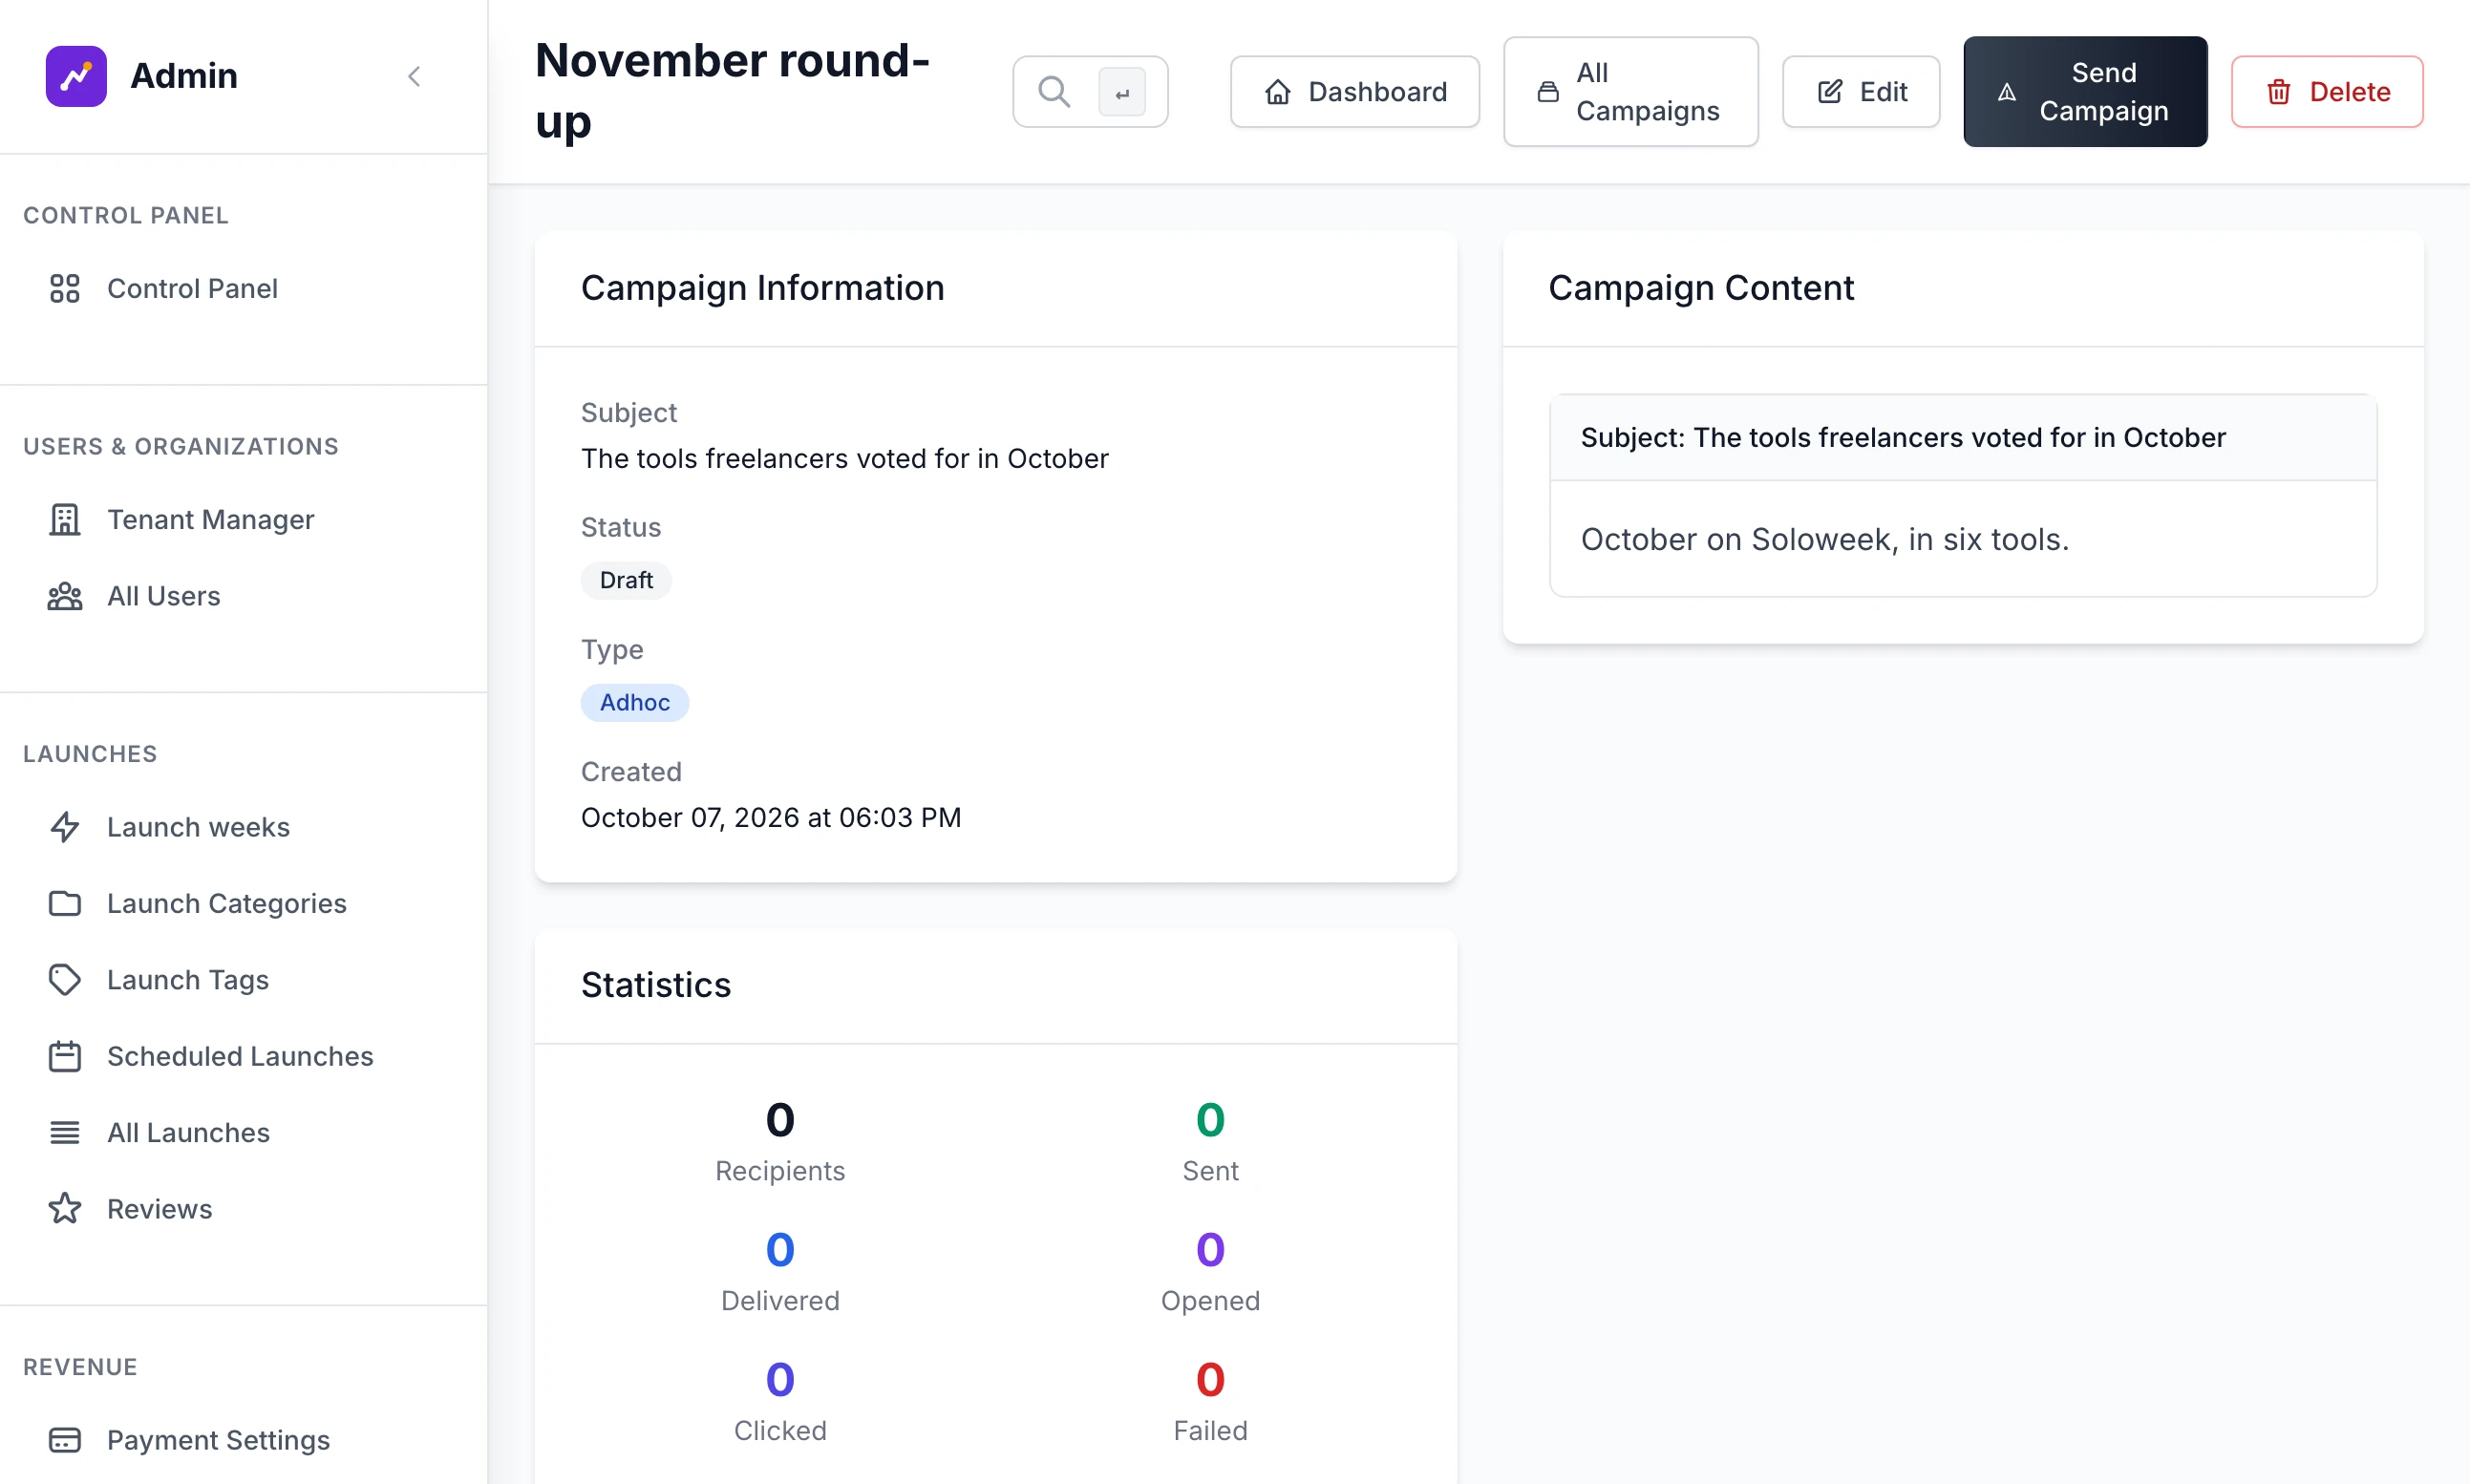
Click Send Now. Nothing is sent yet. The campaign is saved and its own page opens under "created successfully! You can now send the campaign."
Step 6: Check the number and send
On the campaign's page, read Total Recipients under Target Recipients. Then click Send Campaign. Your browser shows the campaign's name and the number of recipients and asks you to confirm.
Test it on yourself#
There is no test-send button. Make the campaign with your own number in Specific User IDs and nothing else chosen, and send it. Your number is at the end of the address when you open yourself in All Users. Read the email in a real inbox, on a phone as well.
A campaign that has been sent cannot be edited or sent again to the same people. So before you send the test, click Template on its form to save the subject and content as a template. Then start a new campaign for everyone and Load the template into it.
25 people or fewer, or more#
25 recipients or fewer: the emails go while you wait, and you see "Campaign sent: 24 emails sent, 0 failed, 0 skipped (unsubscribed)."
More than 25: the campaign is queued, and you see "Campaign queued for 180 recipients. It is sent the next time the job runner runs (within the hour)." The job is Queued campaigns on the System page. It is due every ten minutes, so with the job runner scheduled the wait is short, and Run now sends at once. If the job runner is not scheduled, a queued campaign waits for ever: see Backups and scheduled jobs.
Each person is sent their own email, one after another, through your mail server. Check your provider's hourly and daily limits before a large send.
The audience#
| Choice | Who it selects |
|---|---|
| Specific User IDs | The accounts with those numbers, separated by commas |
| Organizations | Everyone in the accounts you select. Each person who registers gets an account of their own |
| User Roles, User Status | Narrow the Organizations you selected |
| Launch Behavior | People who have, or have not, started a listing in the last so many days |
| Email Engagement | People who did, or did not, receive an earlier campaign in the last so many days |
After it is sent#
The campaign's page keeps its Statistics and, under Email Logs, a row for each of the first 20 people, marked Sent or Failed.
Resend Campaign sends it to people who have not had it. Tick Send to all users and everyone who has not yet received the campaign is sent it. The narrower choices in that box are combined with the campaign's first audience and can select nobody. A resend always goes while you wait, however many people it is for, so keep it for small numbers.
Archive, on the Campaigns list, moves a sent campaign into Archived Campaigns at the foot of the list. Unarchive brings it back. Nothing is deleted.
Delete shows only on a campaign that is a draft or has failed. A sent campaign stays.
Opens, clicks and delivery#
The Email Manager shows Delivery, Open Rate and Click Rate on its first page and Delivered, Opened and Clicked on every campaign. Its logs have an Engagement column.
What your site does know is Sent, meaning your mail server accepted the email, and Failed, meaning it refused, with its reason. For opens, clicks and bounces, look in your email provider's own dashboard.
Automations#
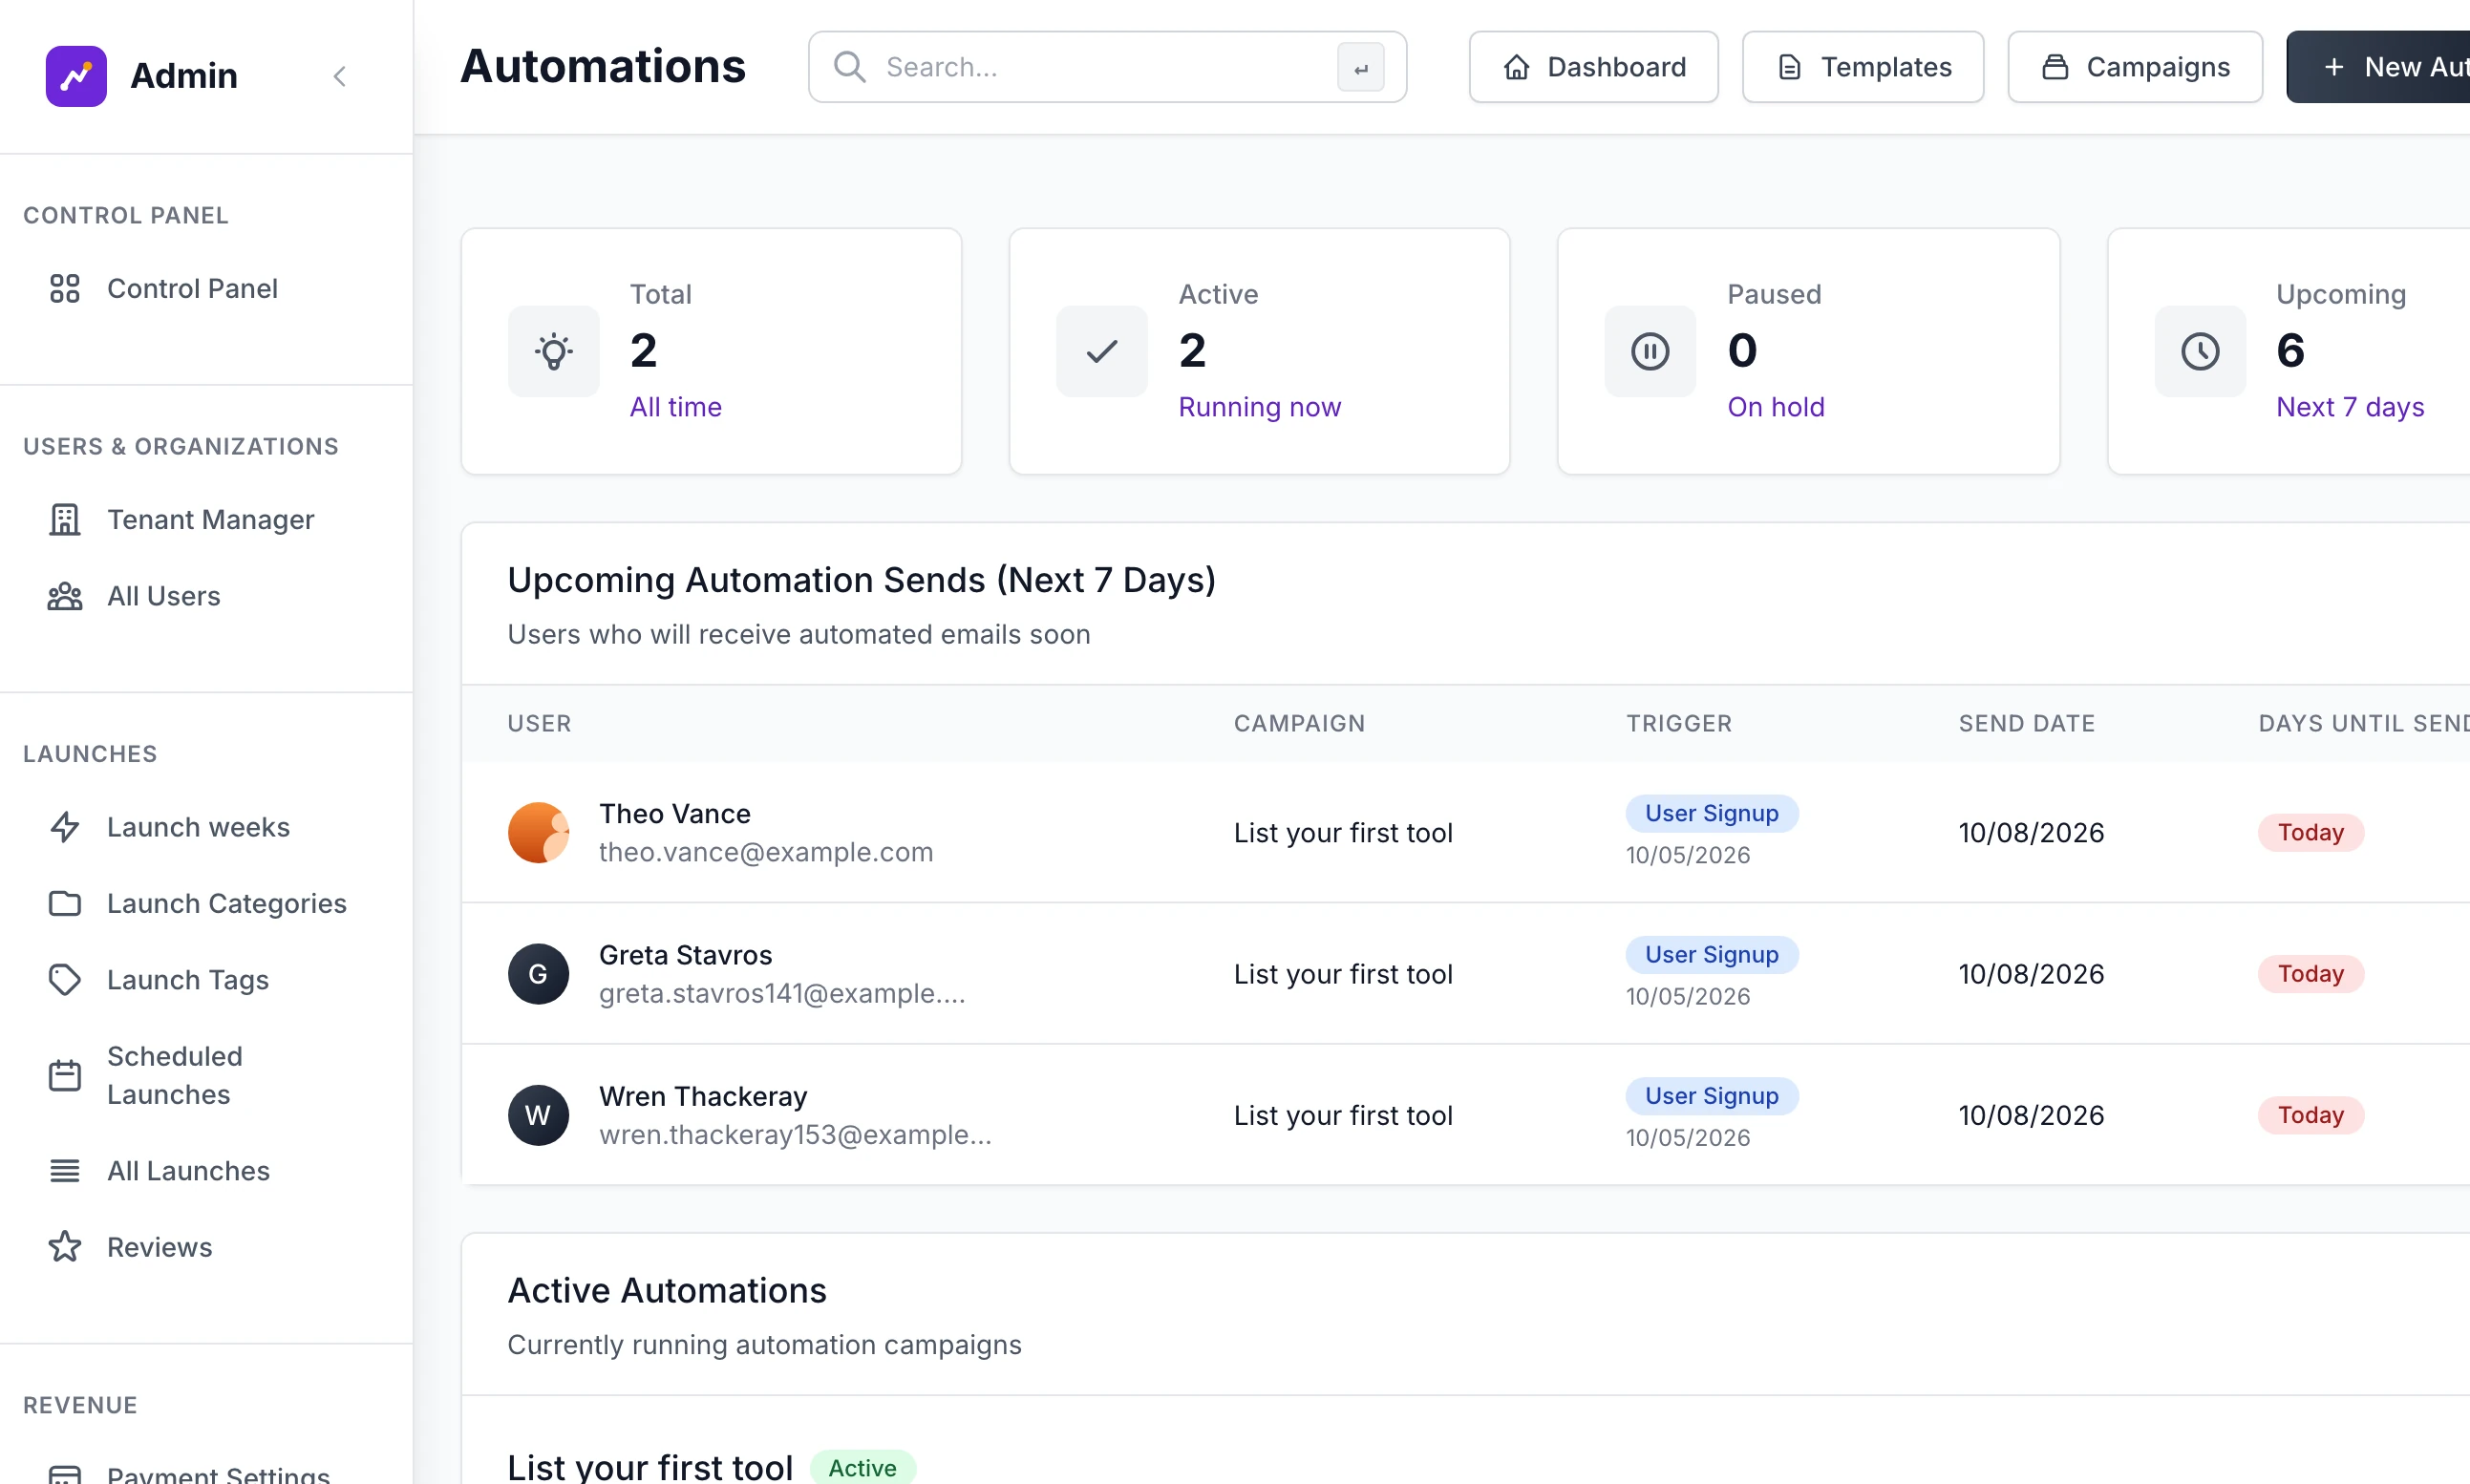
Click Automations at the top of the Email Manager.
Step 1: Start as you would a campaign
New Automation opens the same form. Give it a name, a subject and its content.
Step 2: Switch on Enable Email Automation
It is under Email Automation, below the audience.
Step 3: Choose the trigger and the delay
Under Event Type choose User signup or Launch created. Delay (days) takes 1 to 365 and starts at 7.
Step 4: Narrow the audience, if you want to
Leave the audience alone and everyone who meets the trigger is sent the email. The choices in The audience narrow it.
Step 5: Save it and start it
Click Setup Automation. Its page opens under "created successfully! Start the automation to begin sending." Click Start, and Automation Status reads Active.
A job called Email automations runs every hour. For each active automation it finds the people whose trigger day was exactly the delay ago and sends each of them the email, once.
User signup counts from the day the account was made.
Launch created counts from the day the person started a listing. A draft counts.
Days are counted in UTC.
Only people with a confirmed address and an active account are sent it. Anyone who has unsubscribed is left out.
The automation's page has Pause, Resume and Stop. Its Automation Pipeline shows who is Ready to Send, Approaching and Already Sent. Tick people there and click Exclude Selected to leave them out. Include puts them back.
Unsubscribing#
Every campaign and automation email ends with the line "You are receiving this because you have an account at" your site's name and an Unsubscribe link. It also carries the two headers, List-Unsubscribe and List-Unsubscribe-Post, that let a mail app show an unsubscribe button of its own and act on one click.
The link opens a page on your site, with no sign-in, that asks "Unsubscribe from" your site's name "emails?" above an Unsubscribe button. Afterwards it reads "You're unsubscribed" and offers Subscribe again.
It is the same switch as News and reminders under Emails on the person's account page. Someone who has unsubscribed gets no campaigns, no automations, no draft reminders and no requests for a review. Emails about their account, their launches and their payments are still sent.
"No target users found for this campaign!"
The audience as saved selects nobody. User Roles or User Status on their own select nobody: choose accounts under Organizations as well, or tick Send to all users.
"Campaign cannot be sent in its current state!"
Only a draft can be sent. This one has been sent already, or is queued.
"The campaign could not be sent. Check the server log for details."
The send stopped part-way and the campaign is marked Failed. Note who was reached from its Email Logs, because deleting the campaign removes them. Find the cause in the site's log, then make the campaign again for the people it missed.
Can I schedule a campaign for a later date?
No. The Campaigns list can filter by Scheduled, and nothing in version 2.9.0 gives a campaign a date to go out.
Can I email the people who signed up before the site opened?
Not from here, because they have no accounts. Download their addresses: see Opening day.
Stuck on a step? Send a message.