A tour of the admin
The Control Panel, every item in the admin sidebar, the search, the Audit Log and who is allowed to change things.
Updated 9 Oct 2026 · written for Launch Lab 2.9.0
On this page
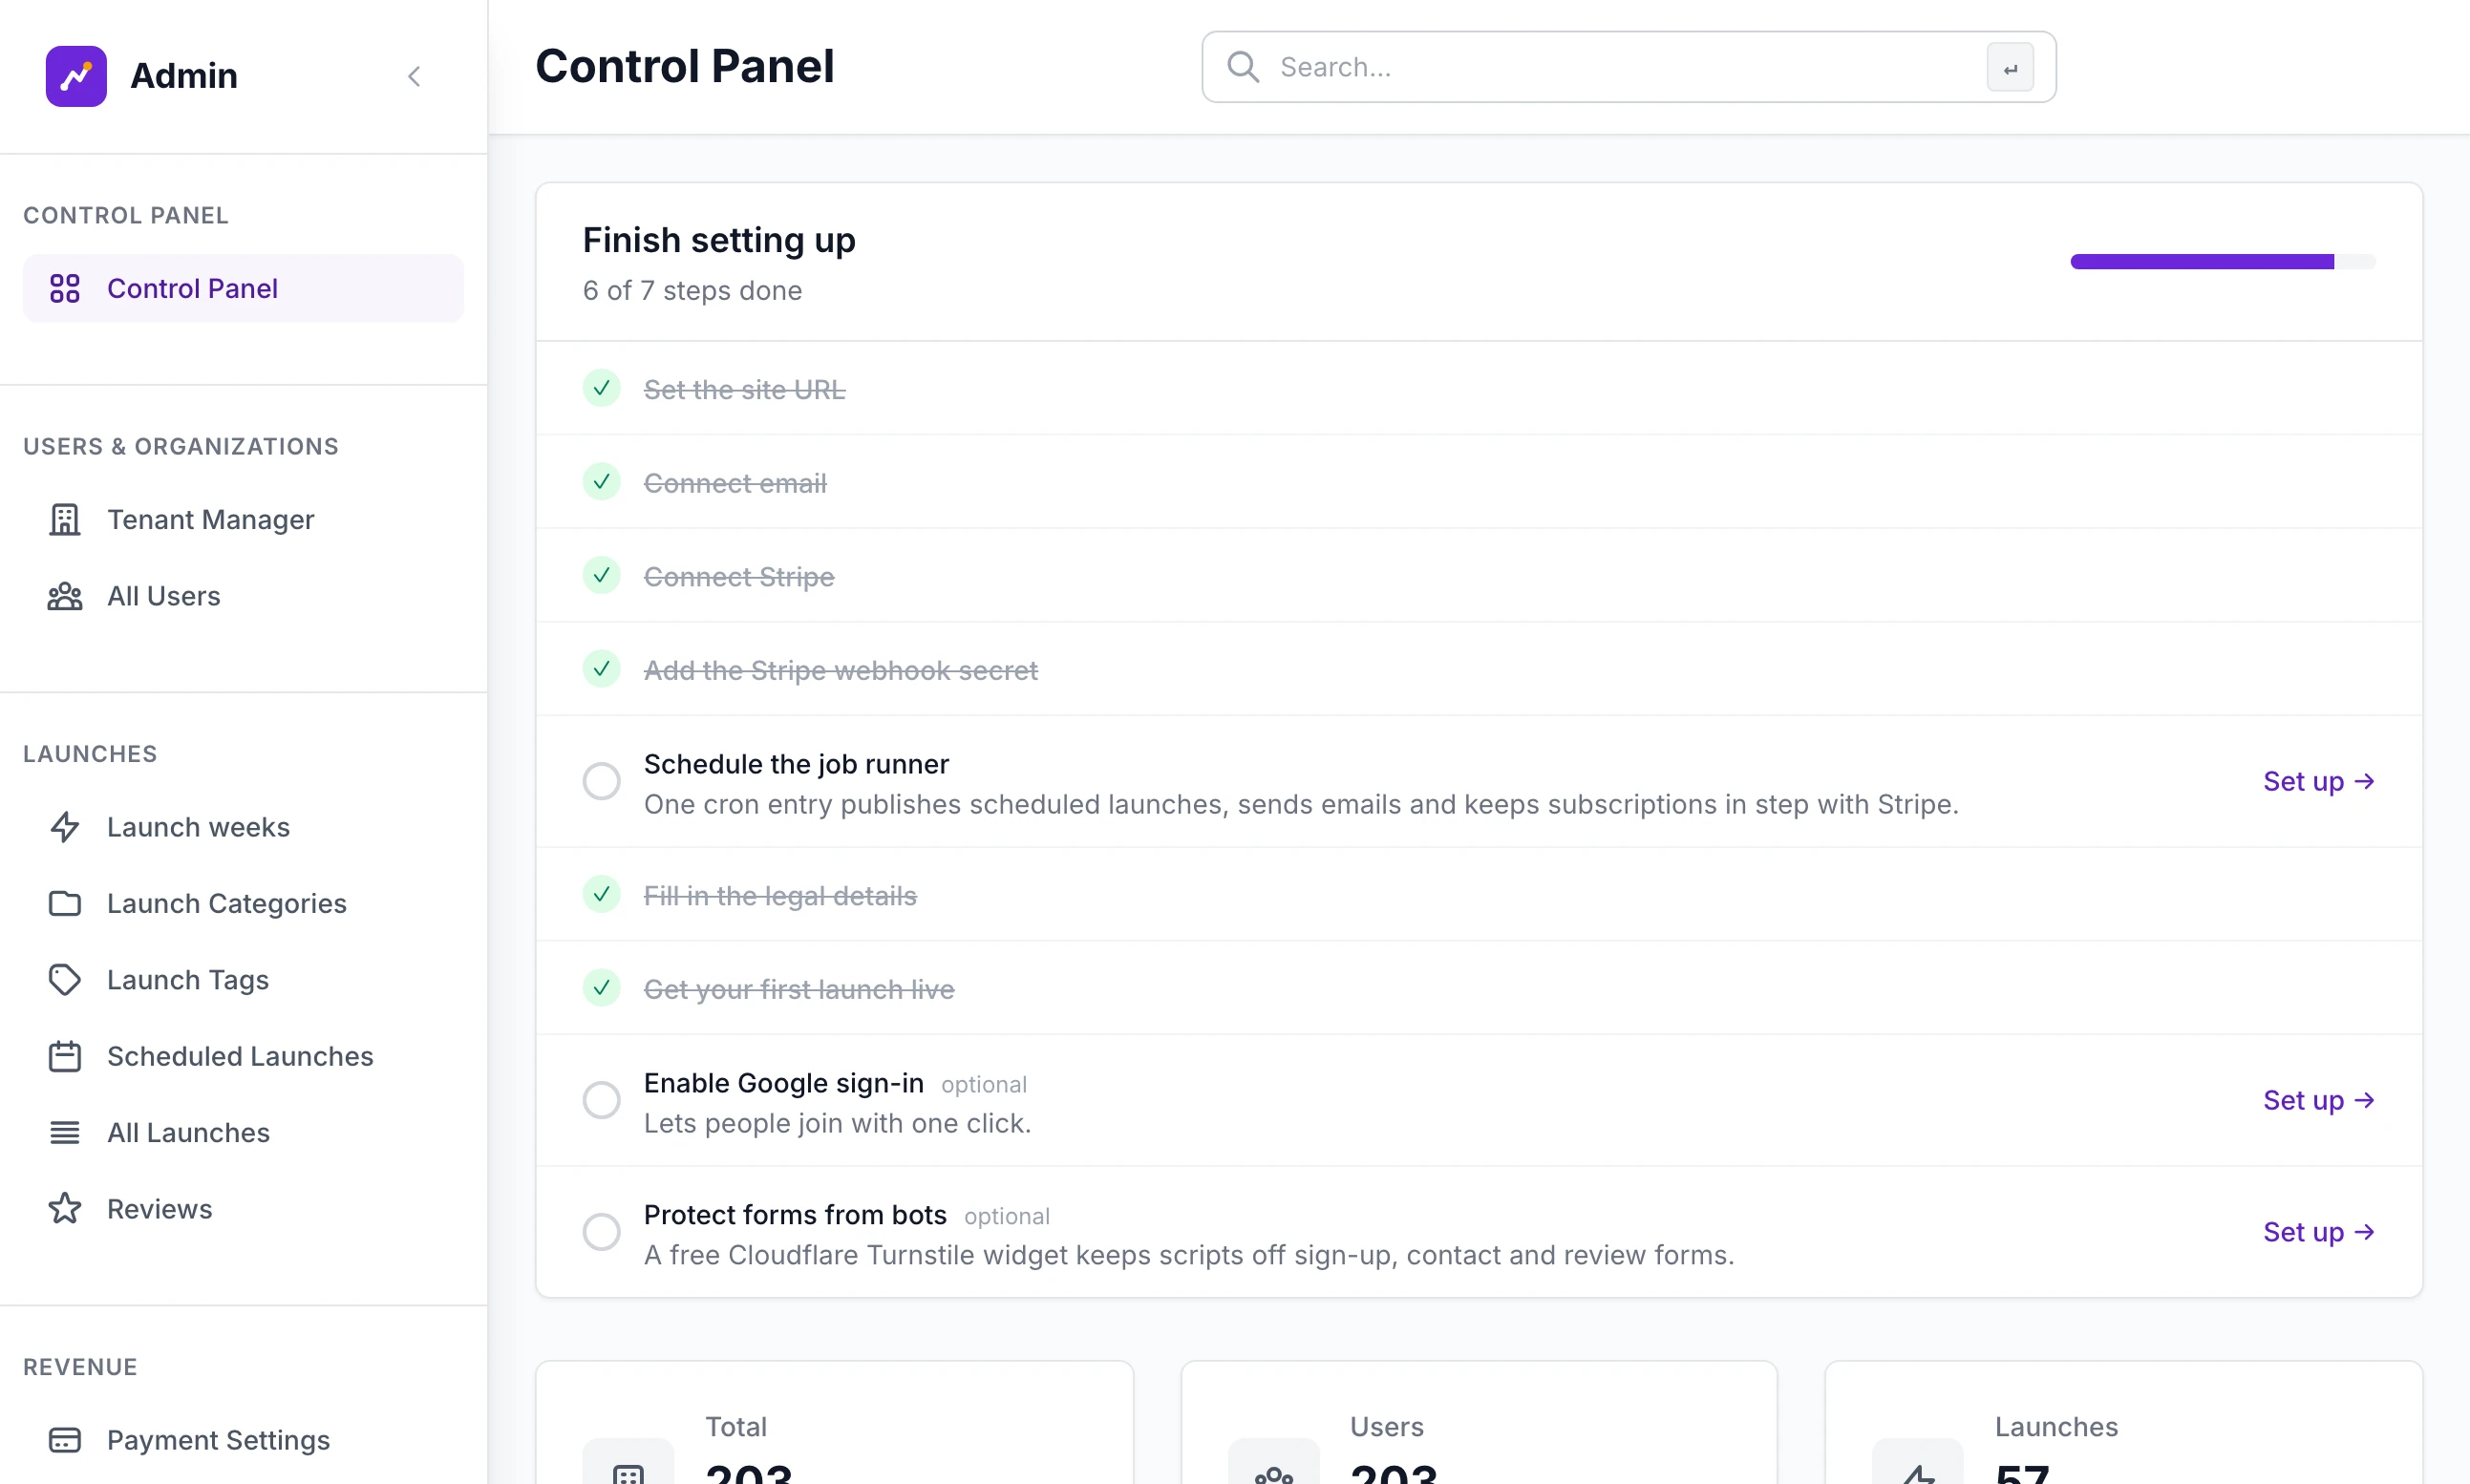
Go to /admin and sign in to reach the Control Panel. It is the first screen of the admin. The sidebar on the left leads to every other screen, in seven sections, and it stays in place wherever you go.
The admin has a few words of its own. A maker's account is called an organization or a tenant: it holds their listings, credits and payments, and it can have more than one person in it. A listing is called a launch. Your public site uses the words you chose for a listing and its maker. These guides say "listing" and "maker".
The Control Panel#
From top to bottom:
Finish setting up: the setup checklist, shown until every step that is not optional is done. See the setup checklist.
Three tiles: Total counts accounts, Users counts people and Launches counts listings in any state. Each is a link to the screen behind the number.
Growth Metrics: eight figures for a period you choose, each set against the period before it: New Signups, New Organizations, New Launches, Approved Launches, Scheduled Launches, Relaunches, Payments and Revenue. It opens on 7 days.
Three charts: Tenants for new accounts, Scheduled Launches for launches booked against launches gone live and Revenue for money taken. Each has its own period.
Sales Transactions and Recent Reviews: the latest payments and reviews.
Upcoming Automation and Recently Logged In: the automatic emails due in the next seven days and the last five people to sign in.
System Status: Active Organizations and Pending Users are counts. System Health always reads Operational. It is fixed text, not a check. The real checks are on the System screen.
Launches, New Tenants and New Users: the newest of each, with a notice above them when listings, feature requests or bug reports are waiting for you.
The setup checklist#
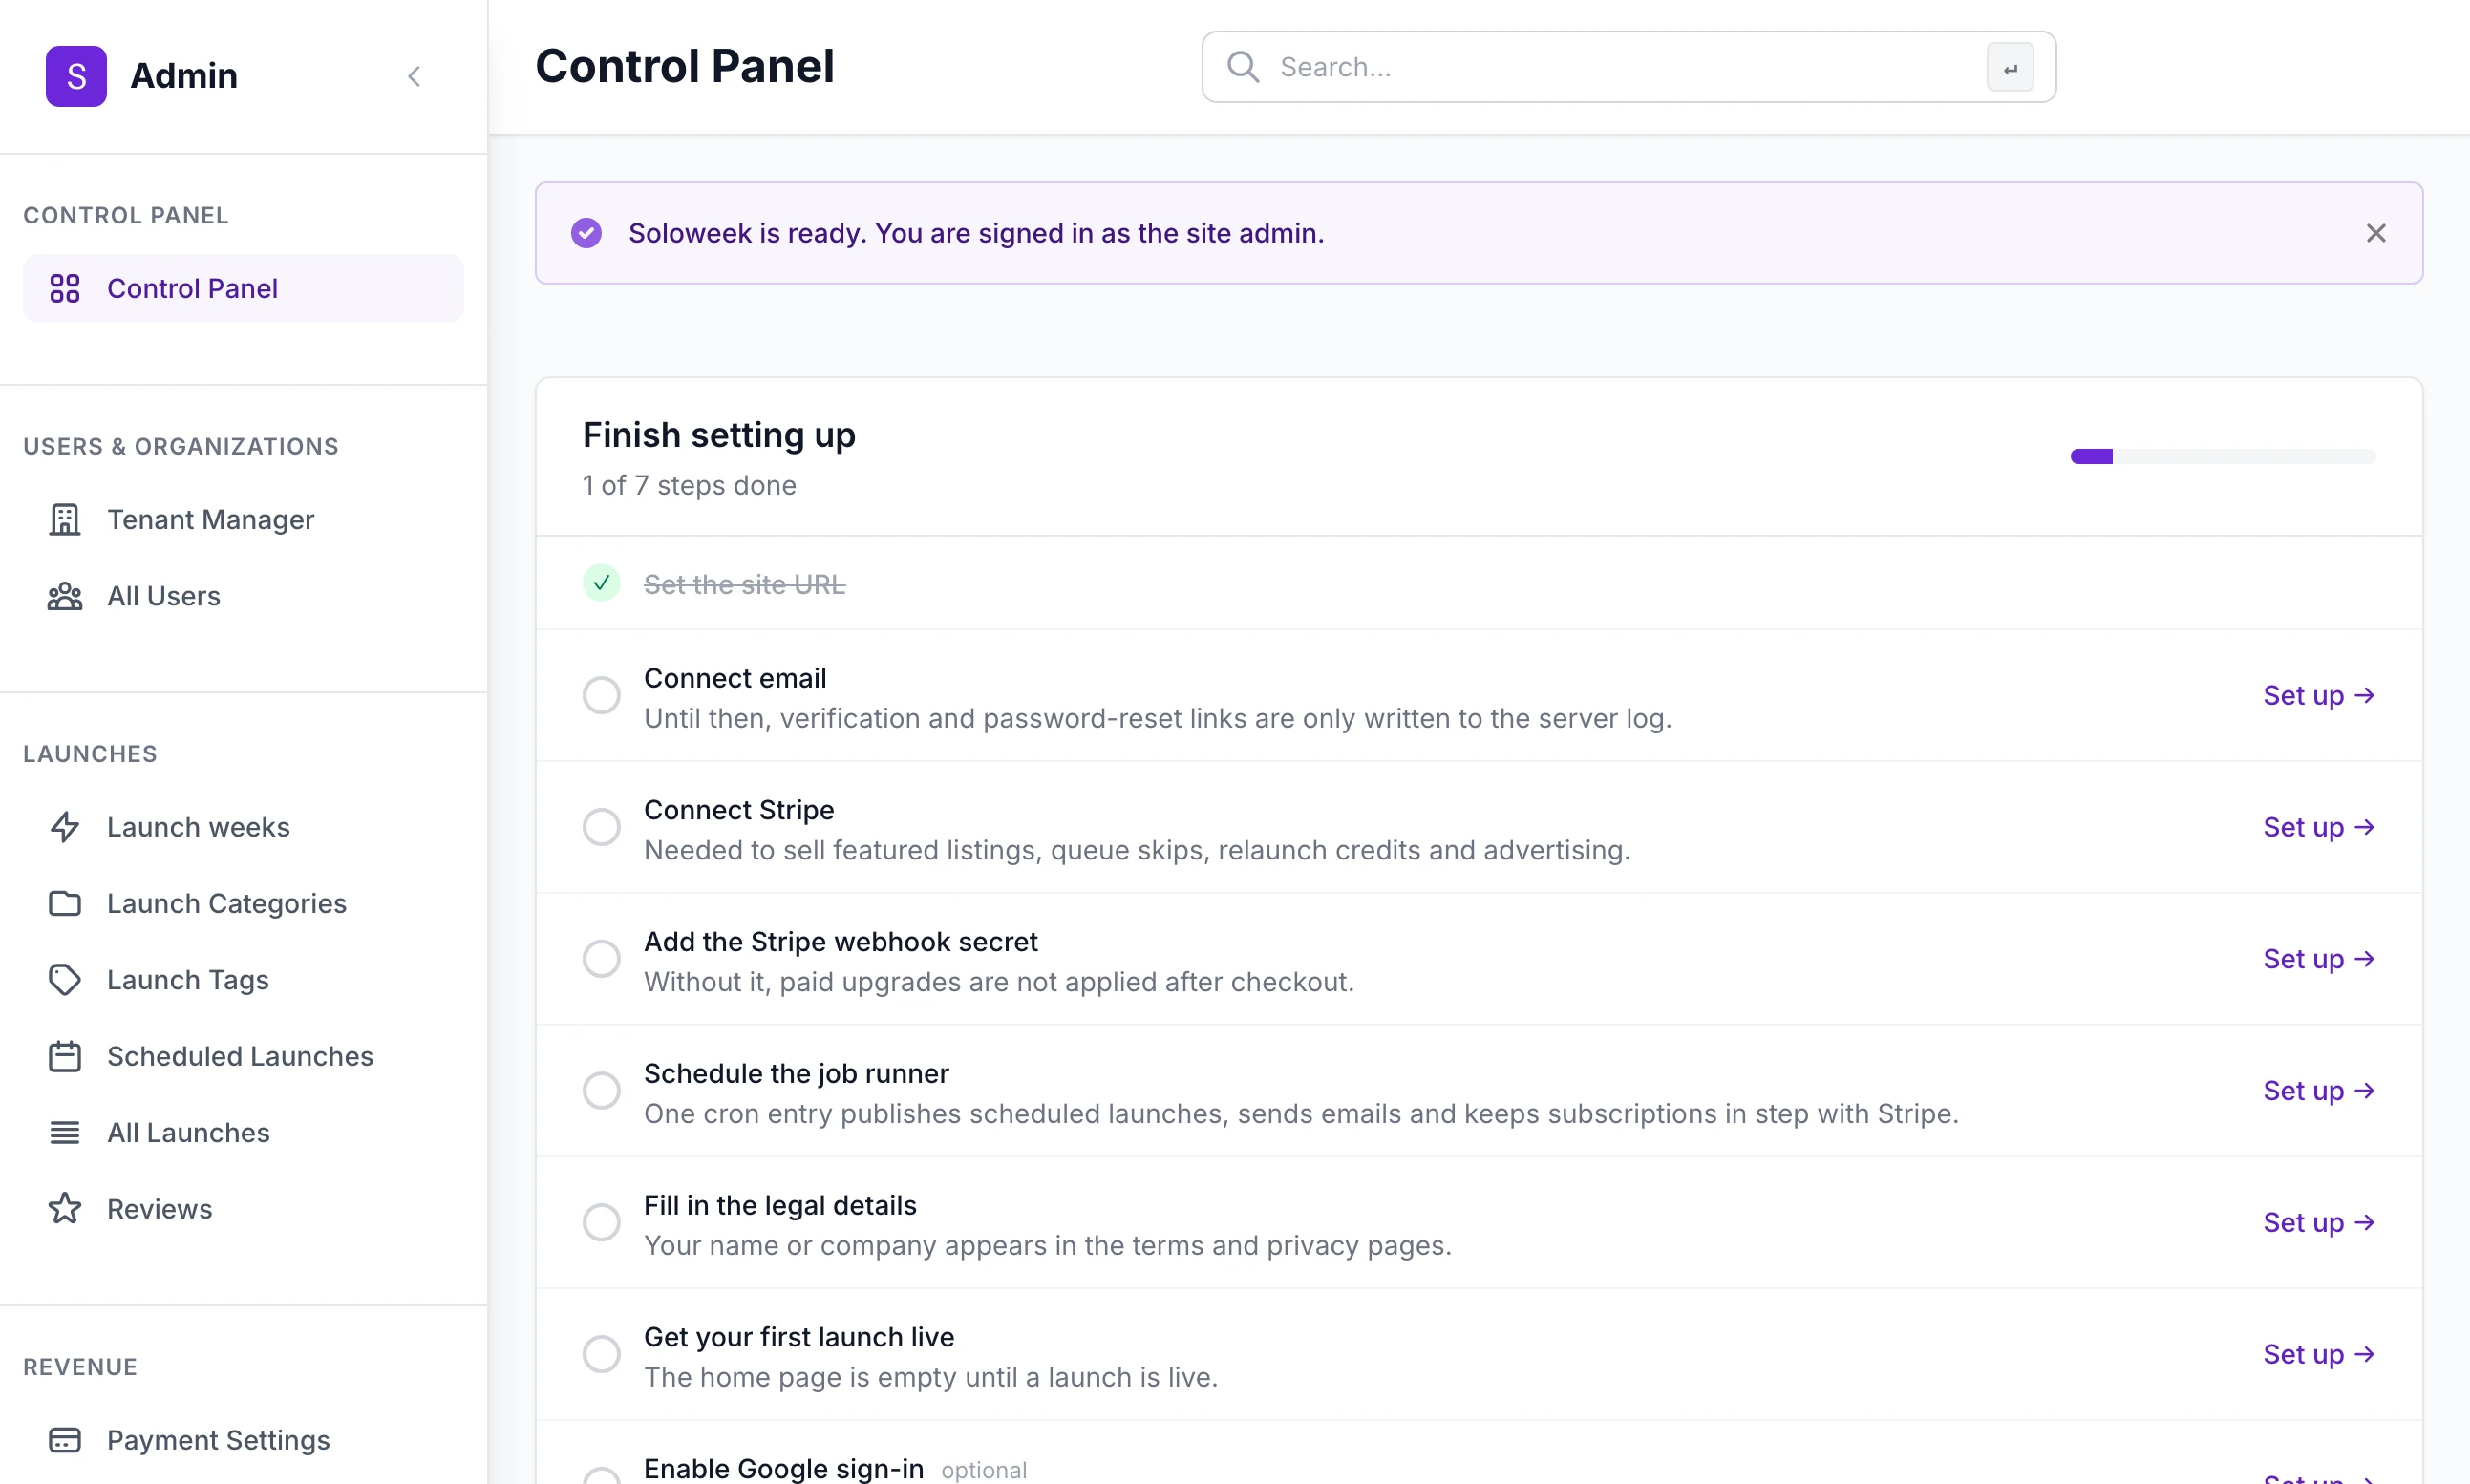
Each line is worked out from the real state of the site, so it ticks itself. A line that is not done has a Set up → link to the screen that does it.
| Line | Ticked when |
|---|---|
| Set the site URL | The site address is filled in. The setup wizard does this. |
| Connect email | An email server is saved |
| Connect Stripe | A Stripe secret key is saved |
| Add the Stripe webhook secret | A webhook signing secret is saved |
| Schedule the job runner | The scheduled job has run in the last two hours |
| Fill in the legal details | Legal entity is filled in, in Site Settings |
| Get your first launch live | A real listing, not an example one, is live |
| Remove the demo content | Shown only while example listings are on the site |
| Turn on secure cookies | Shown only once the site address begins with https:// |
| Enable Google sign-in and Protect forms from bots | Optional. They do not count towards the total. |
The same list is at the top of the System screen. Opening day takes you through it.
The sidebar, section by section#
Some screens are headed differently from their menu item. The guides use the menu item, and the tables below give the heading where it differs.
Users & Organizations#
| Menu item | What it is for | Guide |
|---|---|---|
| Tenant Manager | Every account, with its status, people, relaunch credits and the date it was made. The menu on a row has View Details, Manage Credits, Suspend and Delete. | |
| All Users | Every person, with their account, role, status and last sign-in. Change a role or sign in as someone from here. | The two admin roles, below |
Launches#
| Menu item | What it is for | Guide |
|---|---|---|
| Review queue | Listings waiting for you to check them before they go live. Shown only on a rolling site with that check switched on, or while anything is still waiting. | Running launches day to day |
| Launch weeks | Booked listings, with tabs for Scheduled, Relaunches, This Week, Completed, Featured, Do-follow and Drafts. The screen is headed Launches. Shown on a weekly site, or while anything is still booked. | Running launches day to day |
| Launch Categories | The categories listings are grouped into, with icon, colour and order. | Make it your niche |
| Launch Tags | A second way to sort listings. Empty until you add some. | Make it your niche |
| Scheduled Launches | A card for each coming week: free and paid places used, upgrades bought and revenue. Shown when Launch weeks is. | Running launches day to day |
| All Launches | Every listing in any state, with a search box and buttons to approve, reject, feature or delete the ones you tick. | Running launches day to day |
| Reviews | Approve, hide or delete the reviews visitors leave on listings. | Running launches day to day |
Revenue#
| Menu item | What it is for | Guide |
|---|---|---|
| Payment Settings | Two things on one screen, headed Sales. First your sales totals for each product. Then, under What you sell, the currency, a tick box and price for each extra and the weekly launch schedule. | What you sell and your prices |
| All Transactions | Every payment with its customer, product, amount and status. Open one to see it or refund it. The screen is headed Transactions. | Sales, transactions and refunds |
| Voucher Manager | Create and switch off the vouchers that take a percentage off a featured listing. | Featured listings and vouchers |
| Ad Manager | The adverts advertisers have bought, with status, views and clicks. | Sell advert places |
Content#
| Menu item | What it is for | Guide |
|---|---|---|
| Blog Management | Write, publish and unpublish blog posts. The screen is headed Blog. | Blog, SEO and sharing |
Feedback#
| Menu item | What it is for | Guide |
|---|---|---|
| Feature Requests | What makers have asked for from the Feedback page of their dashboard, each with a status you set. | |
| Bug Reports | Problems makers have reported from the same page. |
Tools#
| Menu item | What it is for | Guide |
|---|---|---|
| Email Manager | Emails sent, templates, campaigns, automations and the email log. The screen is headed Email. | Email and the emails the site sends |
| System | The version you are running, the state of the database and the background jobs, each with a Run now button. The button that removes example listings is here too. | Backups and scheduled jobs |
| Integrations | The keys for email, Stripe, Google sign-in and bot protection, stored encrypted. | Connect Stripe |
| Audit Log | A record of what admins have done. | The Audit Log, below |
| Security Monitor | What the site has blocked: IP addresses, email addresses and email domains. Also the activity it found suspicious. | |
| Brand | The wordmark, mark, colours and the icons and share image drawn from them. | Brand, looks and footer credits |
| Site Settings | Nine tabs: General, Launching, Wording, Appearance, Features, Contact & Social, Founder, Footer credits and Analytics & Legal. | Make it your niche |
| Google AdSense | Google's adverts on your pages. The screen is headed AdSense Management. | Sell advert places |
One screen is not in the sidebar. Coming-soon sign-ups, the email addresses people left while the site was closed, is reached from a link on the Launching tab of Site Settings.
Search#
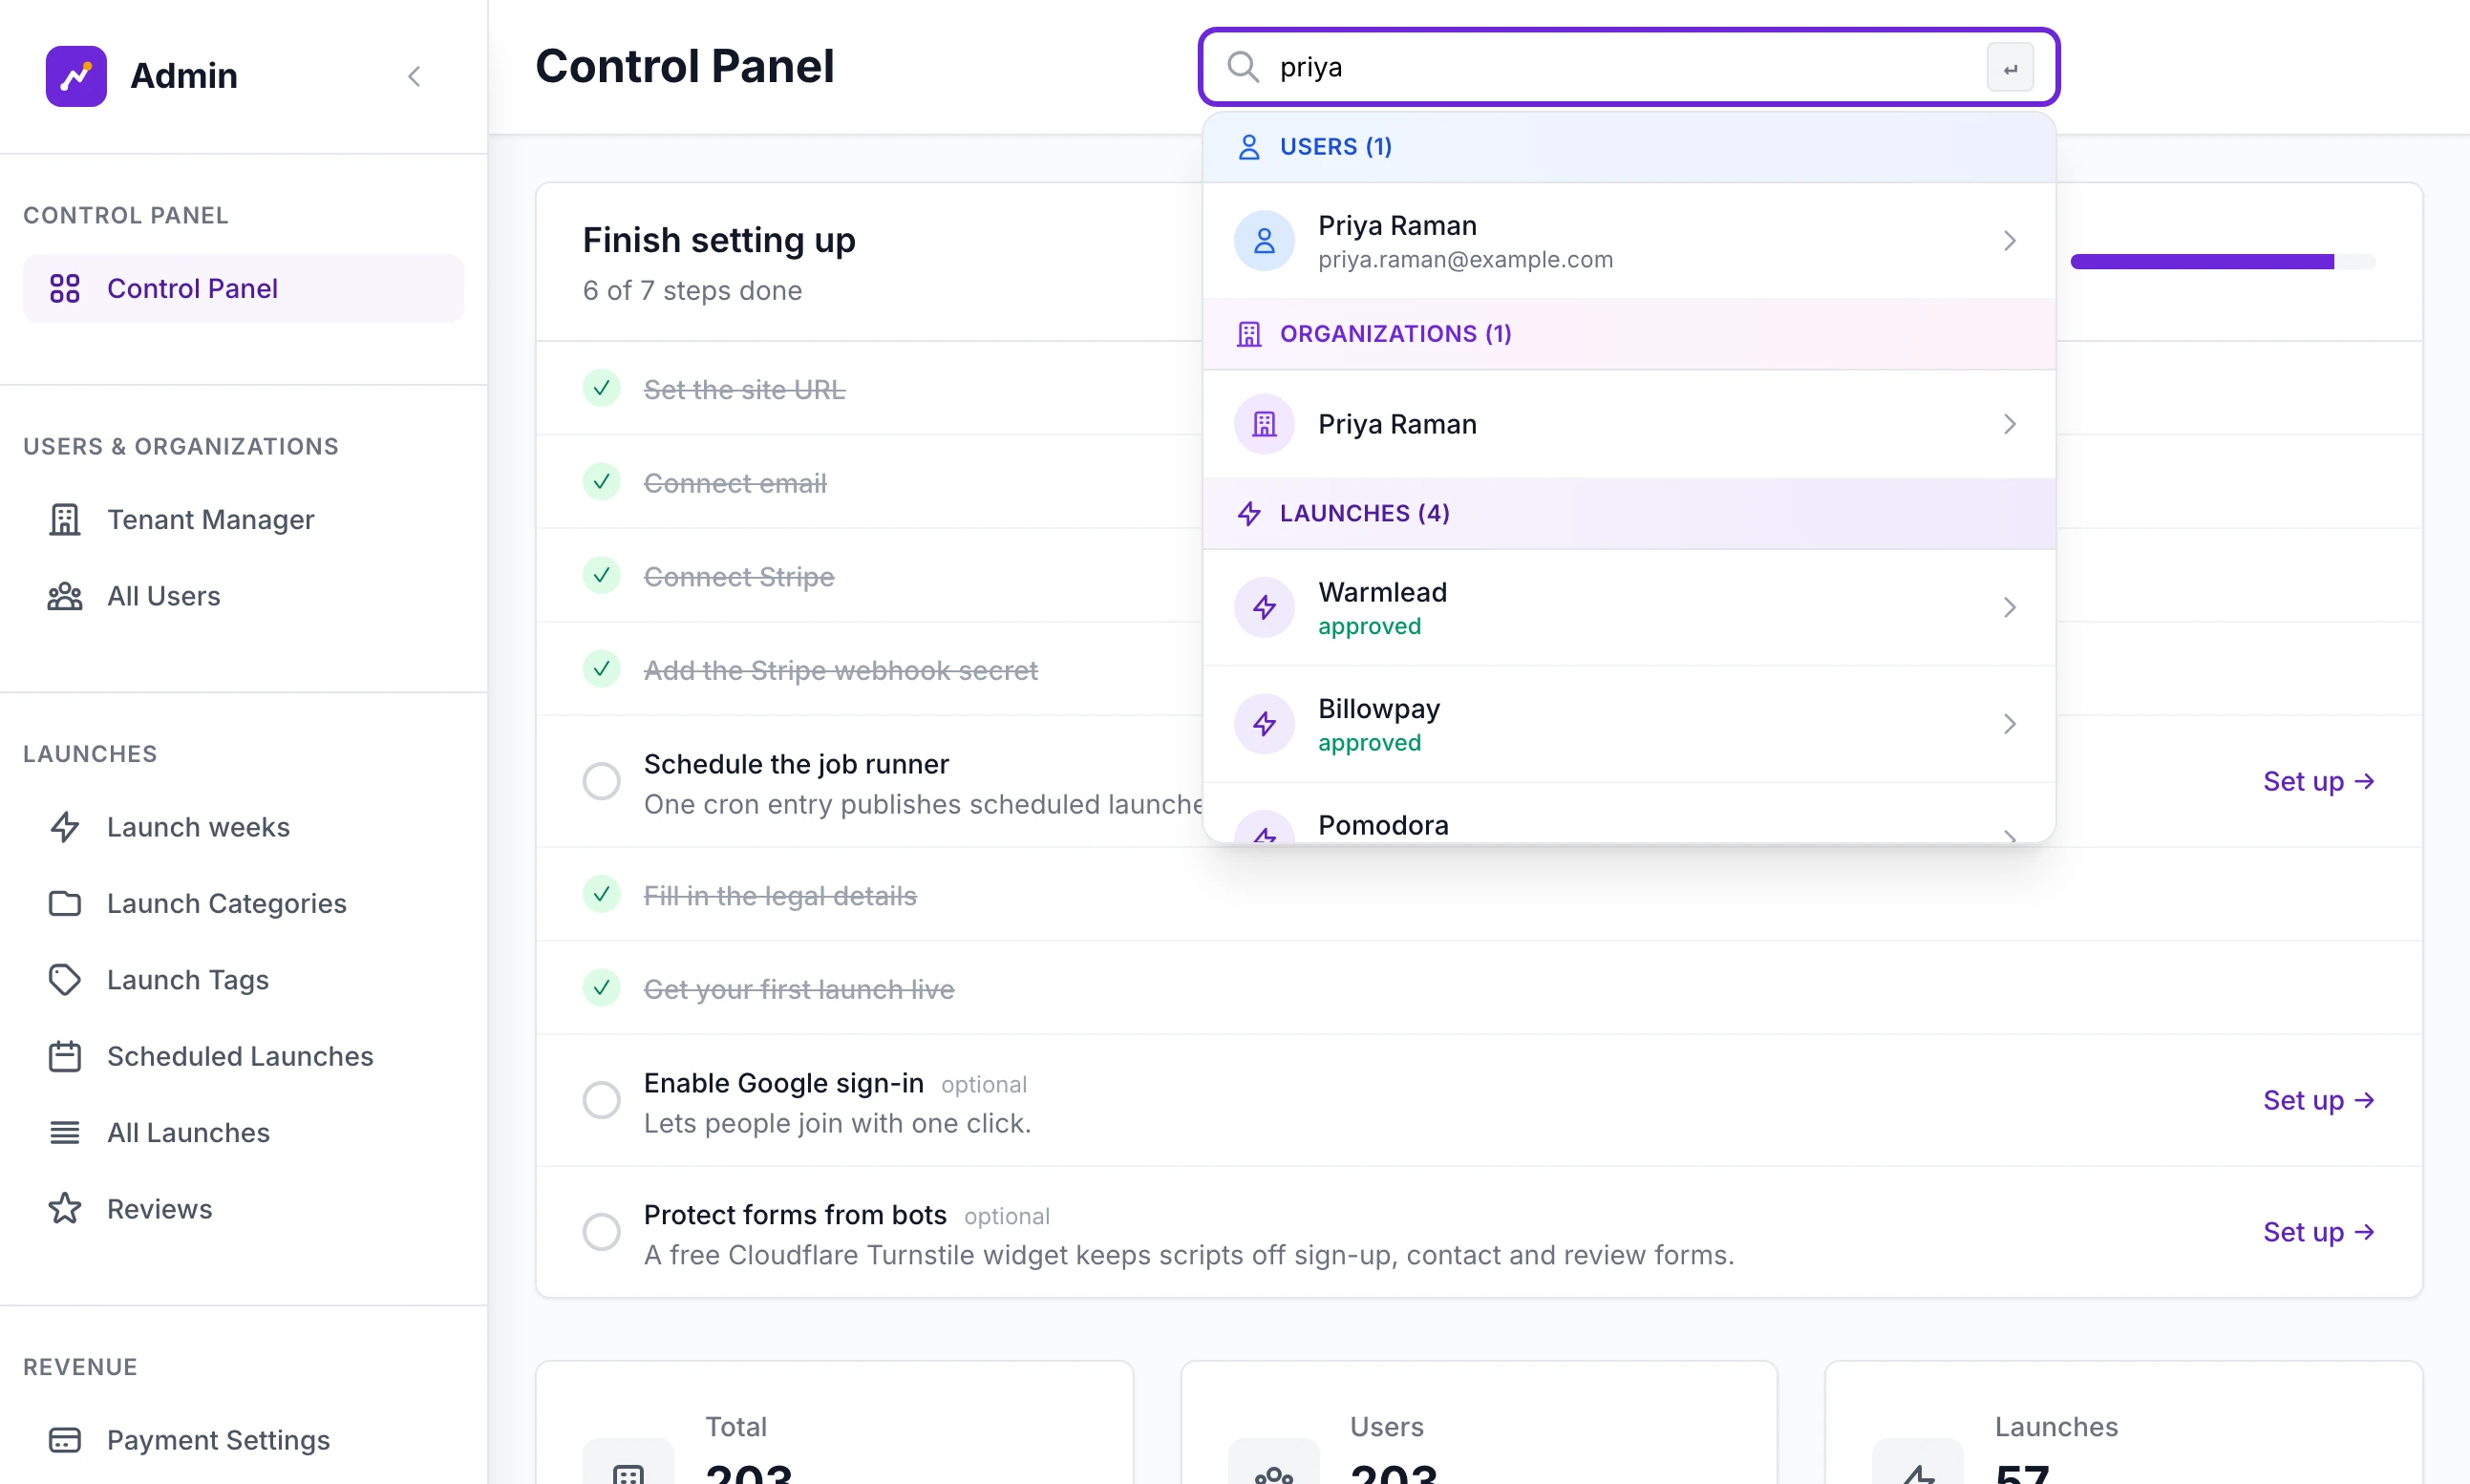
The box at the top of every admin screen searches the whole site at once. Type two characters or more and results appear under it as you type, grouped as Users, Organizations, Launches, Payments, Subscriptions and Vouchers, with up to five of each.
| It finds | By |
|---|---|
| A person | Name, email address, username or the name of their account |
| An account | Its name or description |
| A listing | Name, tagline, description, website address or its maker's email address |
| A payment or subscription | The buyer's name or email address, or a Stripe ID |
| A voucher | Its code or description |
Click a result to open it. A listing that is live opens on its public page, and one that is not opens in the listing editor. Subscriptions and vouchers have no page of their own, so those results open All Transactions and Voucher Manager.
On a phone the box is hidden. Open the sidebar and tap Search under Control Panel.
The Audit Log#
Open Audit Log under Tools in the admin sidebar. It lists what admins have done, newest first, 50 to a page.
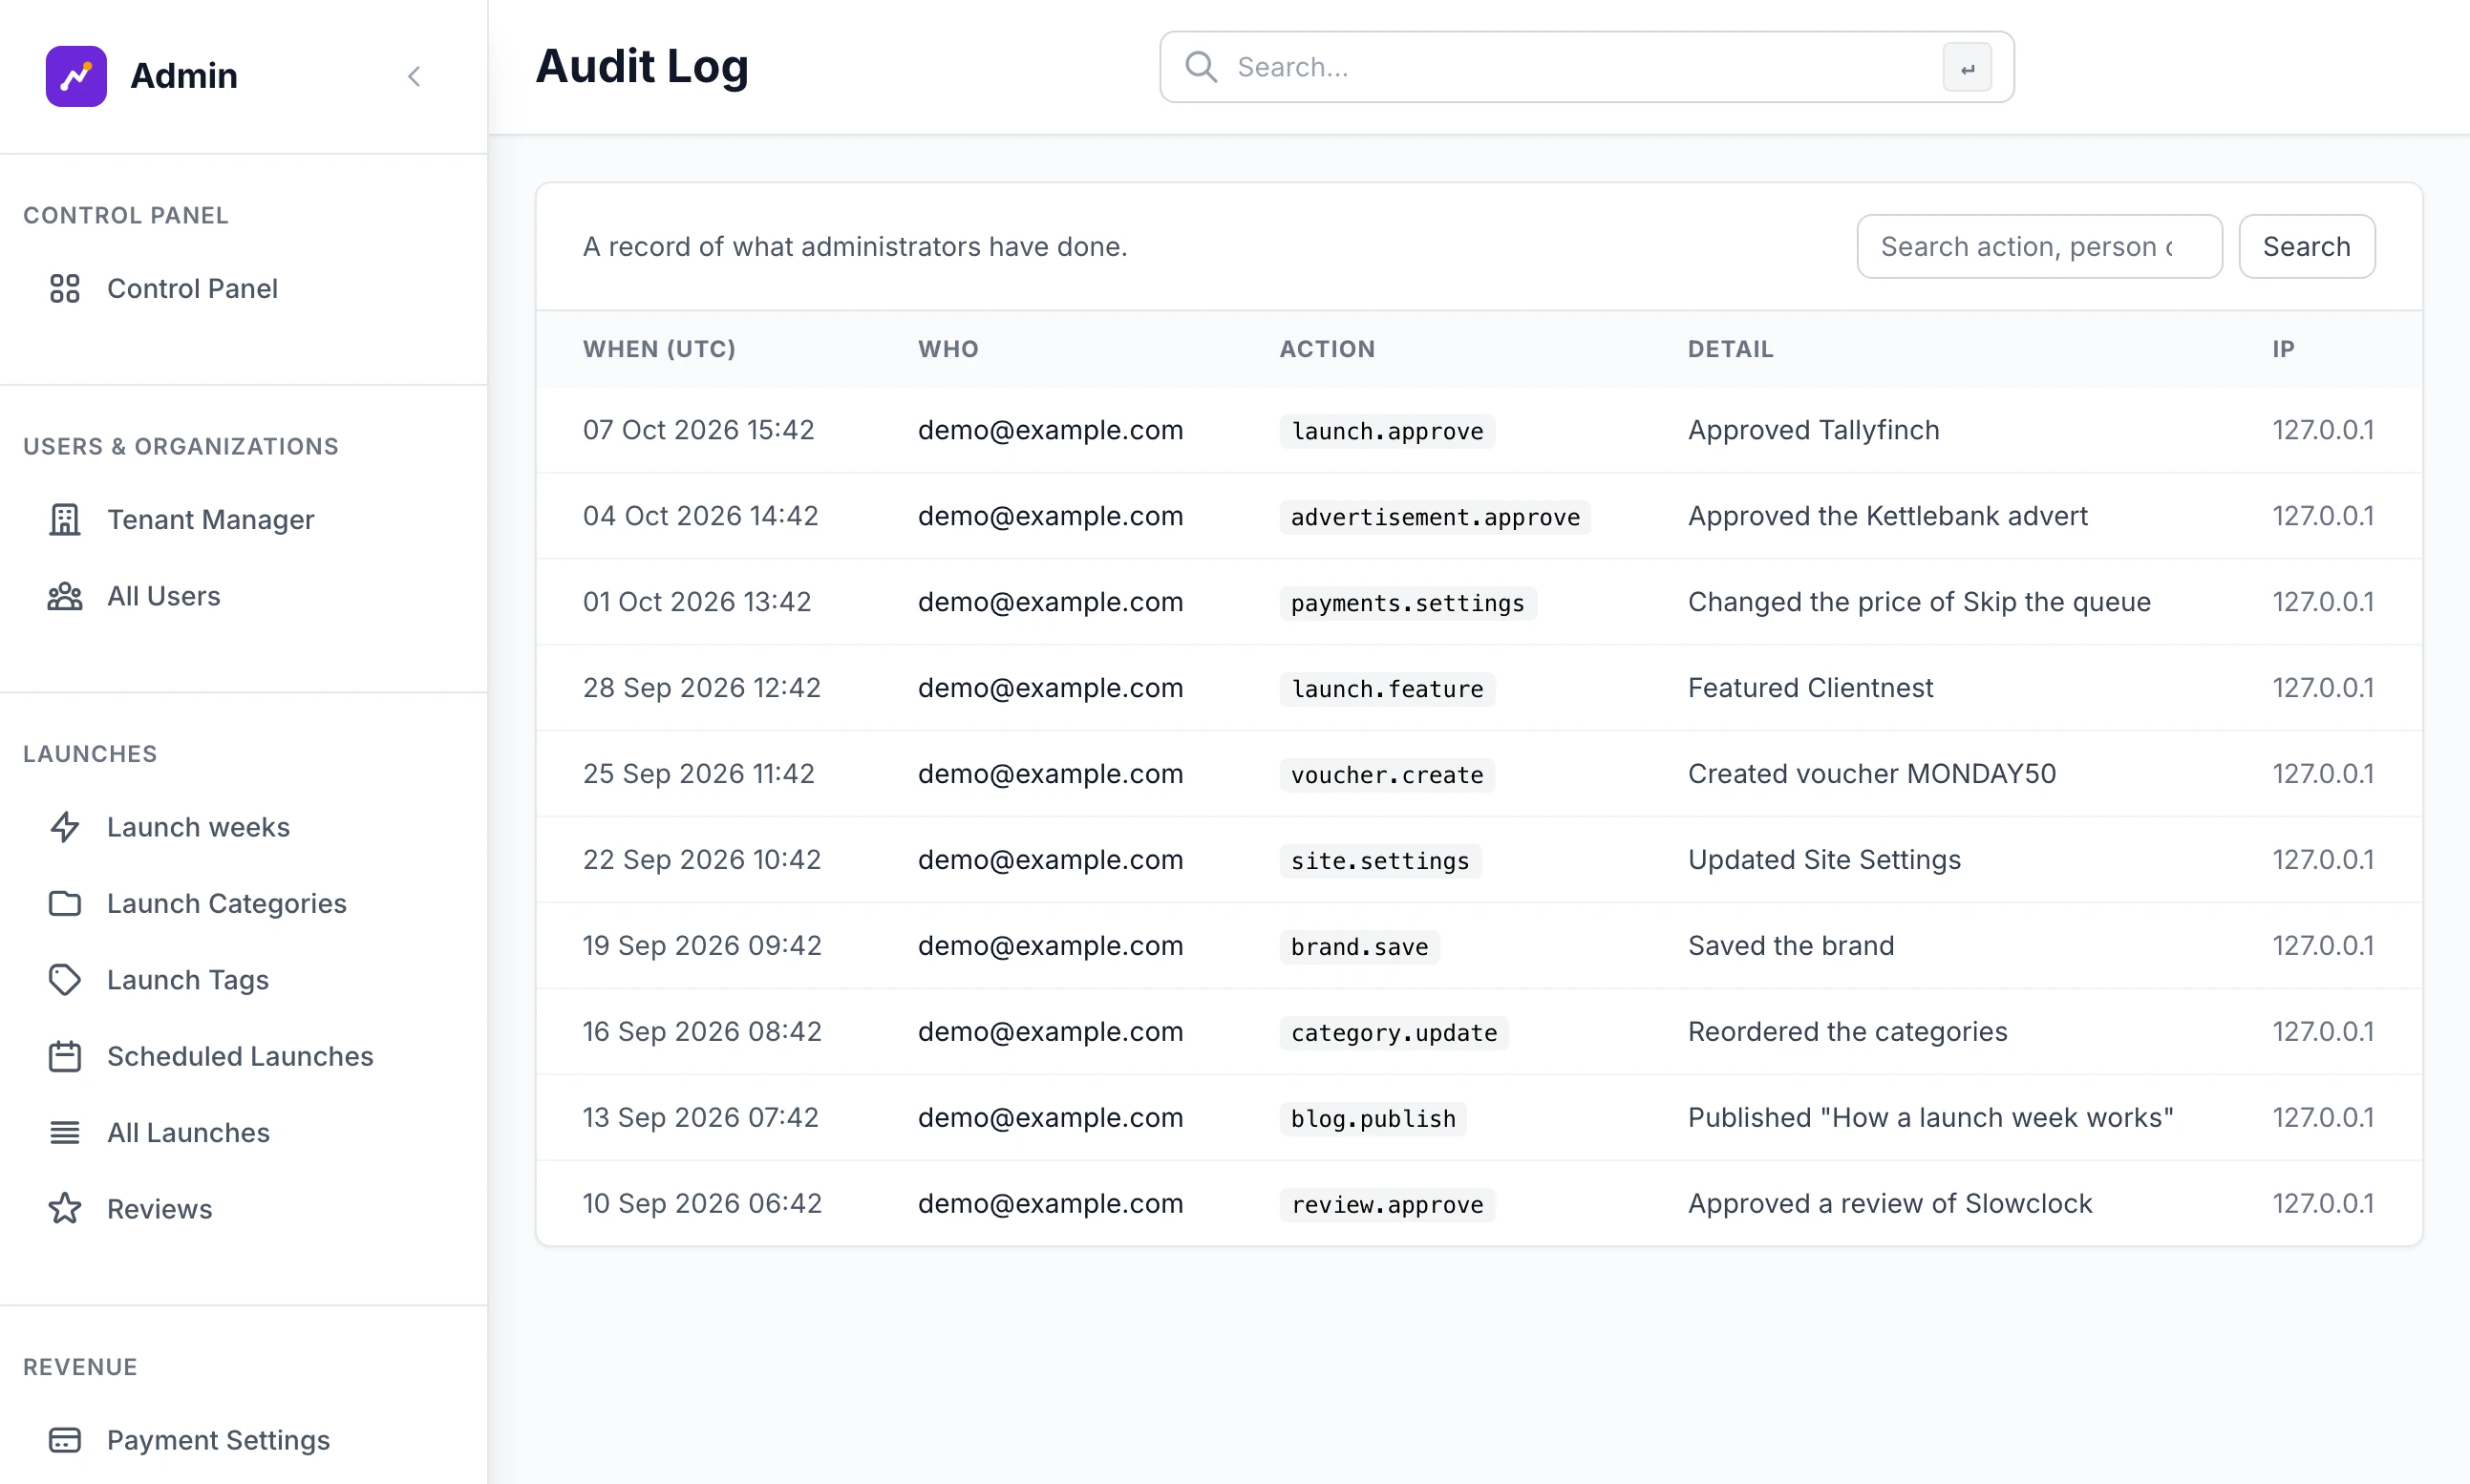
When (UTC): the time, in UTC and not your own time zone.
Who: the admin's email address.
Action: a short code. A named action reads like
launch.approve,payment.refundoruser.impersonate. Any other change saved on an admin screen is recorded with a code that beginsadmin., such asadmin.update_site_settings.Detail: what it was done to, such as the listing's name or the amount refunded.
IP: the address the admin was at.
The box at the top right searches the action, the person and the detail. Entries cannot be edited or deleted from the admin.
The two admin roles#
An admin is an ordinary account with one of two roles. All Users shows the role in the Role column.
| Role | Shown as | What it can do |
|---|---|---|
system_admin | System Admin | Everything. The account the setup wizard made is one. |
read_only_admin | Read Only Admin | Open every admin screen except Integrations, and change nothing. |
A read-only admin sees a blue bar on every admin screen: "Read-Only Mode You can view all admin pages but cannot perform any actions." Anything they try to save is refused with "Read-only admin access — you cannot modify data" and they are returned to the Control Panel. Integrations refuses them with "Full System Administrator access required", and they cannot sign in as another person. Use the role for a bookkeeper, or for someone you are showing the business to.
The other roles in the list, Owner, Admin, Member and Viewer, belong to a maker's own account. An Admin there is an admin of that team, not of your site. A signed-in person without one of the two admin roles who opens /admin is sent to the home page with "System Administrator access required".
Make a second admin#
There is no "add admin" button. The person makes their own account and you raise it.
Step 1: Have them create an account
They sign up on your site like any maker and confirm their email address. Until email is connected the confirmation link is not sent. It is written to the server log.
Step 2: Open All Users
Open All Users under Users & Organizations in the admin sidebar. Find them with the search box above the table.
Step 3: Open the menu on their row
Click the button at the end of their row, in the Actions column. The menu has View Details, Impersonate, Promote to Admin and Make Read-Only Admin.
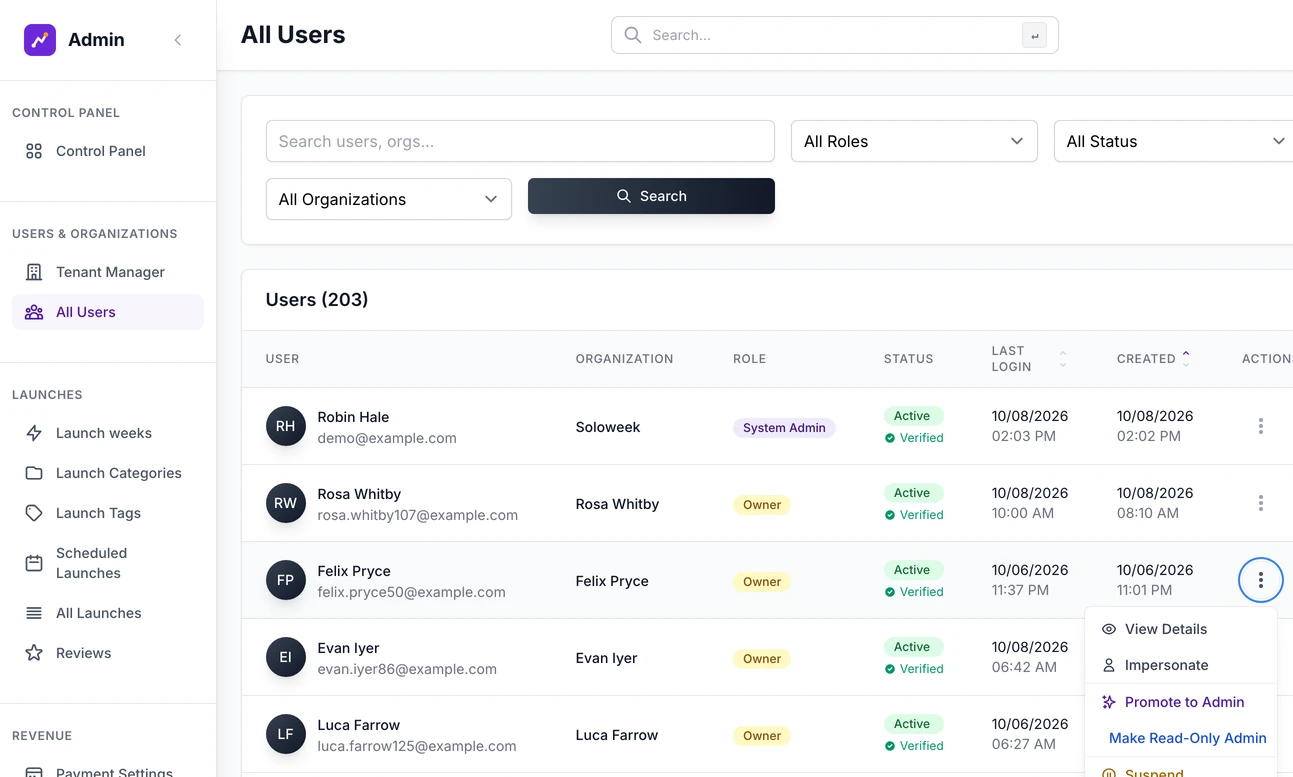
Roles are changed from the menu at the end of a row. Step 4: Choose the role
Click Promote to Admin for full control, or Make Read-Only Admin. Your browser asks you to confirm, then you see a message such as "Priya Raman role changed from Owner to System Admin."
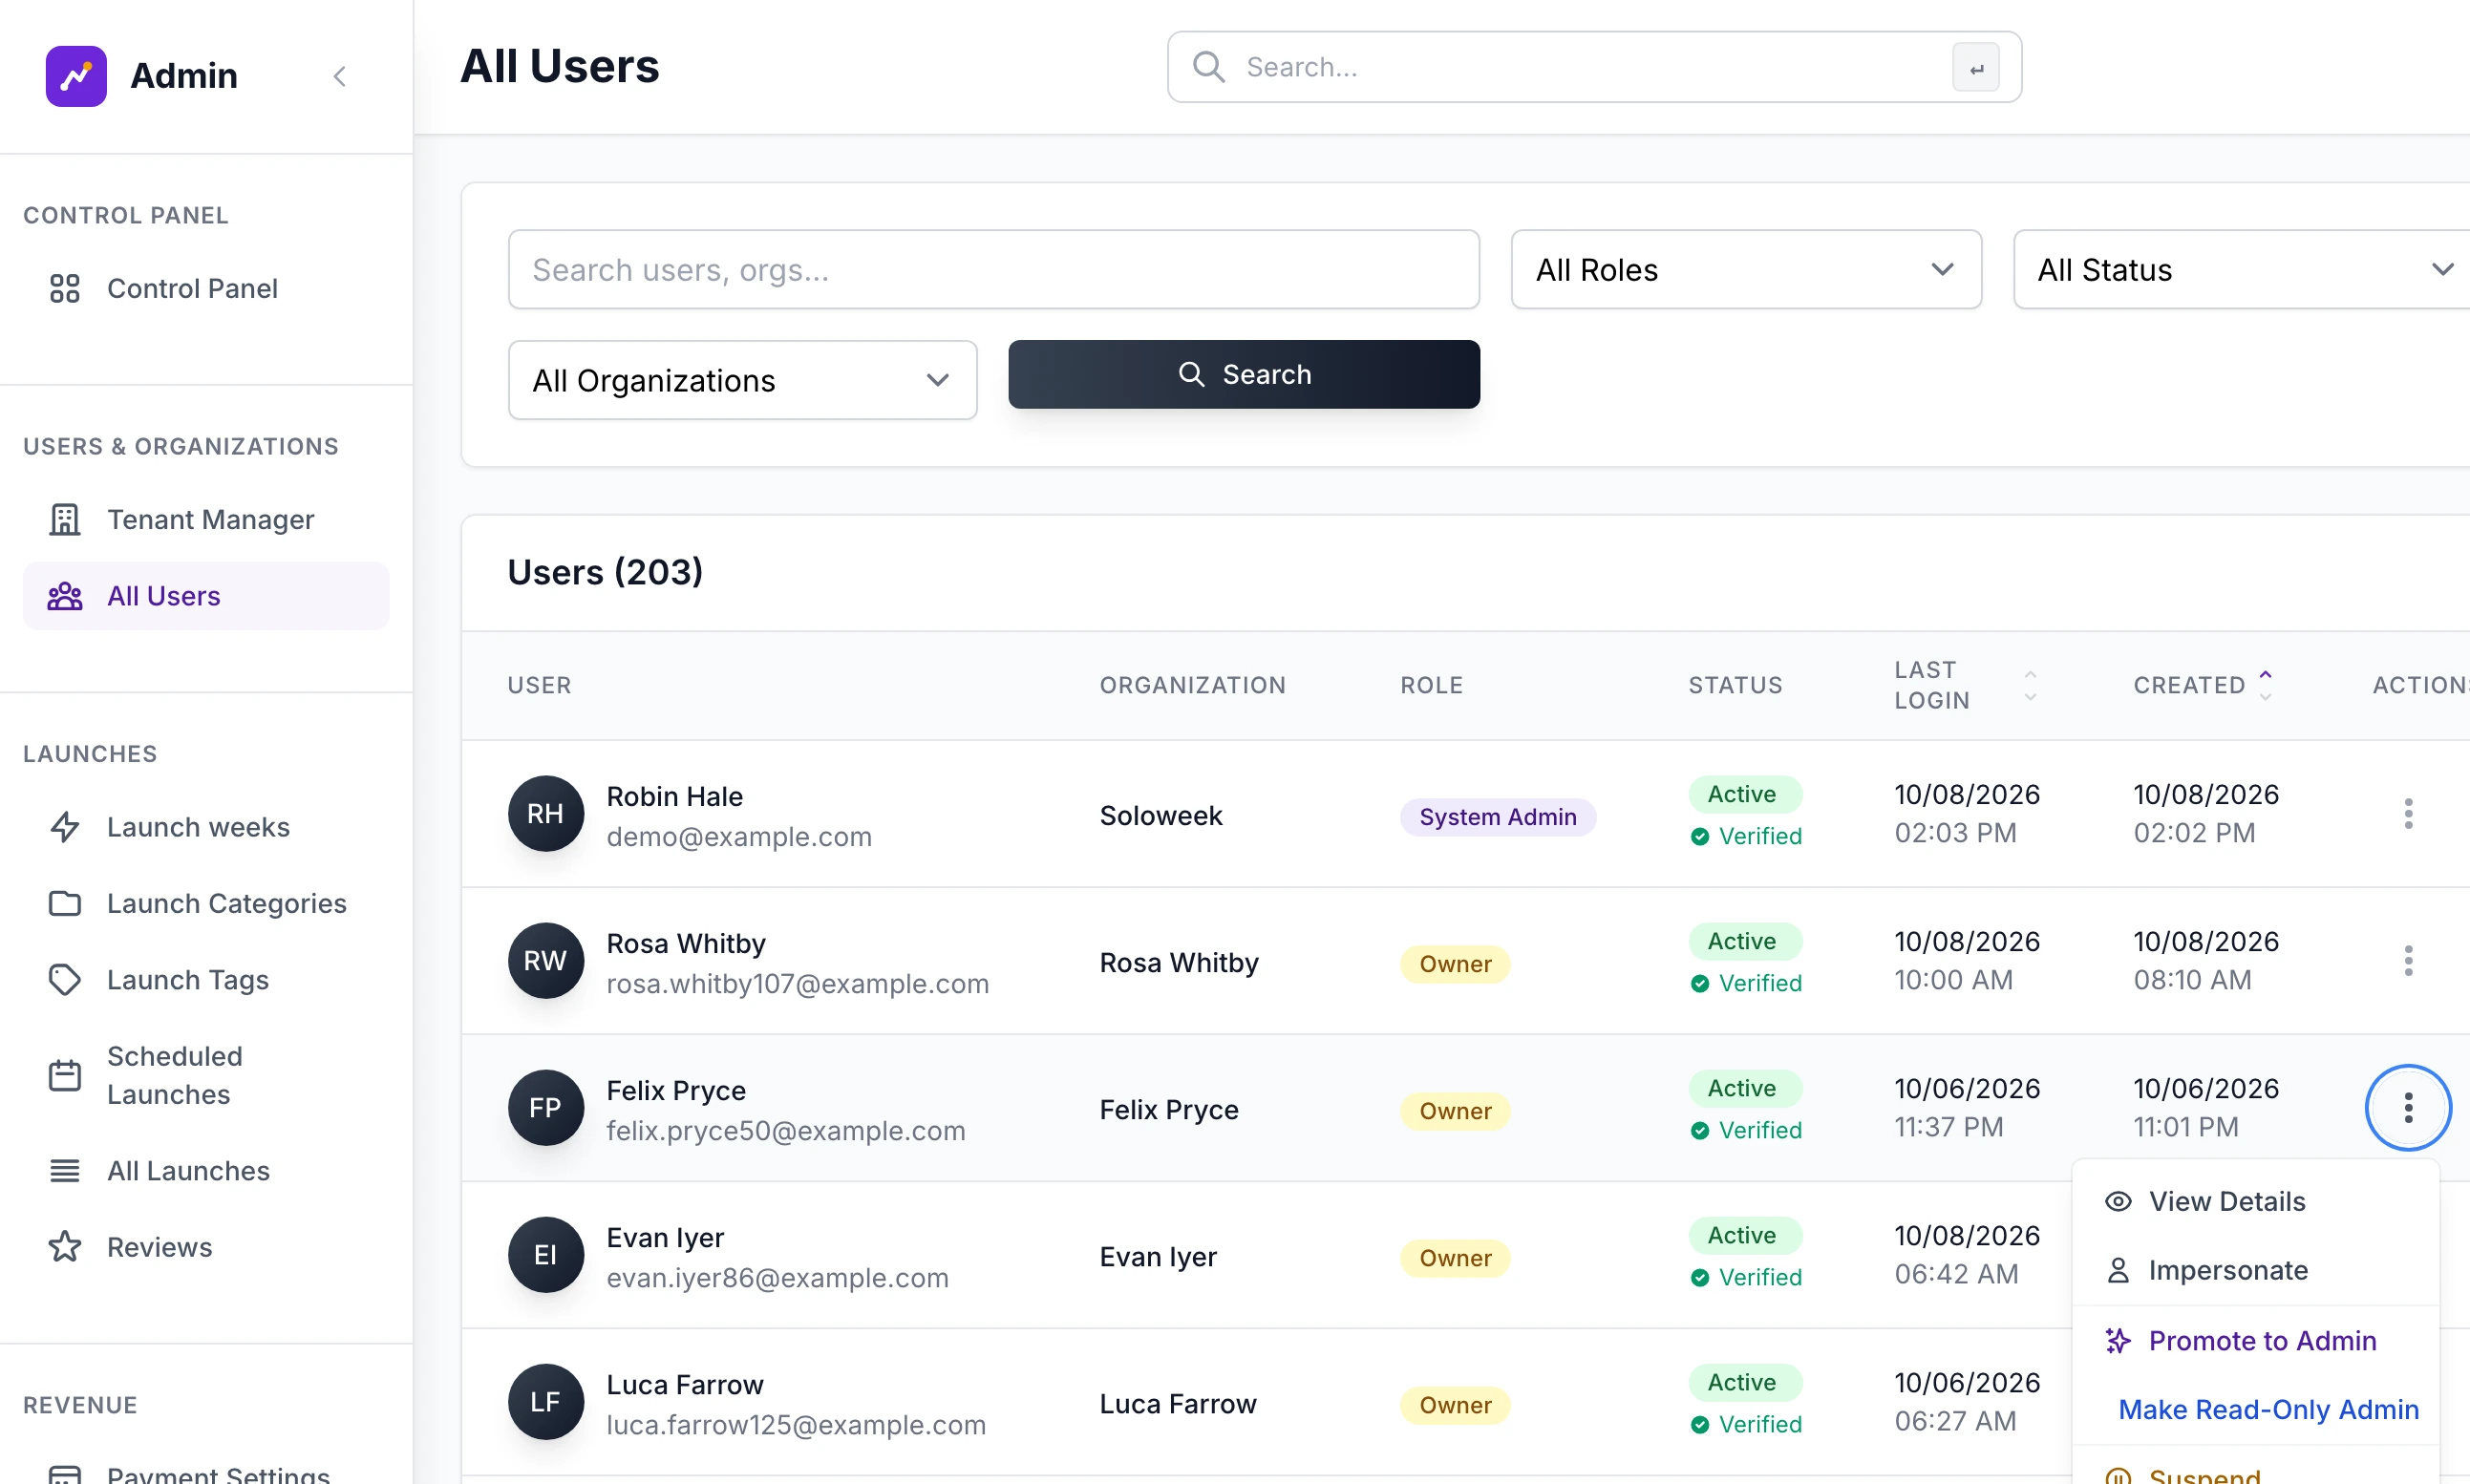
To take the role away again, use Demote to Member in the same menu. You cannot change your own role: your own row does not offer it.
A person has one role at a time. Someone who signed up as a maker is the Owner of their own account, and making them an admin replaces that. Demote to Member then leaves them a Member, not an Owner. To put that back, choose View Details, set Role to Owner under Edit Profile and click Save Changes.
Sign in as a user#
To see the site exactly as one maker sees it, open the menu on their row in All Users and click Impersonate. The button is also on their View Details page.
You land on their dashboard under "You are now signed in as", with their name and email address.
An amber bar stays across the top of every page: "You are signed in as" and their email address, with a link, Return to your admin account.
Click that link and you are back on All Users with "You are back in your admin account."
While you are signed in as them, everything you do is done as them, purchases included. Each time you do this it is written to the Audit Log as user.impersonate. Another admin cannot be impersonated: the menu offers it, and clicking gives "Administrators cannot be impersonated."
Back to App#
Your admin account is also an ordinary account on your own site. Back to App, at the bottom of the sidebar, leaves the admin for your own dashboard, the same one a maker gets, where you can add listings of your own. Sign Out is under it.
To return, click Admin area in that dashboard's sidebar, or go to /admin.
The footer of every admin screen shows the version you are running, such as v2.9.0, and has a View site link to your public home page.
Why can I not see Launch weeks or Review queue?
The sidebar shows the screens that fit the way your site launches. Launch weeks and Scheduled Launches belong to weekly launches, and Review queue to rolling launches with the check before going live switched on. Each also stays visible while it still has something in it after you change the way the site launches.
The search box says "Search error"
The search could not be run. In version 2.9.0, on a site that keeps its data in the SQLite file, the search needs SQLite version 3.44 or newer, and an older Python can come with an older SQLite. Check yours with the command below. If it prints a lower number, install a newer Python and make the virtual environment again, or move the site to PostgreSQL.
python -c "import sqlite3; print(sqlite3.sqlite_version)"Can I change what a read-only admin is allowed to see?
Not from the admin. The two roles are fixed.
Can an admin also be a maker?
Yes. An admin account is an ordinary account as well. Use Back to App to reach your own dashboard and add a listing there like anyone else.
Stuck on a step? Send a message.