The setup wizard, step by step
All seven steps of the wizard that creates your site, what each choice writes and where in the admin you change it later.
Updated 9 Oct 2026 · written for Launch Lab 2.9.0
On this page
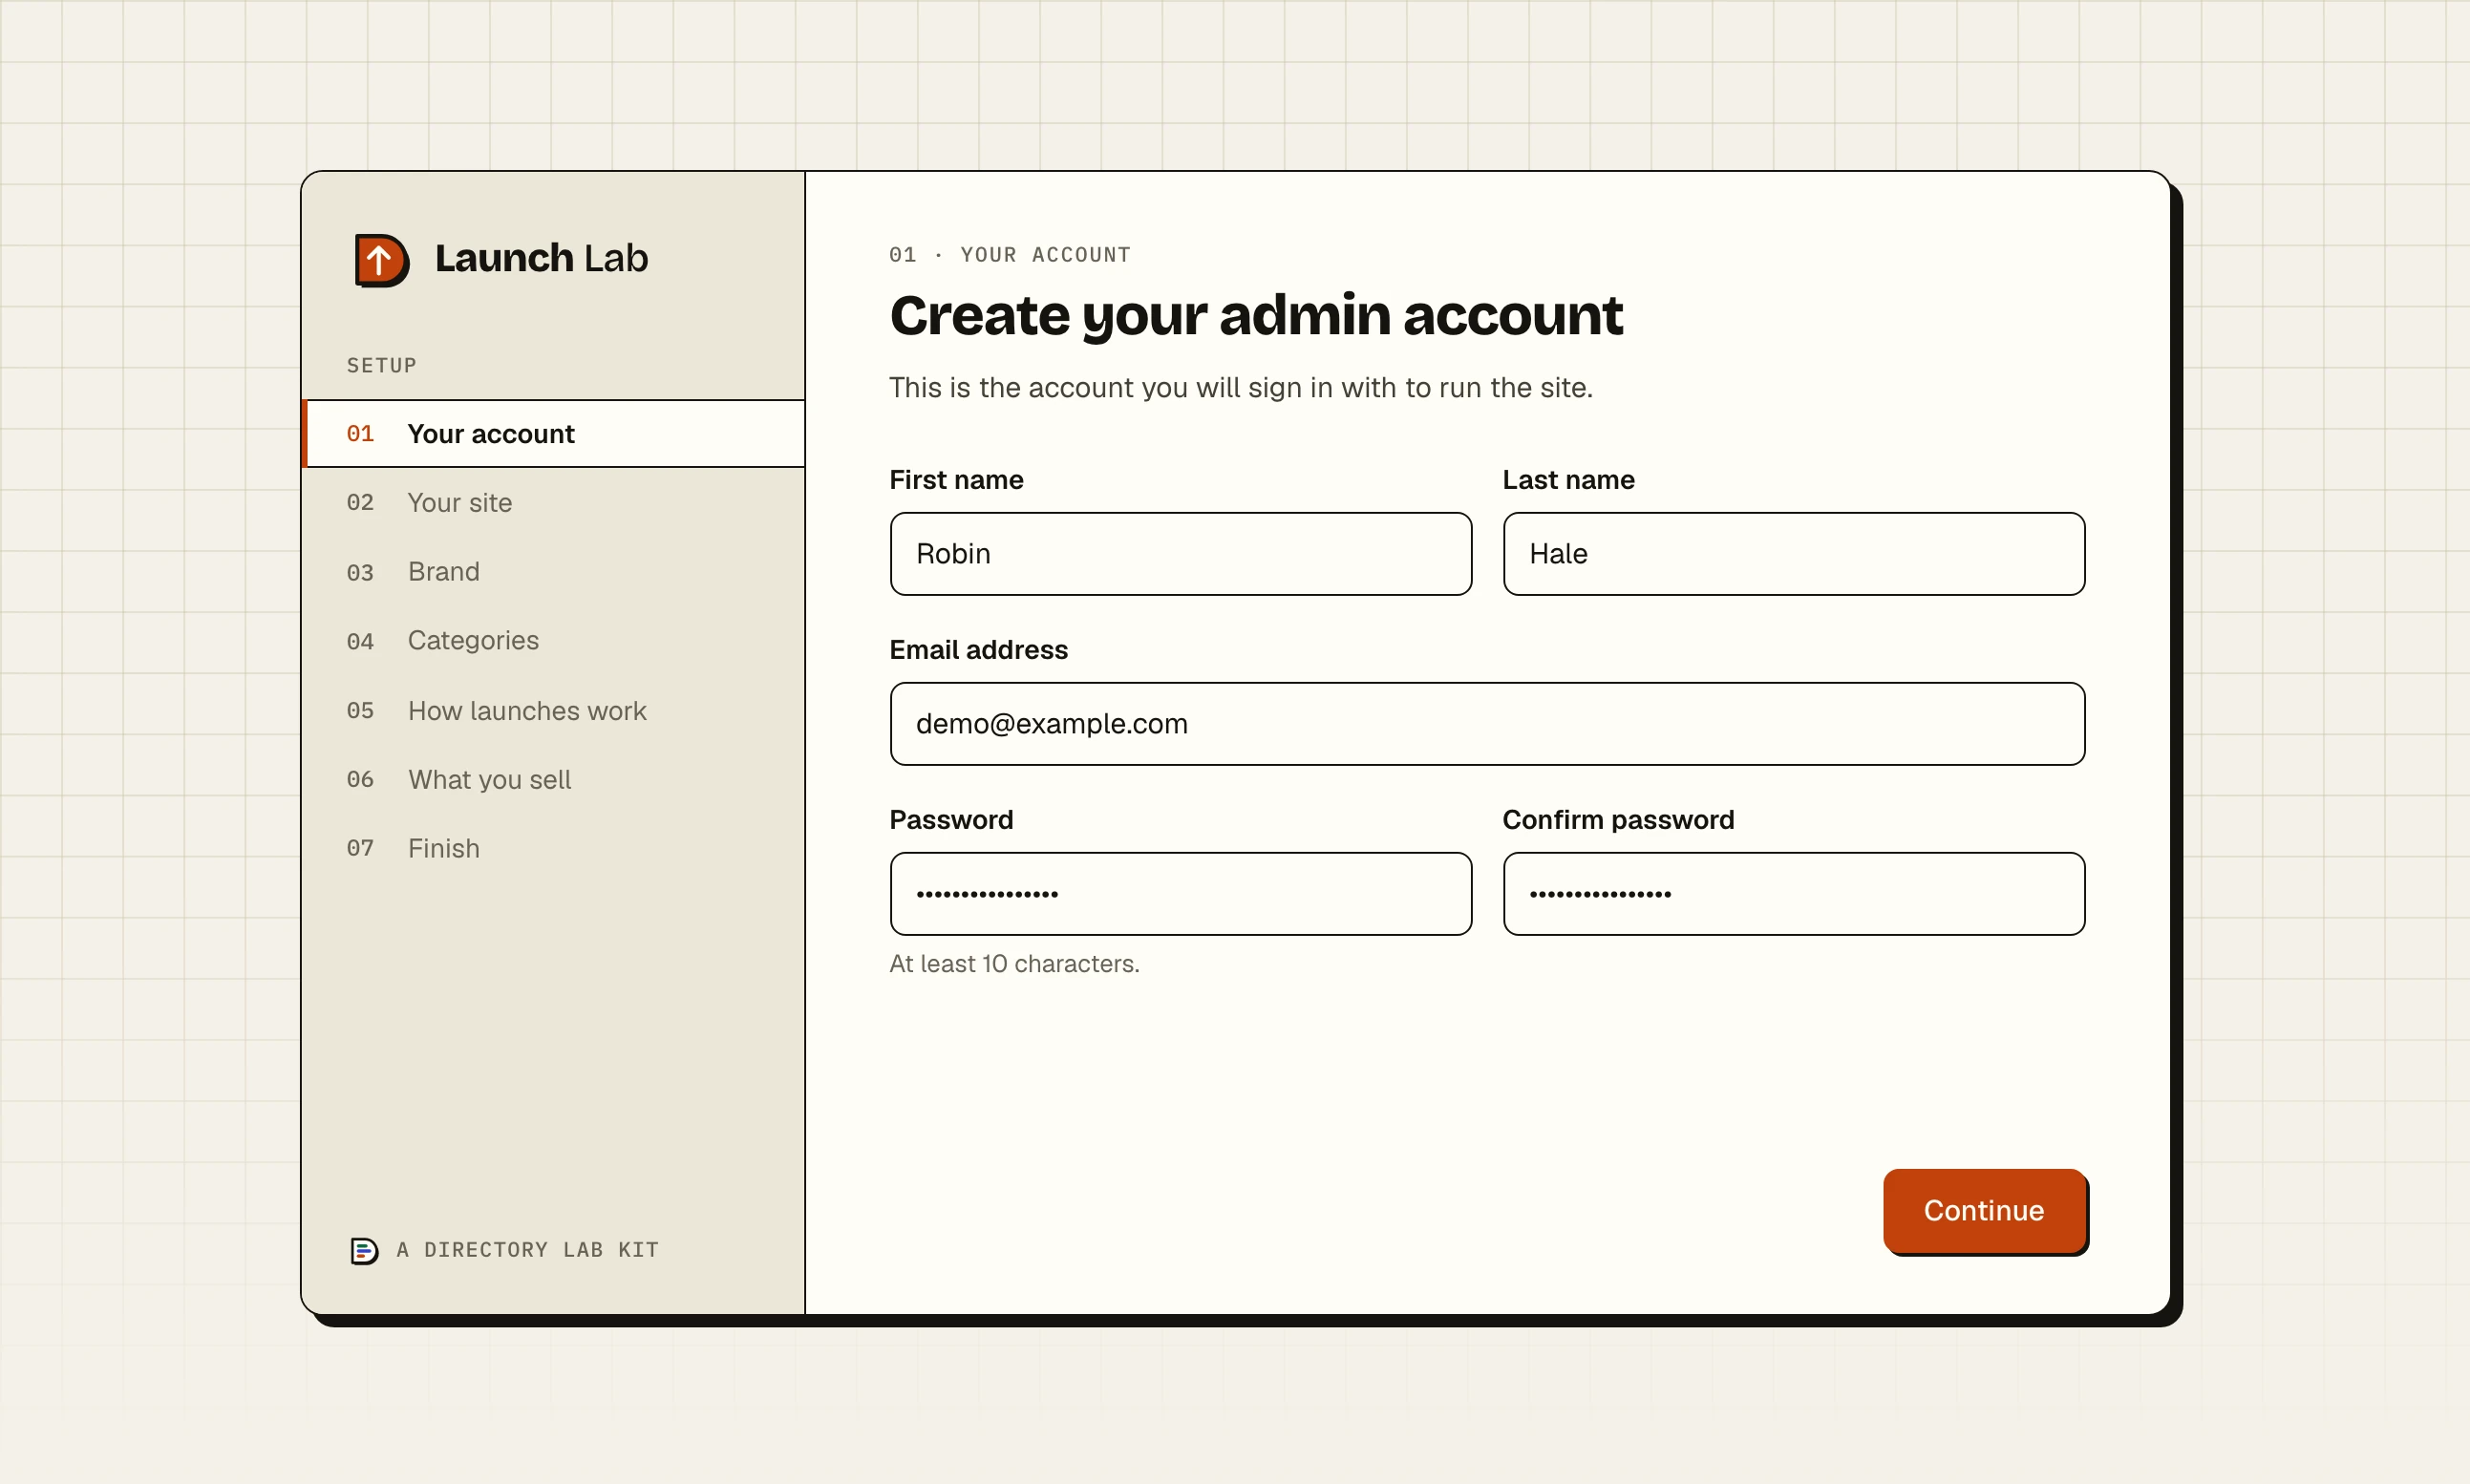
Open /setup on a new site to reach the setup wizard. You rarely need to type the address: until the site has an admin, every page sends you there. The wizard asks for the few things the site cannot guess, creates your admin account and leaves you signed in to the admin.
How the wizard works#
The seven steps are listed down the left. On a phone the list folds away and a count such as "Step 1 of 7" takes its place. Continue moves on, and ← Back returns to the step before with everything you typed still there.
It is one form. Nothing is saved until you click Create site on the last step. Close the tab or reload the page before then and you start again from the first step.
Each step is checked as you leave it. A box that is empty or wrong is pointed out by your browser before you can move on.
Pressing Enter moves to the next step. It does not create the site early.
Every answer can be changed later in the admin. Each step below says where.
Your site uses its own words for what is launched and who launches it. These guides say "listing" and "maker".
The setup code#
On your own computer the wizard opens straight away. On a server it first asks you to prove the server is yours, on a page headed Enter your setup code.
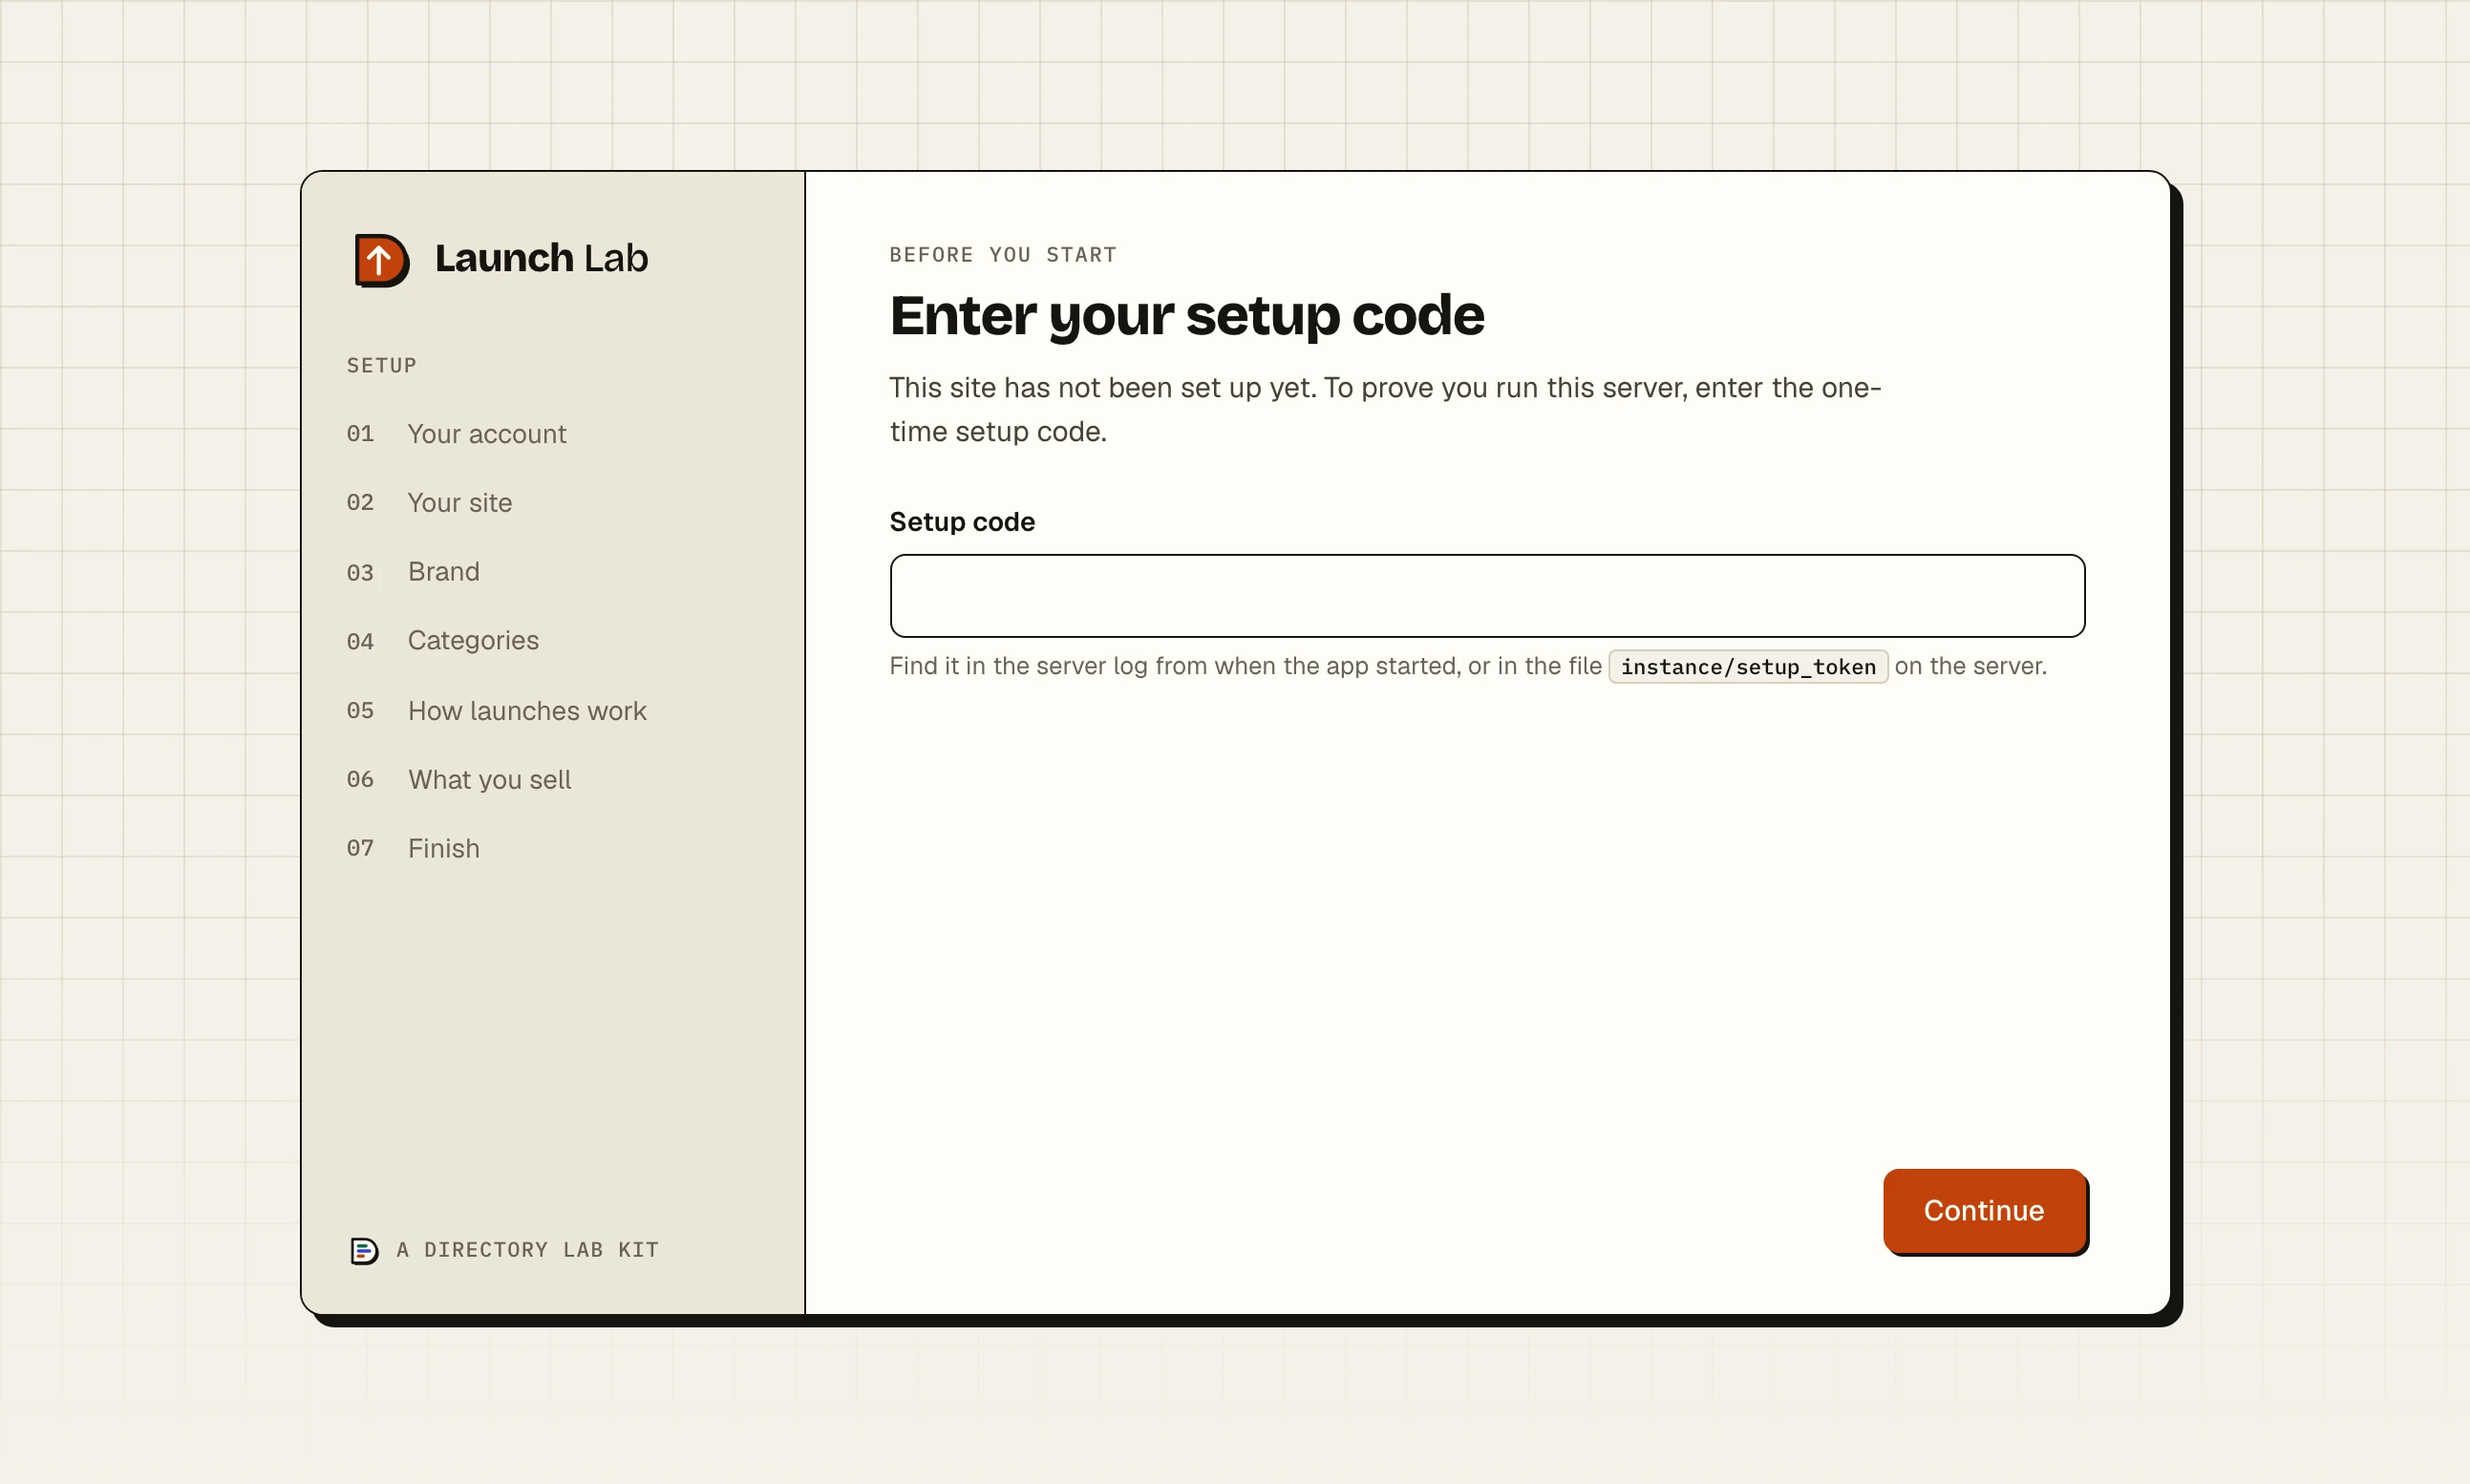
The code is printed in the server log when the site starts, and it is the only thing in the file instance/setup_token. Type it into Setup code and click Continue. A wrong code brings the page back with "That setup code is not correct." Install Launch Lab on your computer explains when the code is asked for.
The seven steps#
Step 1: Create your admin account
This is the account you will sign in with to run the site.
First name and Last name: optional. Left empty, the account is called Site Admin.
Email address: what you sign in with. It also becomes the site's support email, the address shown to users and used for replies.
Password and Confirm password: at least 10 characters, typed twice.
The account is made as a full admin and is already confirmed, so the site does not need to send you an email before you can sign in. Change your name and password later from Profile and Password in the sidebar of your own dashboard. The support email is in Site Settings on the Contact & Social tab.
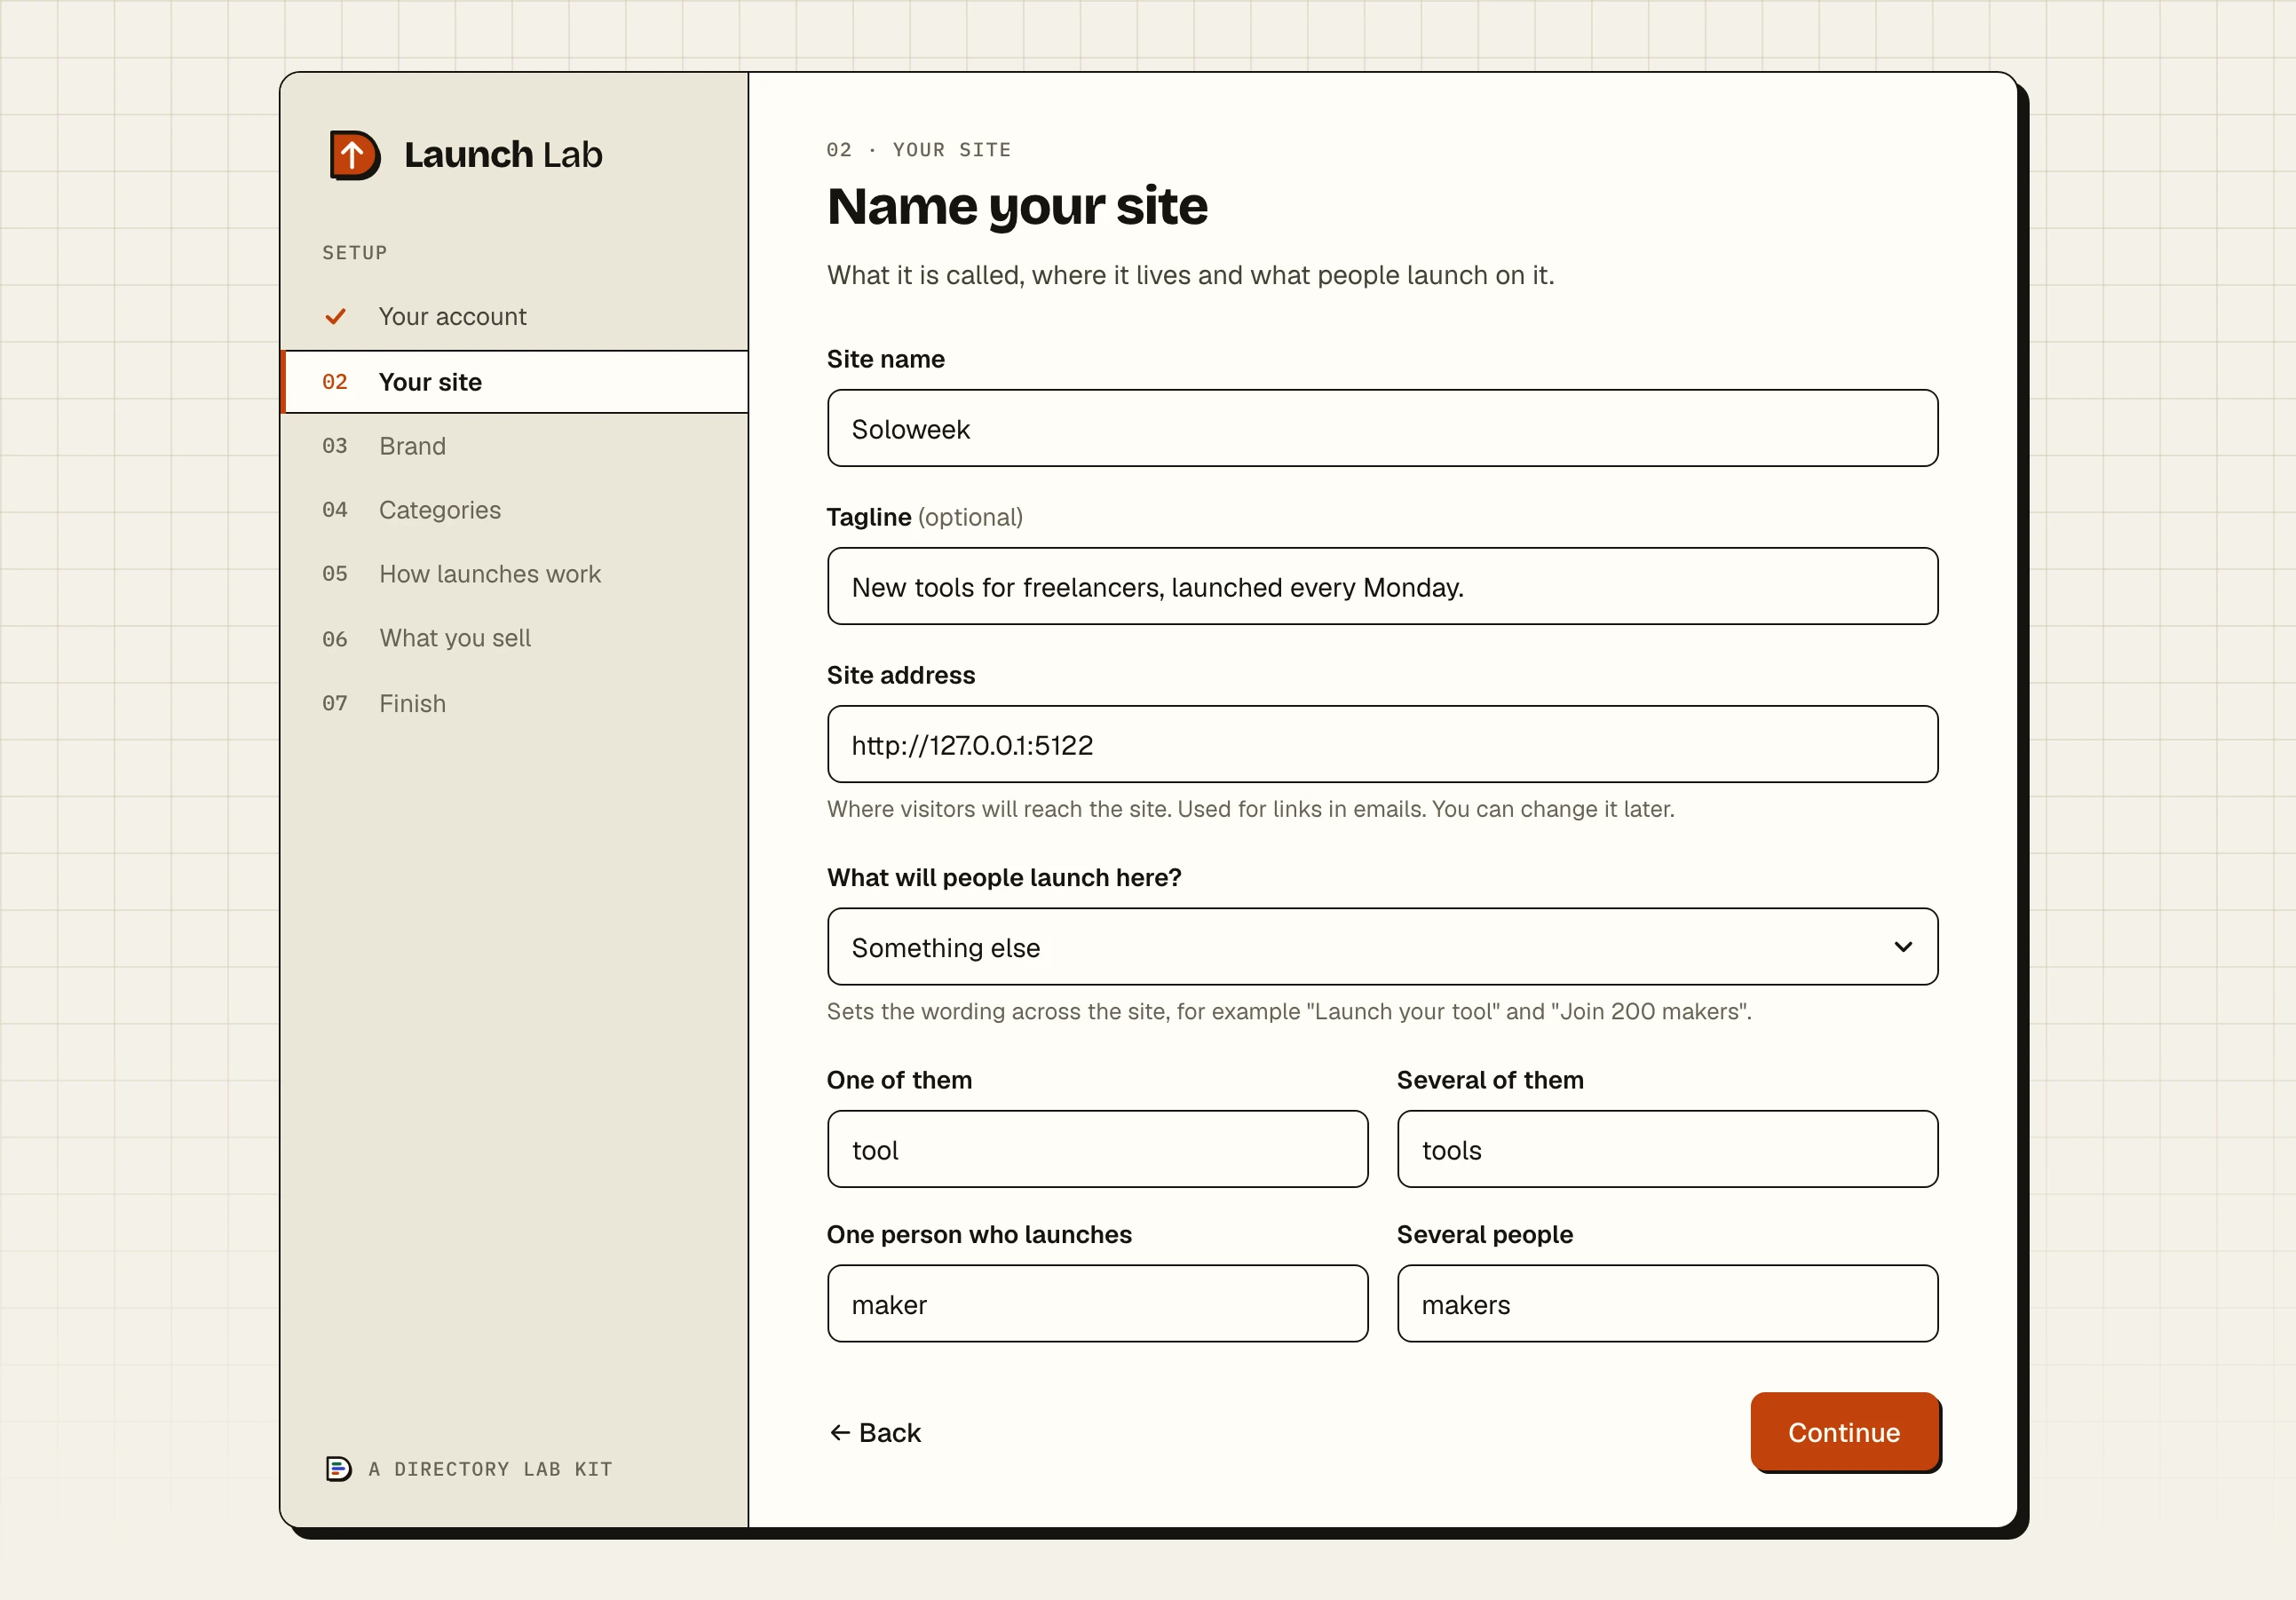
Step 2: Name your site
Site name: from 2 to 100 characters. It is shown in the header, in page titles and in emails.
Tagline (optional): one line about what the site is for. The home page uses it as its heading until you write a different one.
Site address: where visitors will reach the site. It starts as the address you are on now and must begin with
http://orhttps://. It is used for links in emails.What will people launch here?: the words the site uses everywhere, such as "Launch your product". Choose from Products (launched by makers), Apps (launched by developers), AI agents (launched by builders), Tools (launched by makers), Courses (launched by creators) and Games (launched by studios).
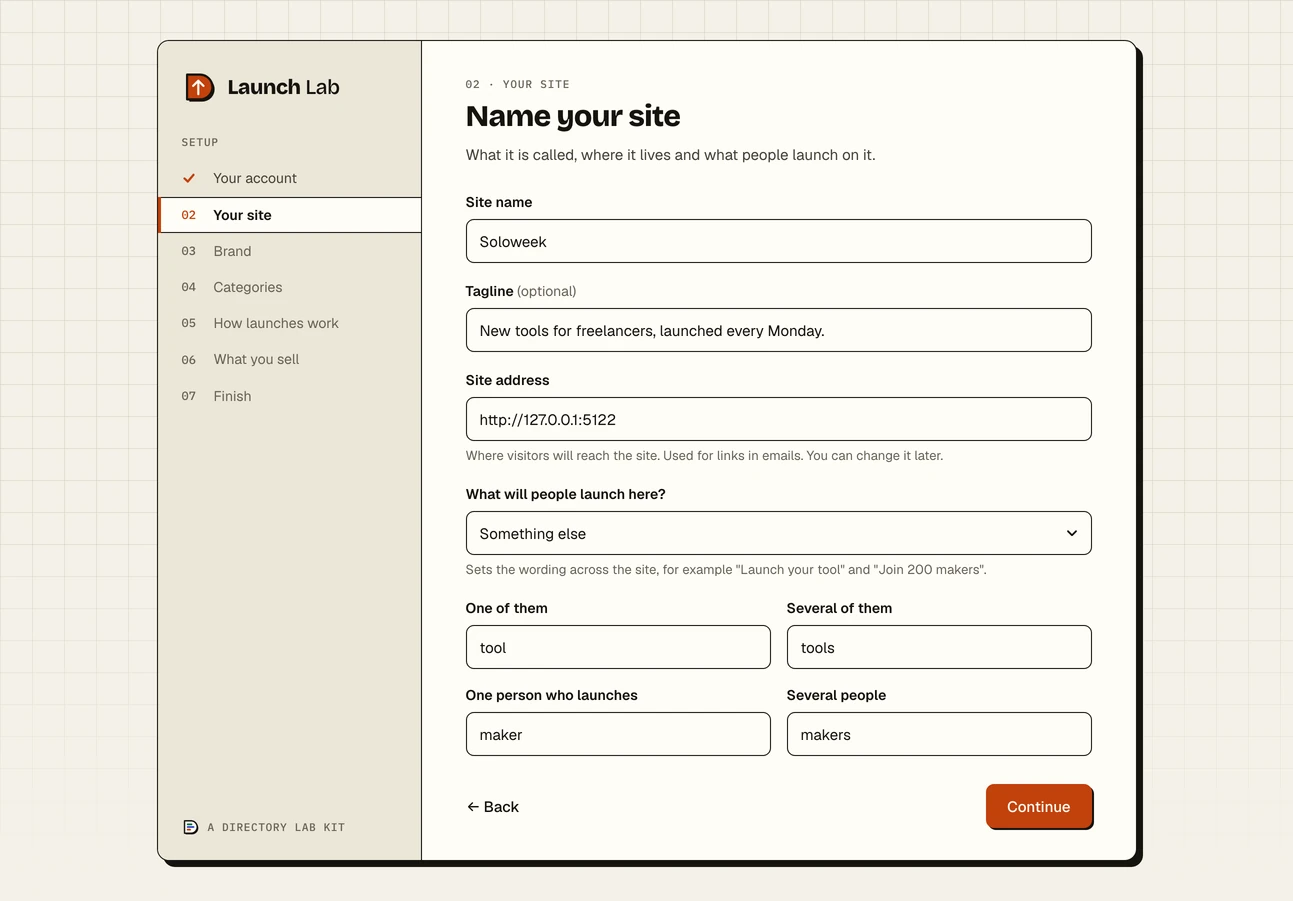
Step two names the site and sets the words it uses. Choose Something else and four boxes appear: One of them, Several of them, One person who launches and Several people. Type each word in lower case.
Change the name, tagline and address later in Site Settings on the General tab, where the address is called Site URL. The words are on the Wording tab.
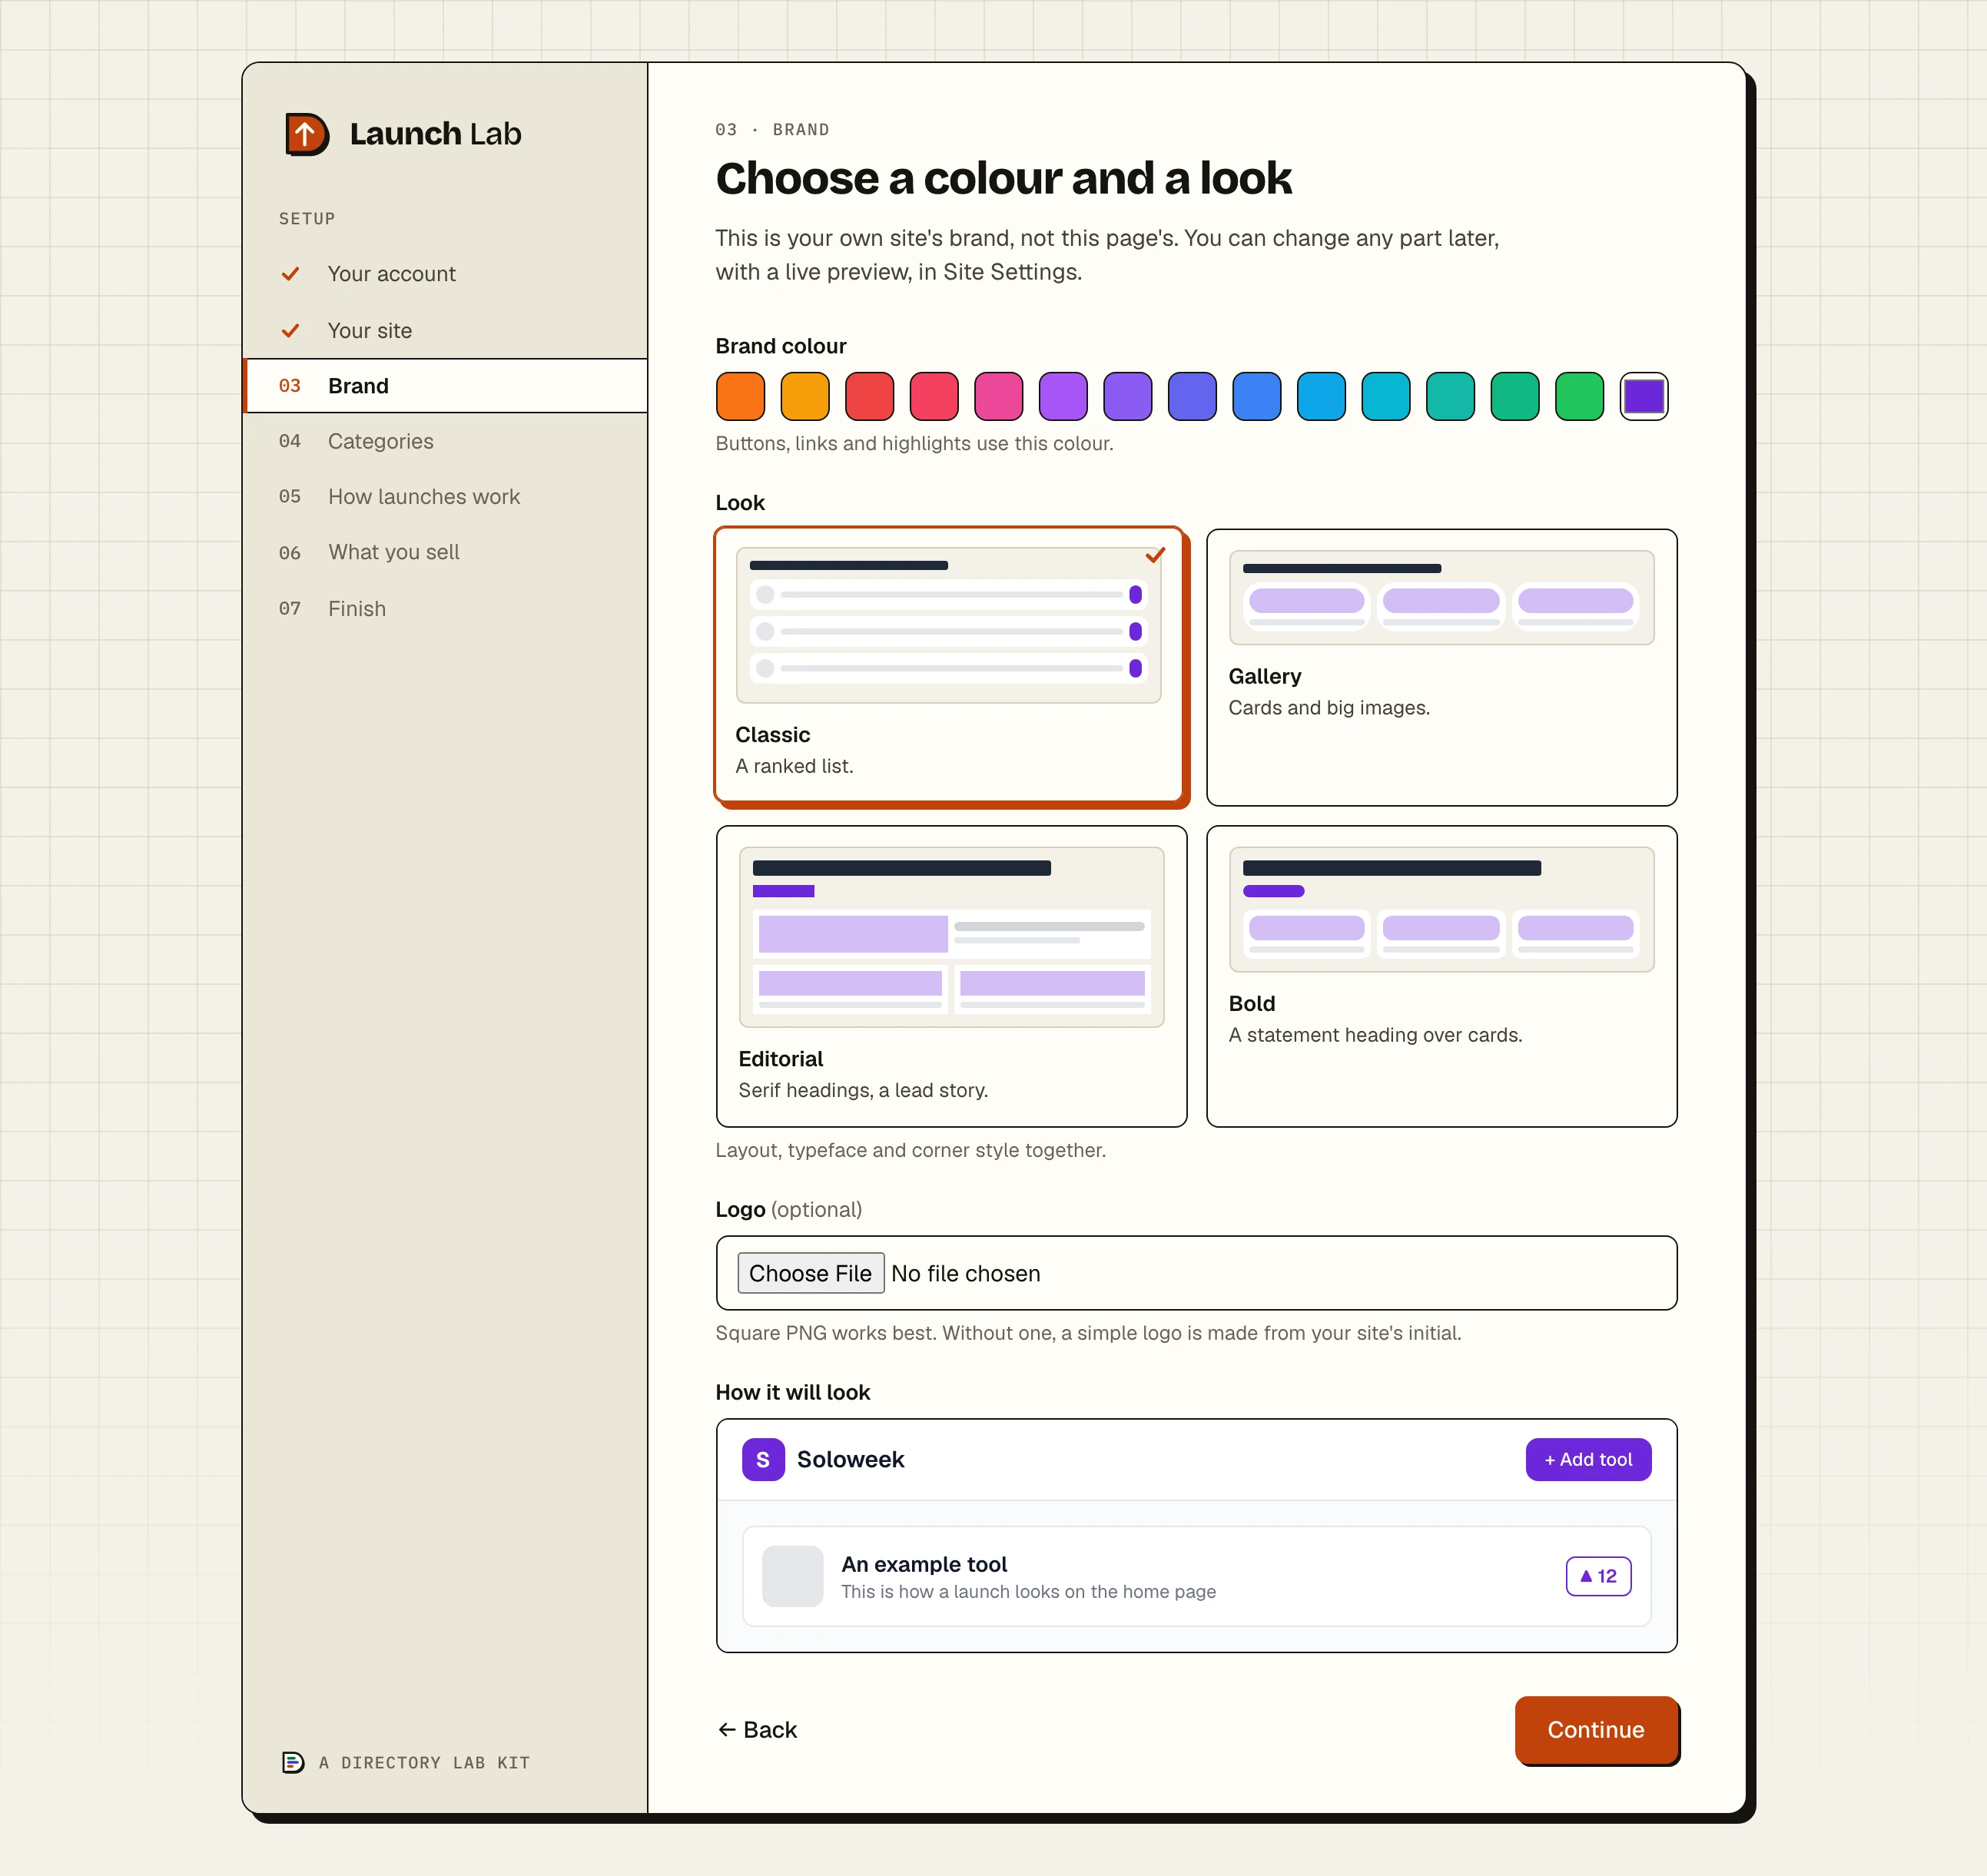
Step 3: Choose a colour and a look
Brand colour: click one of the fourteen swatches, or the last square to pick any colour. Buttons, links and highlights use it. A new site starts on orange.
Look: layout, typeface and corner style together. Classic is a ranked list. Gallery is cards and big images. Editorial has serif headings and a lead story. Bold puts a statement heading over cards.
Logo (optional): a PNG, JPG, GIF or WebP image. A square PNG works best. Without one, the site draws a logo from the first letter of its name on a square of your colour.
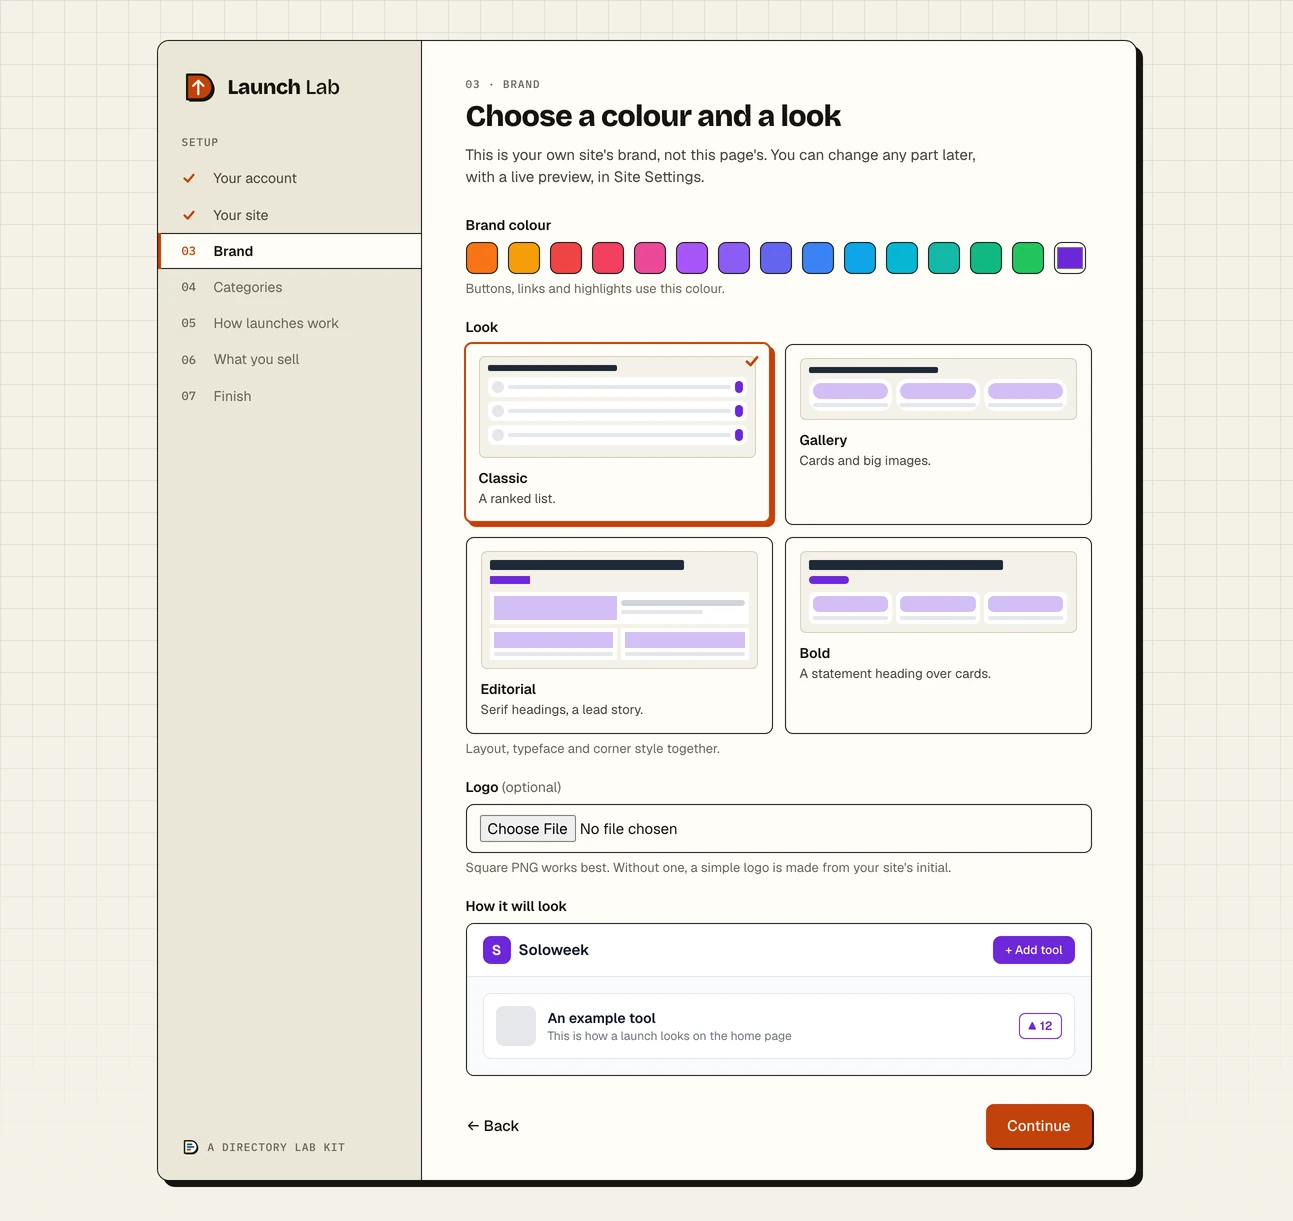
Pick a colour and a look in the wizard; both can be changed later. How it will look at the bottom is a small preview of your site in the colour you picked. The wizard's own buttons keep their colour. Change the colour and the logo later on Brand under Tools in the admin sidebar, and the look in Site Settings on the Appearance tab.
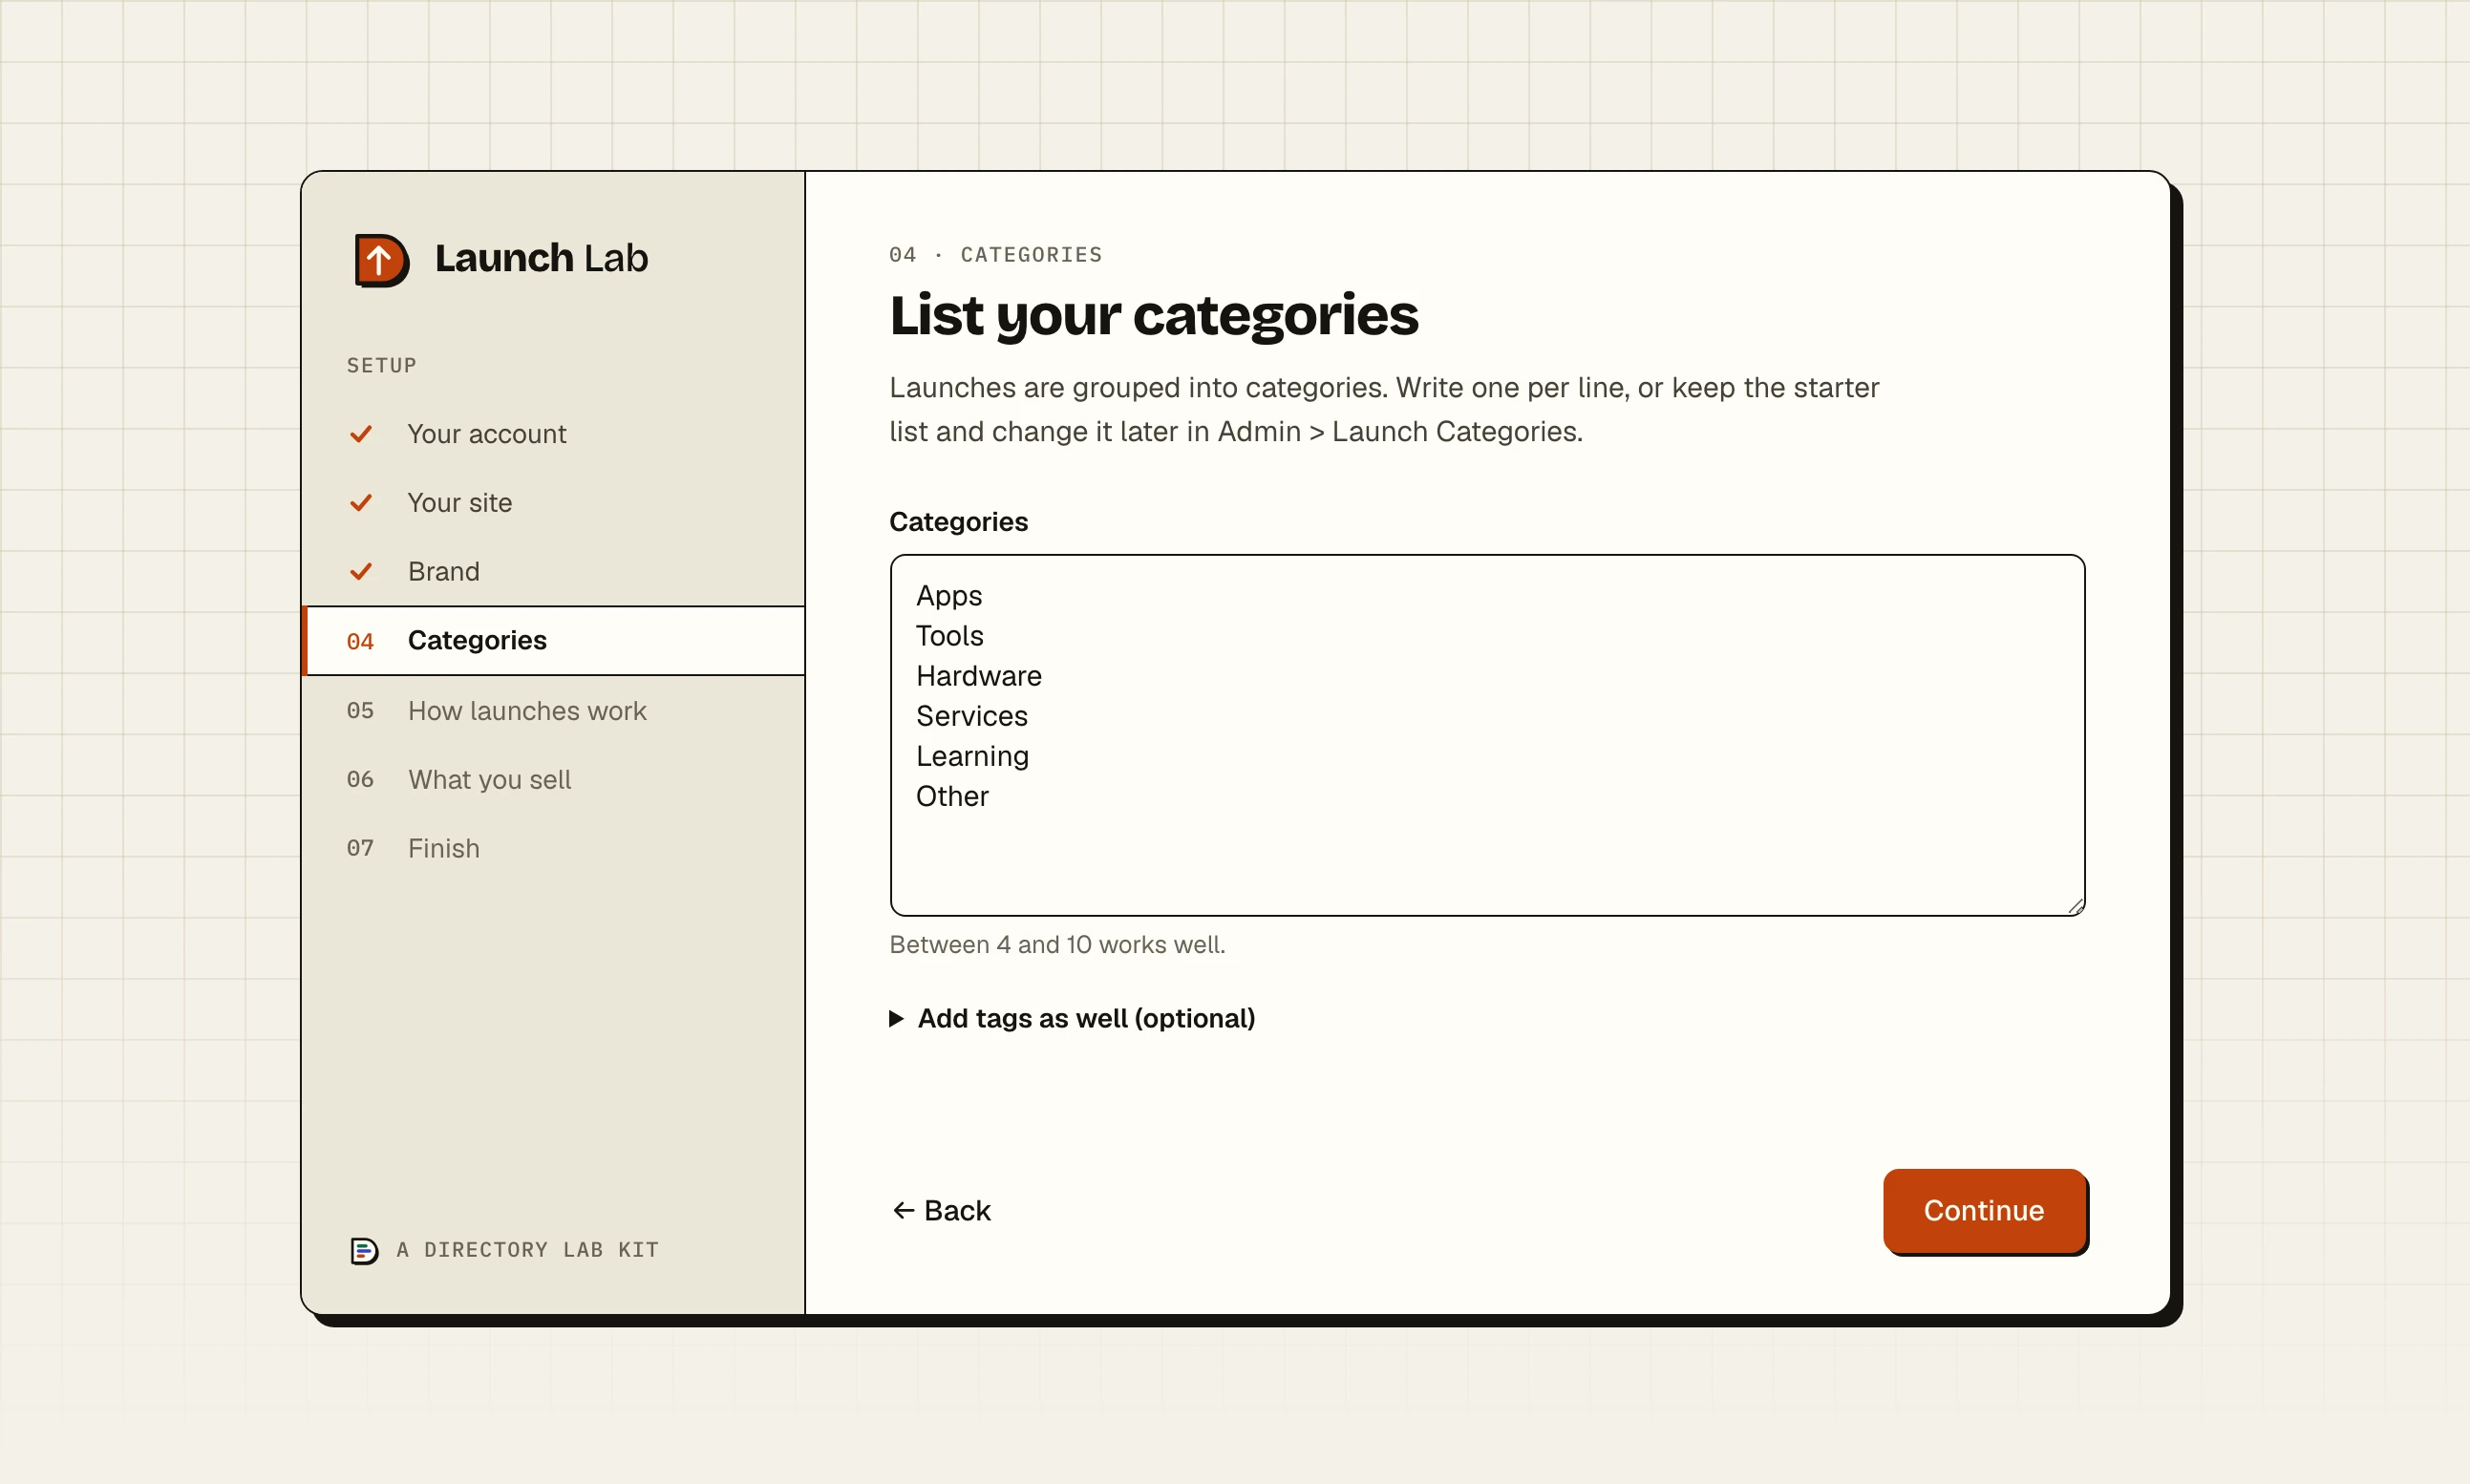
Step 4: List your categories
Categories: one on each line. The box starts with six: Apps, Tools, Hardware, Services, Learning and Other. Between 4 and 10 works well. A name can be up to 50 characters, a repeated name is dropped and the first 30 are kept.
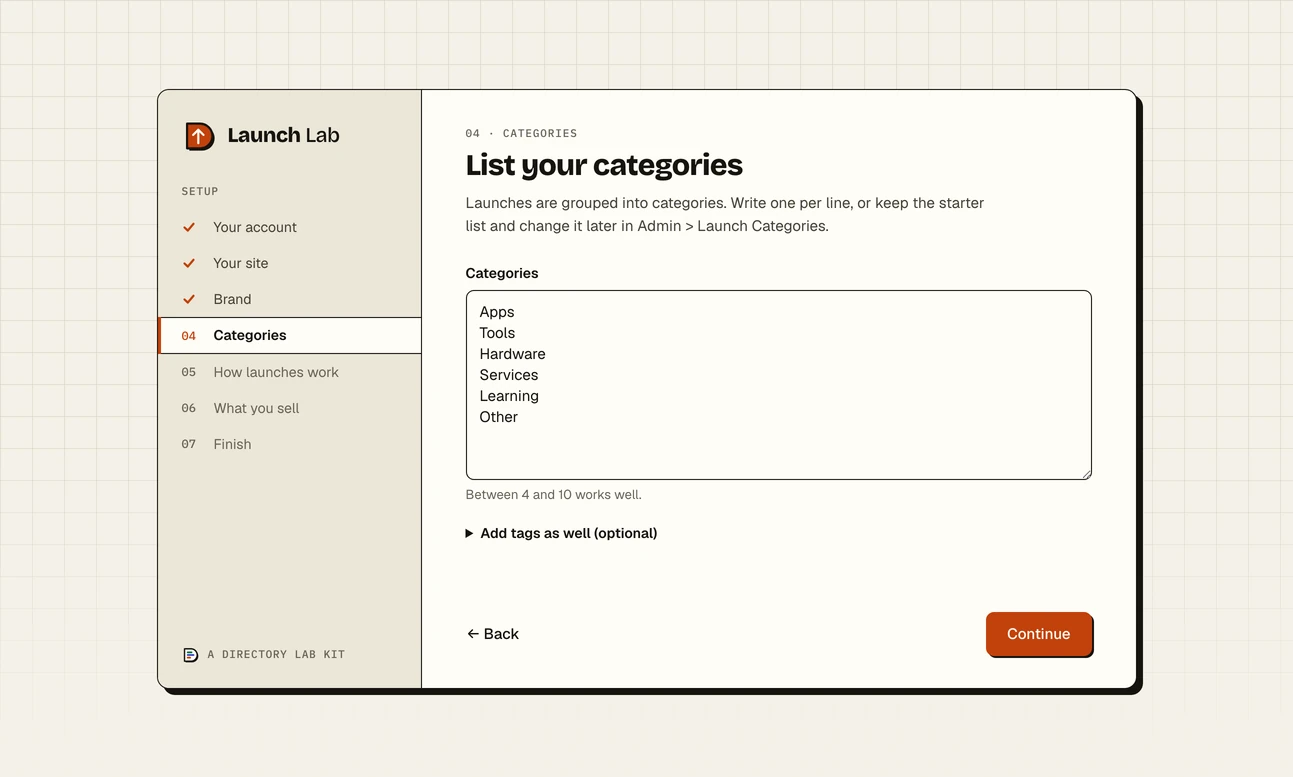
Categories go in one to a line. Tags are optional. Click Add tags as well (optional) if you want a second way to sort listings, one that is not the category. A listing can carry several tags.
Tags: one on each line, up to 30. Leave it empty and nothing about tags is shown on the site.
What one is called and What several are called: your own words for a tag, such as "platform" and "platforms".
Change tags later in Launch Tags under Launches.
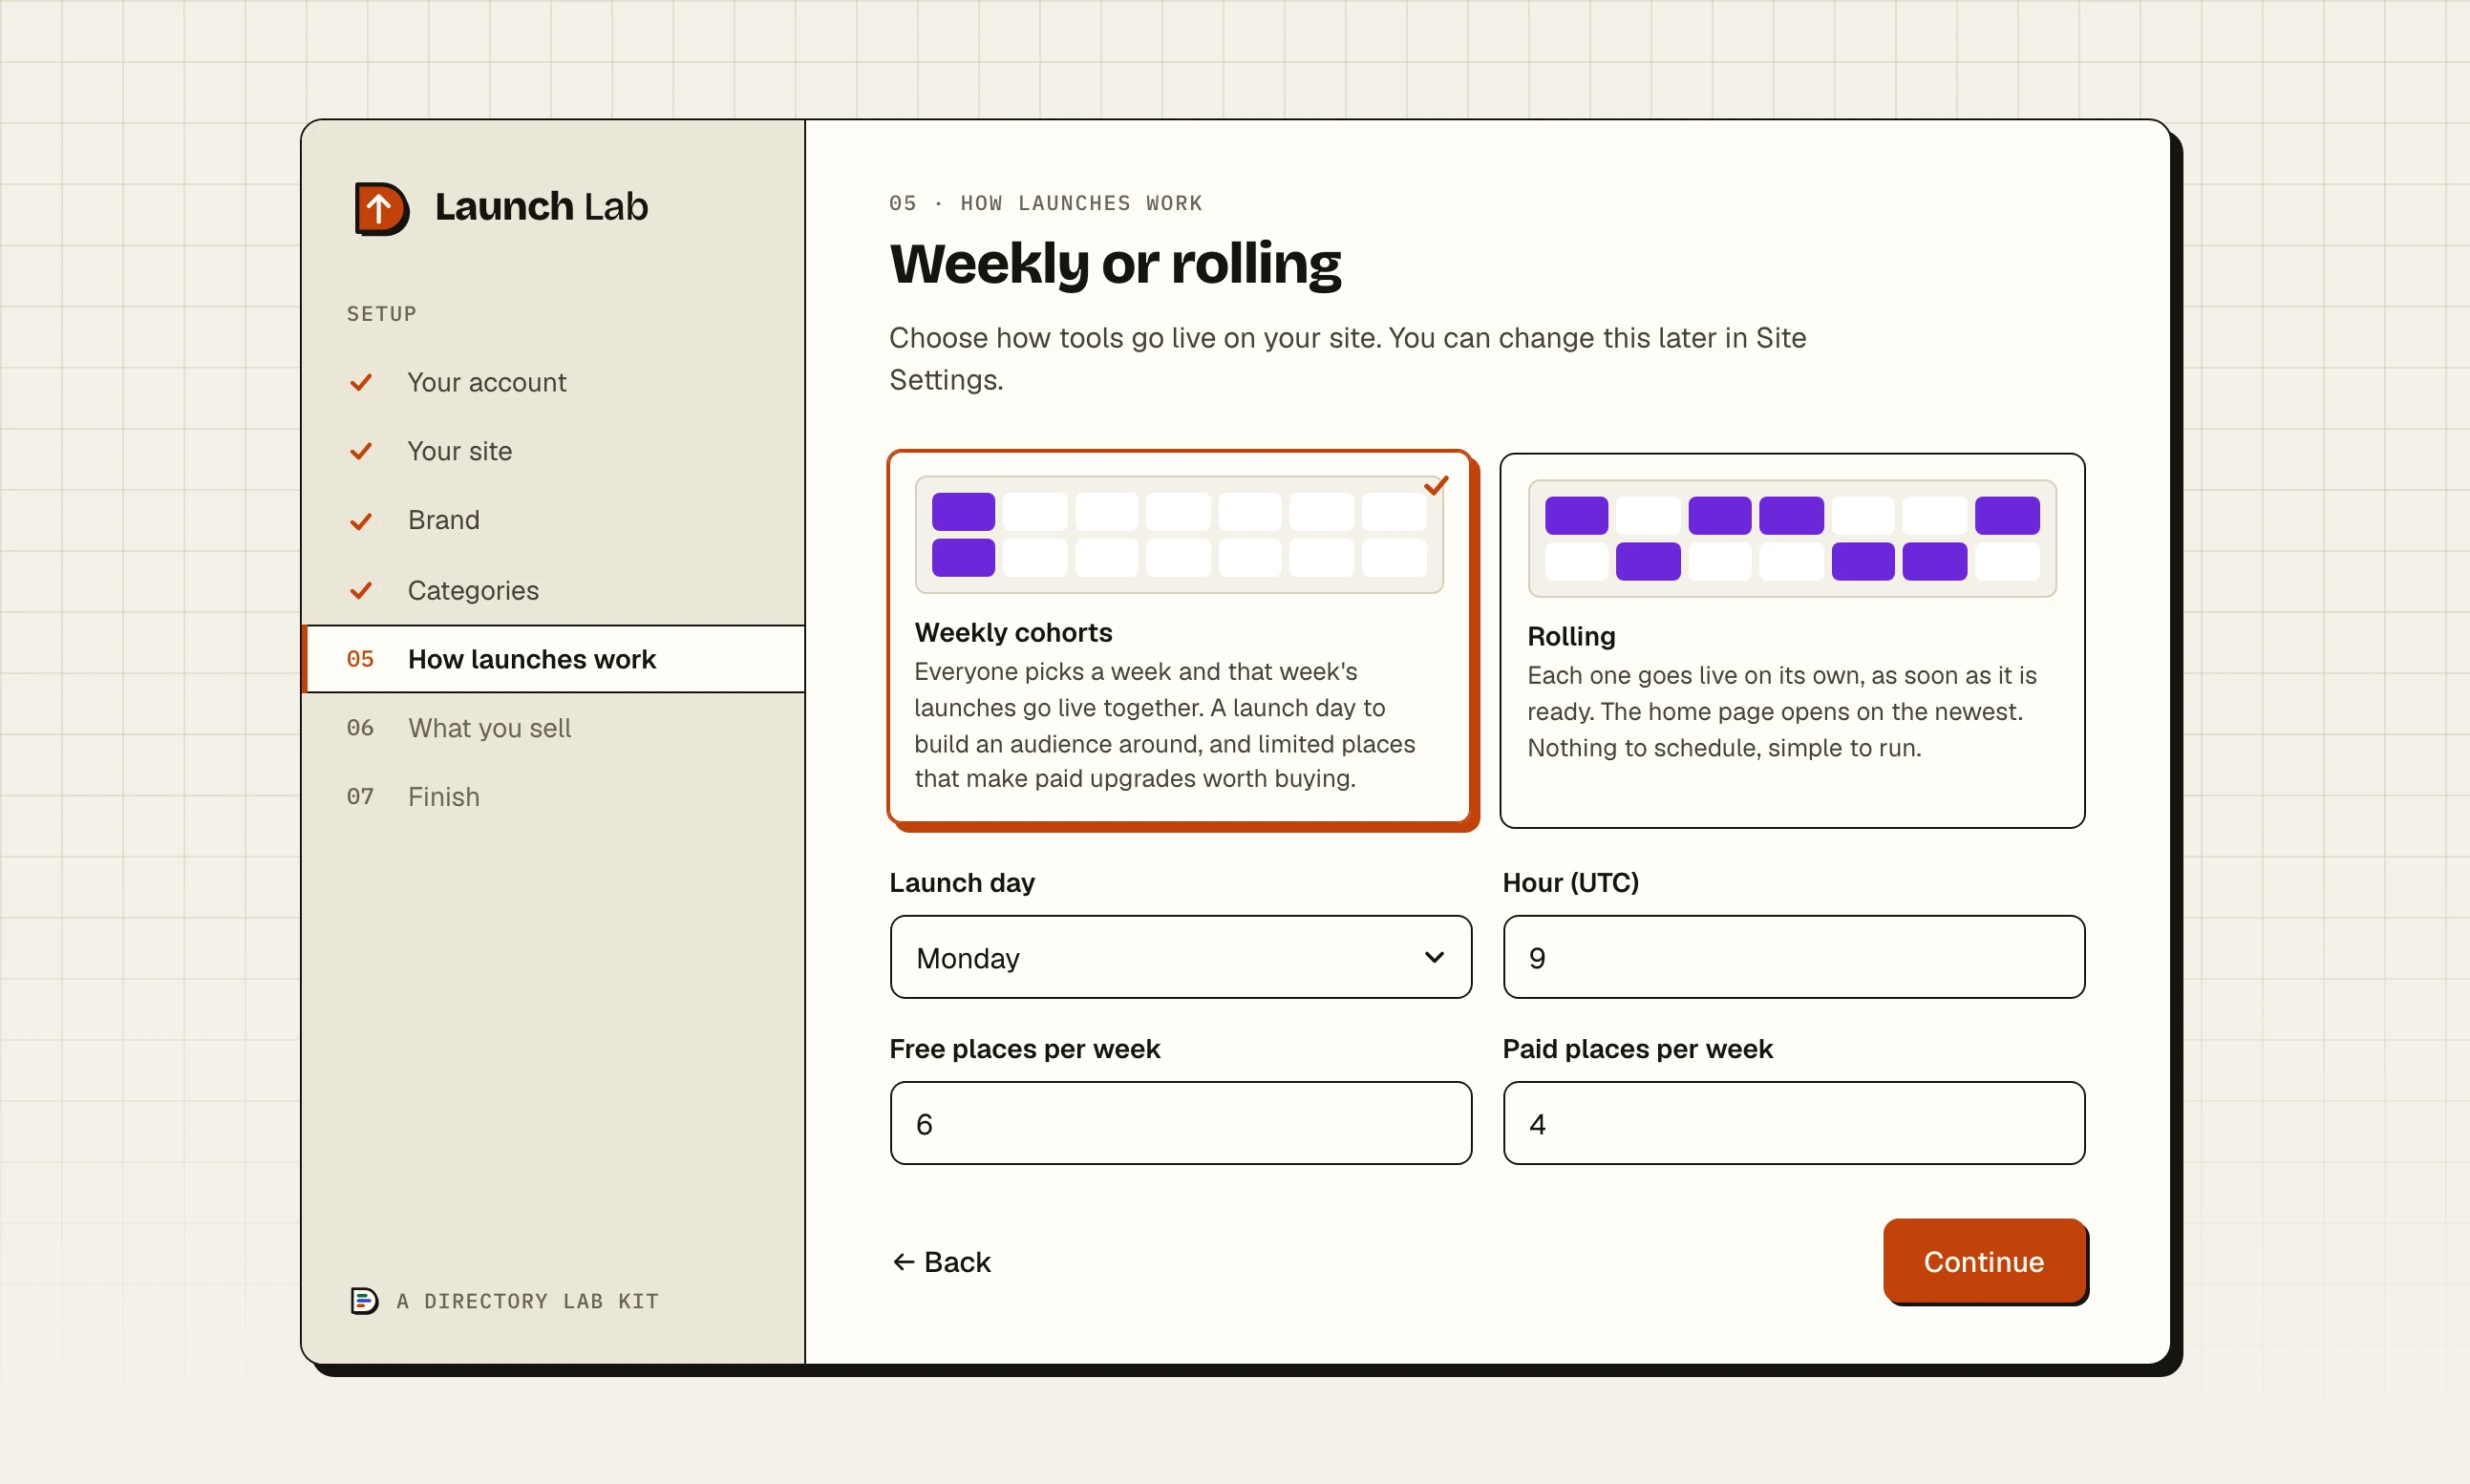
Step 5: Choose weekly or rolling
Pick how listings go live.
Weekly cohorts: everyone picks a week and that week's launches go live together.
Rolling: each one goes live on its own, as soon as it is ready. The home page opens on the newest.
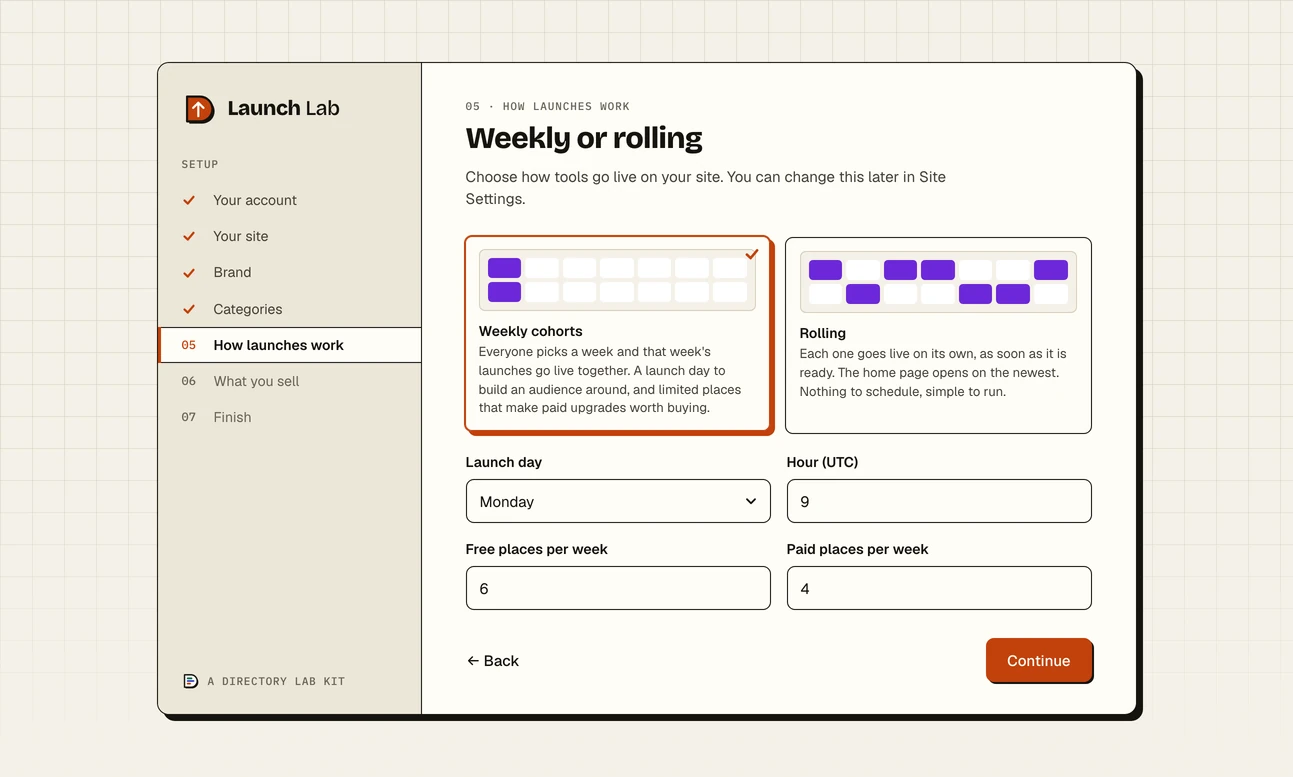
Choose weekly cohorts or rolling launches, and how many places a week has. With Weekly cohorts chosen, four more boxes show:
Launch day: the day of the week a new week begins. It starts on Monday.
Hour (UTC): the hour, from 0 to 23, that the week turns over. It starts at 9, which is 09:00 UTC.
Free places per week: how many listings can book each week without paying. It starts at 10 and must be at least 1.
Paid places per week: how many more can pay to get into a week. It starts at 5, and 0 means none.
With Rolling chosen, there is one tick box in their place:
Check each one before it goes live: new listings wait in a review queue until you approve them, and you get an email for each. Untick it and a listing is public the moment its maker publishes it.
Change the choice later in Site Settings on the Launching tab. The day, hour and places are in Payment Settings under Revenue, in the part headed Weekly launch schedule. How launches work compares the two ways in full.
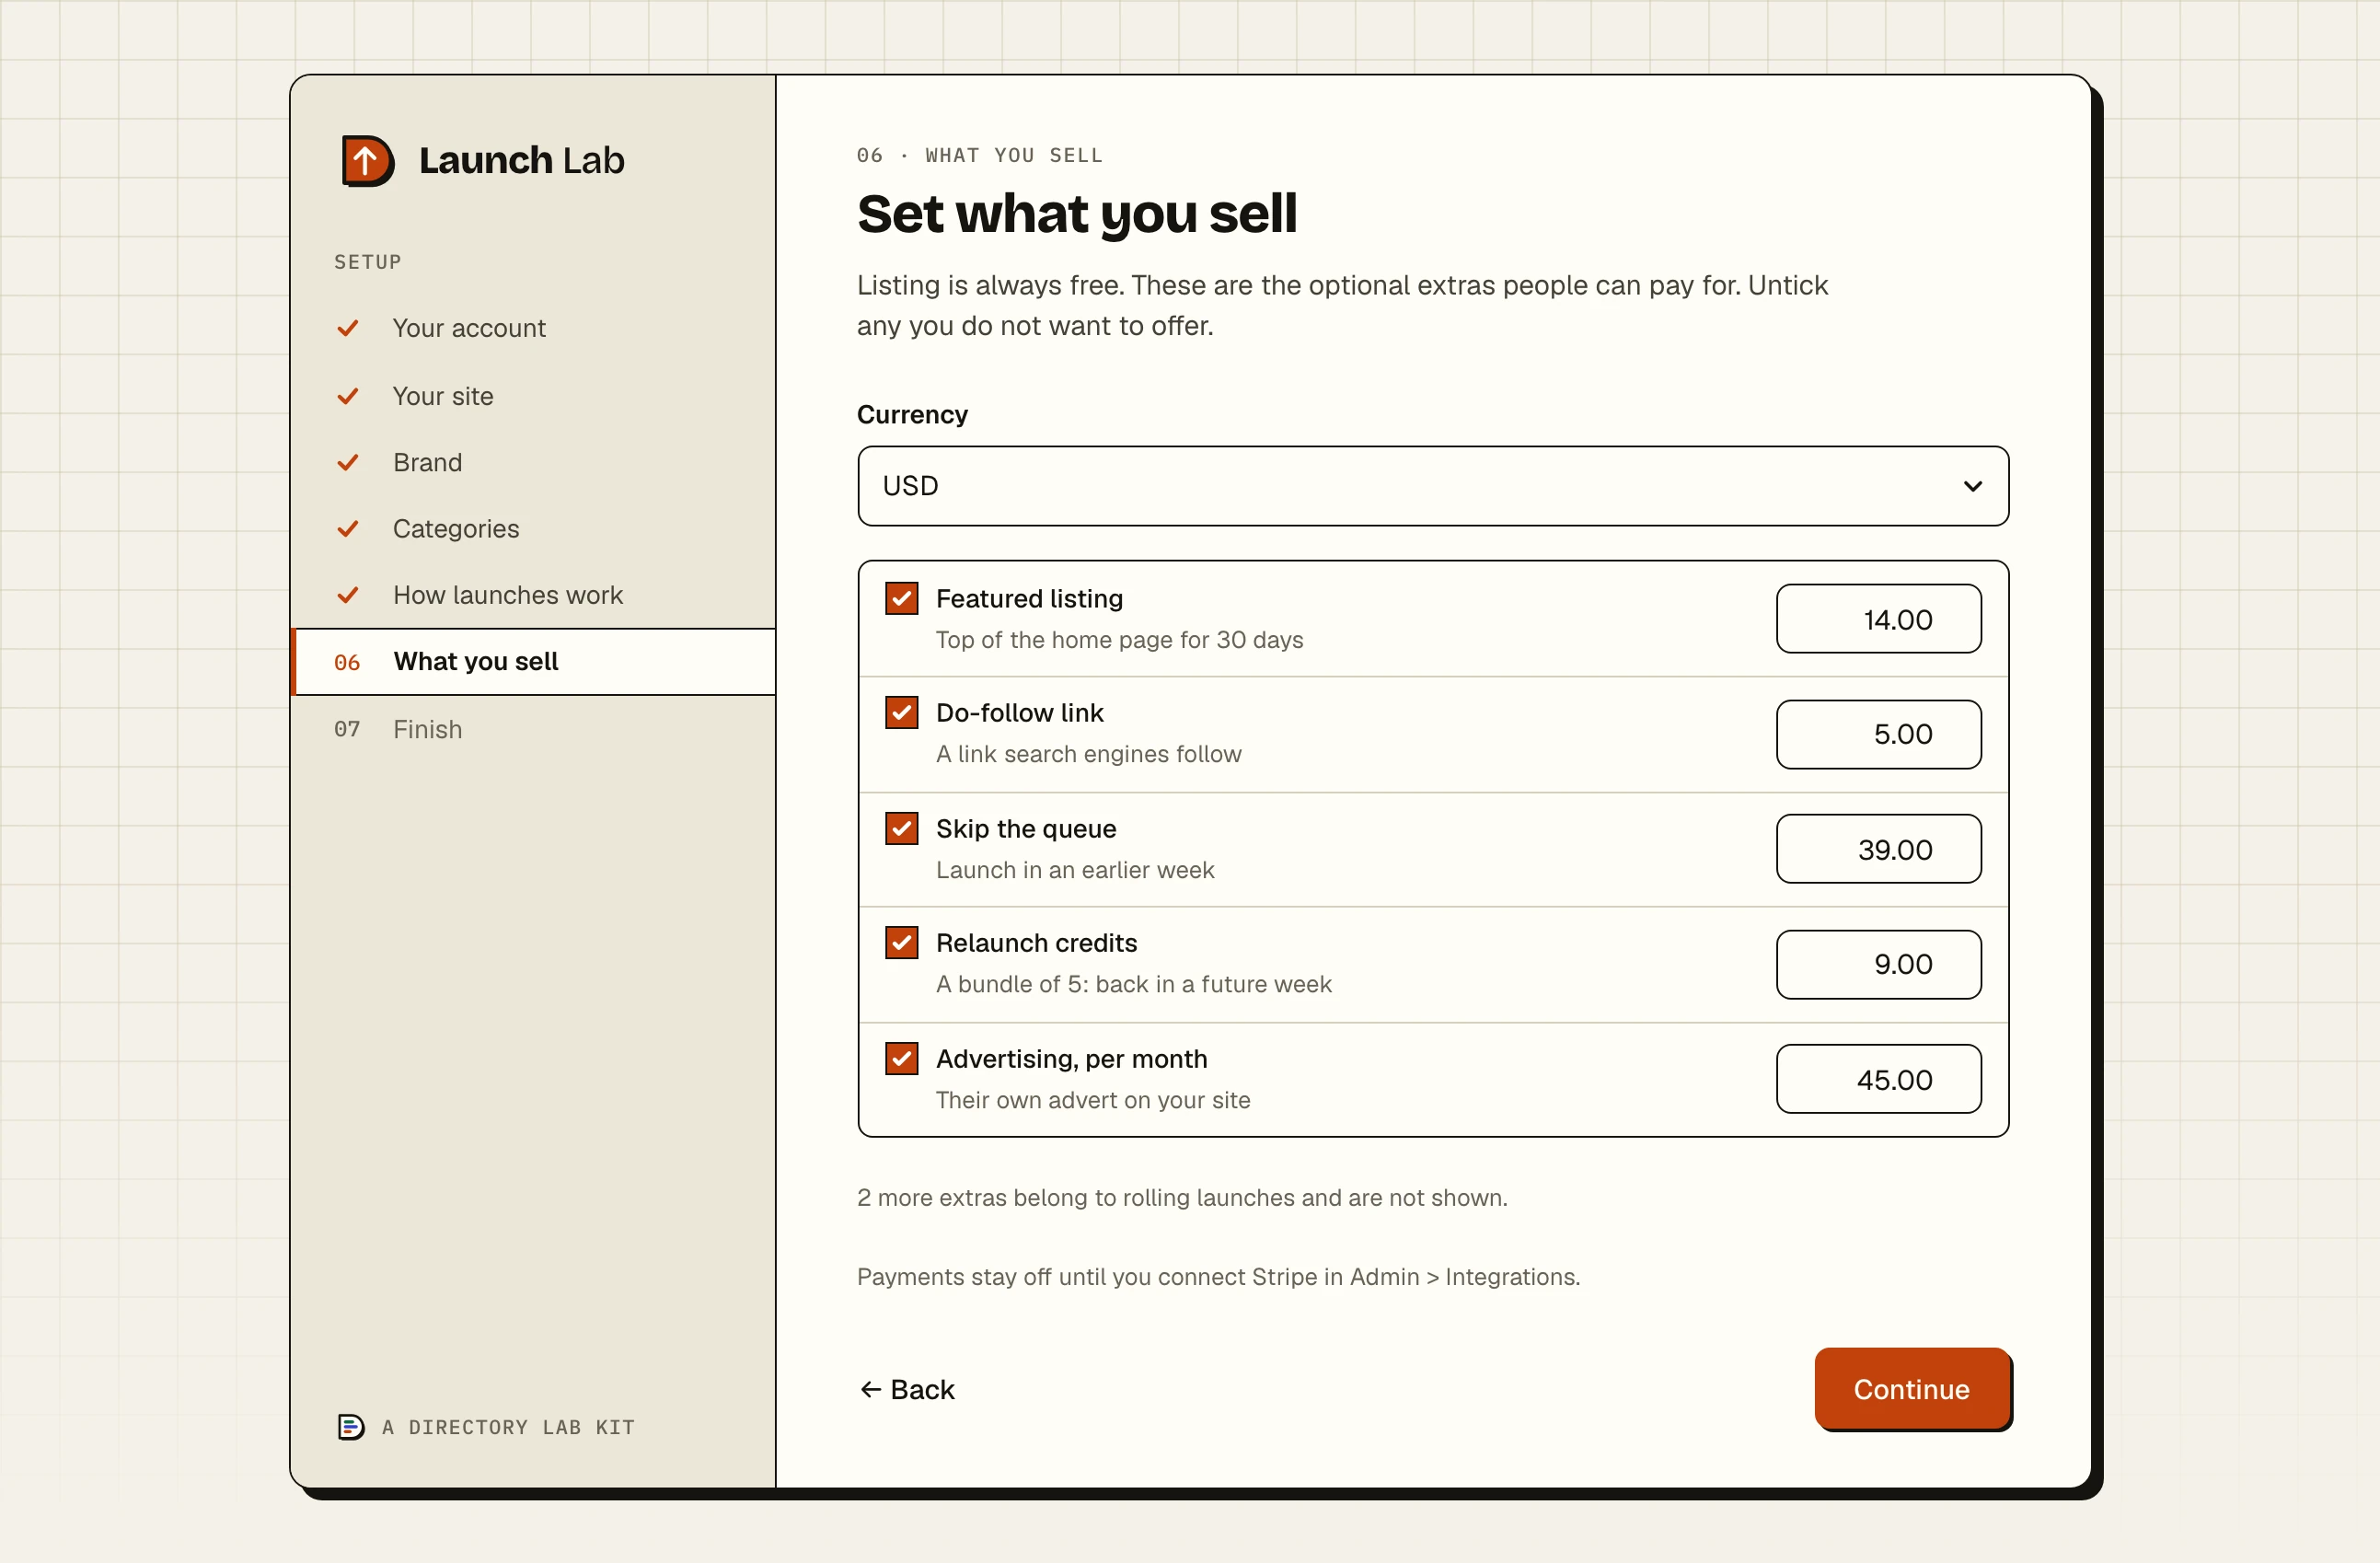
Step 6: Set what you sell
Adding a listing is always free. This step sets the extras people can pay for.
Currency: one currency for the whole site, from a list of twenty. It starts on USD.
A row for each extra, with a tick box and a price. Untick any you do not want to offer.
Extra What it is Starts at Shown for Featured listing Top of the home page for 30 days 14.00 Weekly and rolling Do-follow link A link search engines follow 5.00 Weekly and rolling Skip the queue Launch in an earlier week 39.00 Weekly Relaunch credits A bundle of 5: back in a future week 9.00 Weekly Fast-track review Checked ahead of the queue 19.00 Rolling, with the check before going live ticked Bump Back to the top of the newest list 9.00 Rolling Advertising, per month Their own advert on your site 45.00 Weekly and rolling 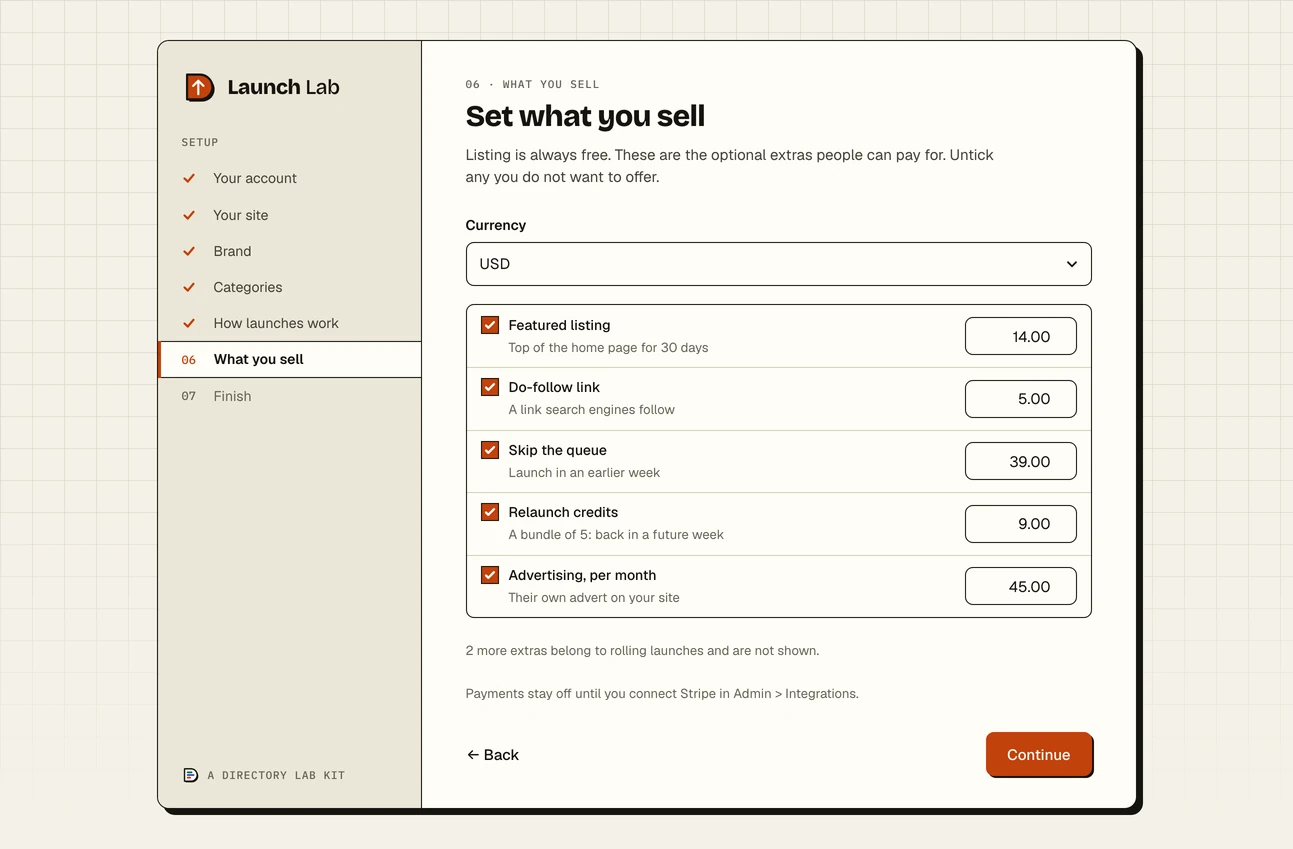
Tick what you want to sell and set each price. Only the rows that fit the way you chose to launch are shown, with a line under them such as "2 more extras belong to rolling launches and are not shown." The hidden ones stay switched on at their starting prices, ready if you change the way the site launches.
Nothing can be bought yet. The step ends with "Payments stay off until you connect Stripe in Admin > Integrations." Change all of it later in Payment Settings under Revenue. That page is headed Sales, and the part you want is What you sell. What you sell and your prices covers each extra.
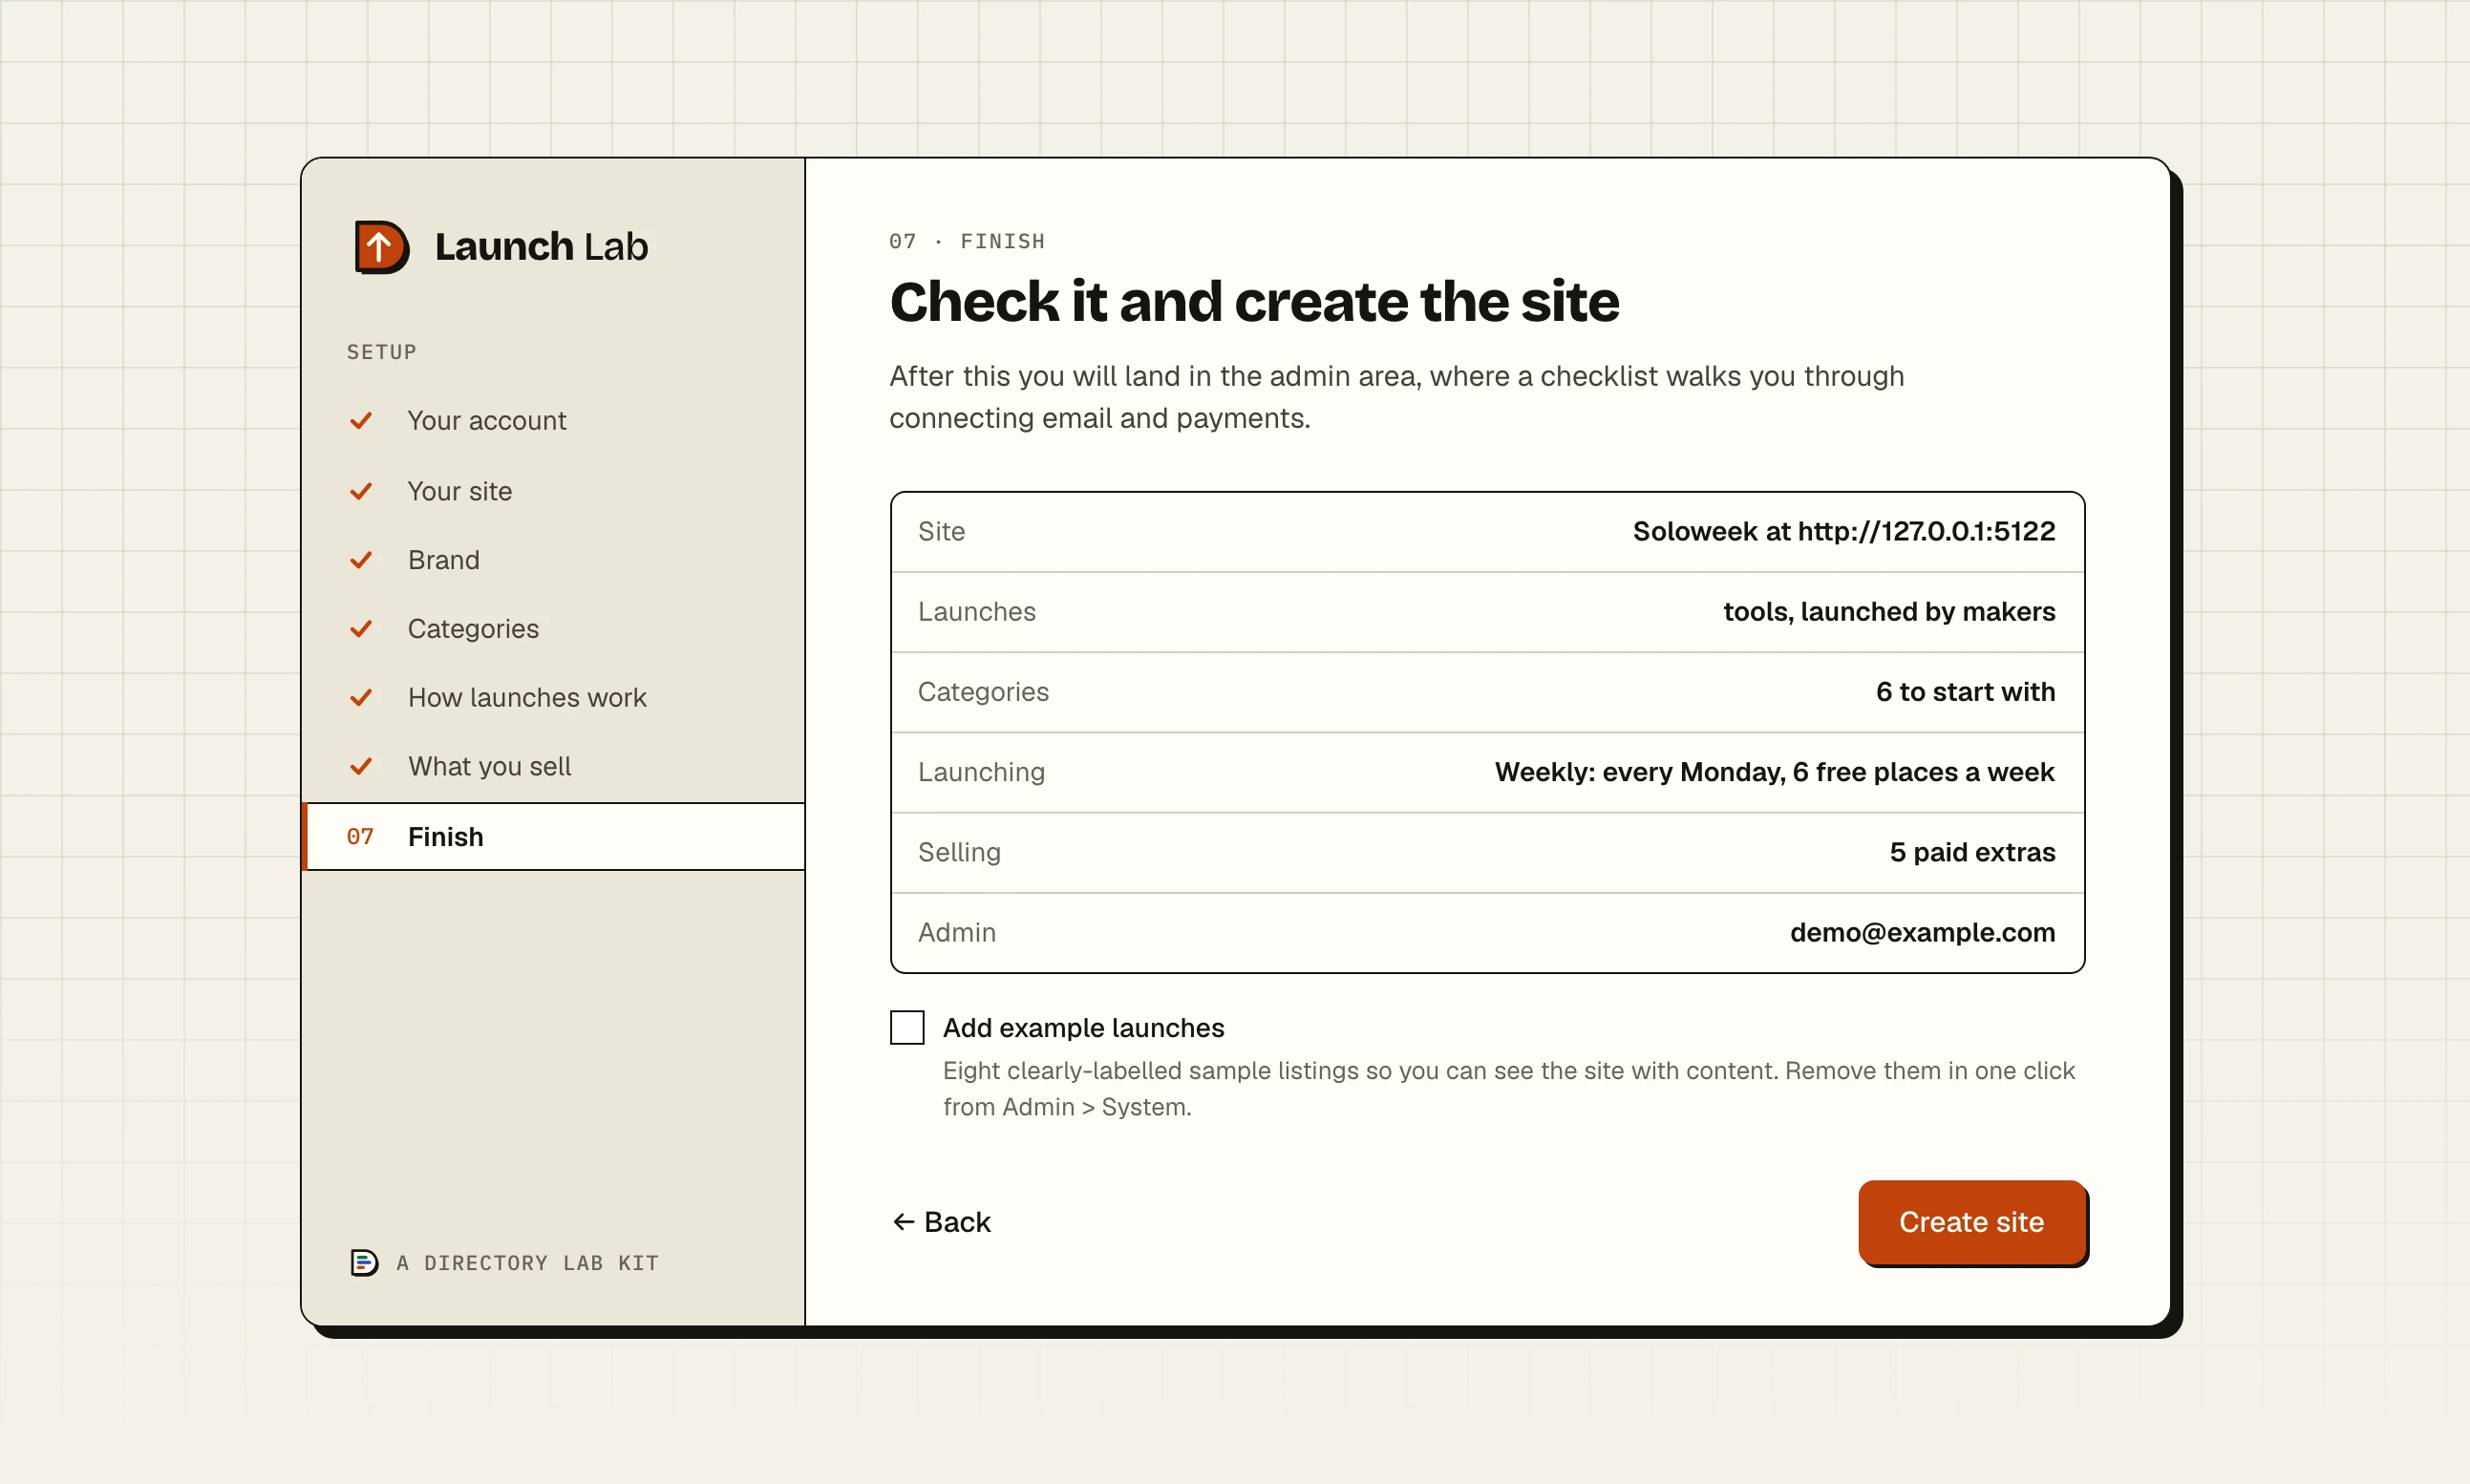
Step 7: Check it and create the site
The last step reads your choices back in six lines: Site, Launches, Categories, Launching, Selling and Admin. Use ← Back to change anything.
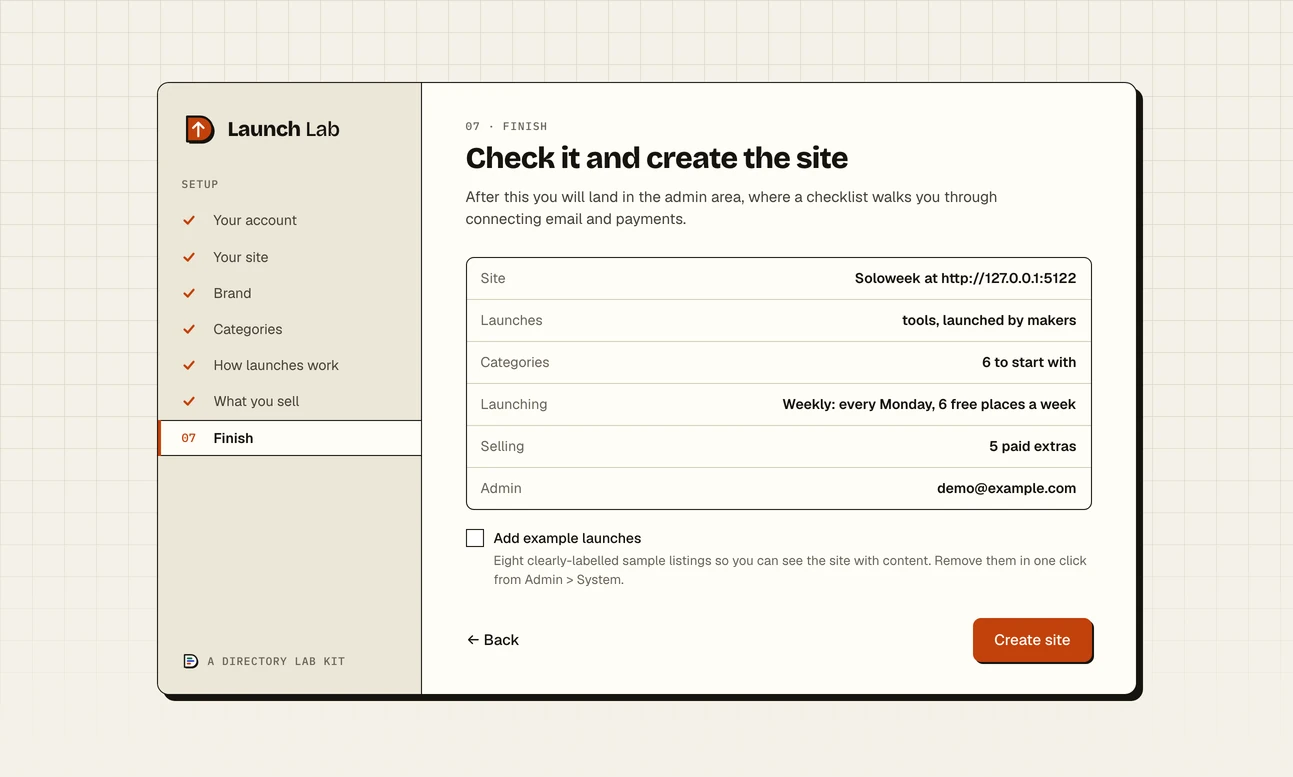
The last step reads your choices back before it creates the site. Add example launches: ticked to begin with. It adds eight sample listings so that you can see the site with something on it. See the example launches.
Click Create site. You land on the Control Panel in the admin, signed in, under a message with your site's name: "Soloweek is ready. You are signed in as the site admin."
Where you land#
The top of the Control Panel is a list headed Finish setting up, with a count of how many steps are done.
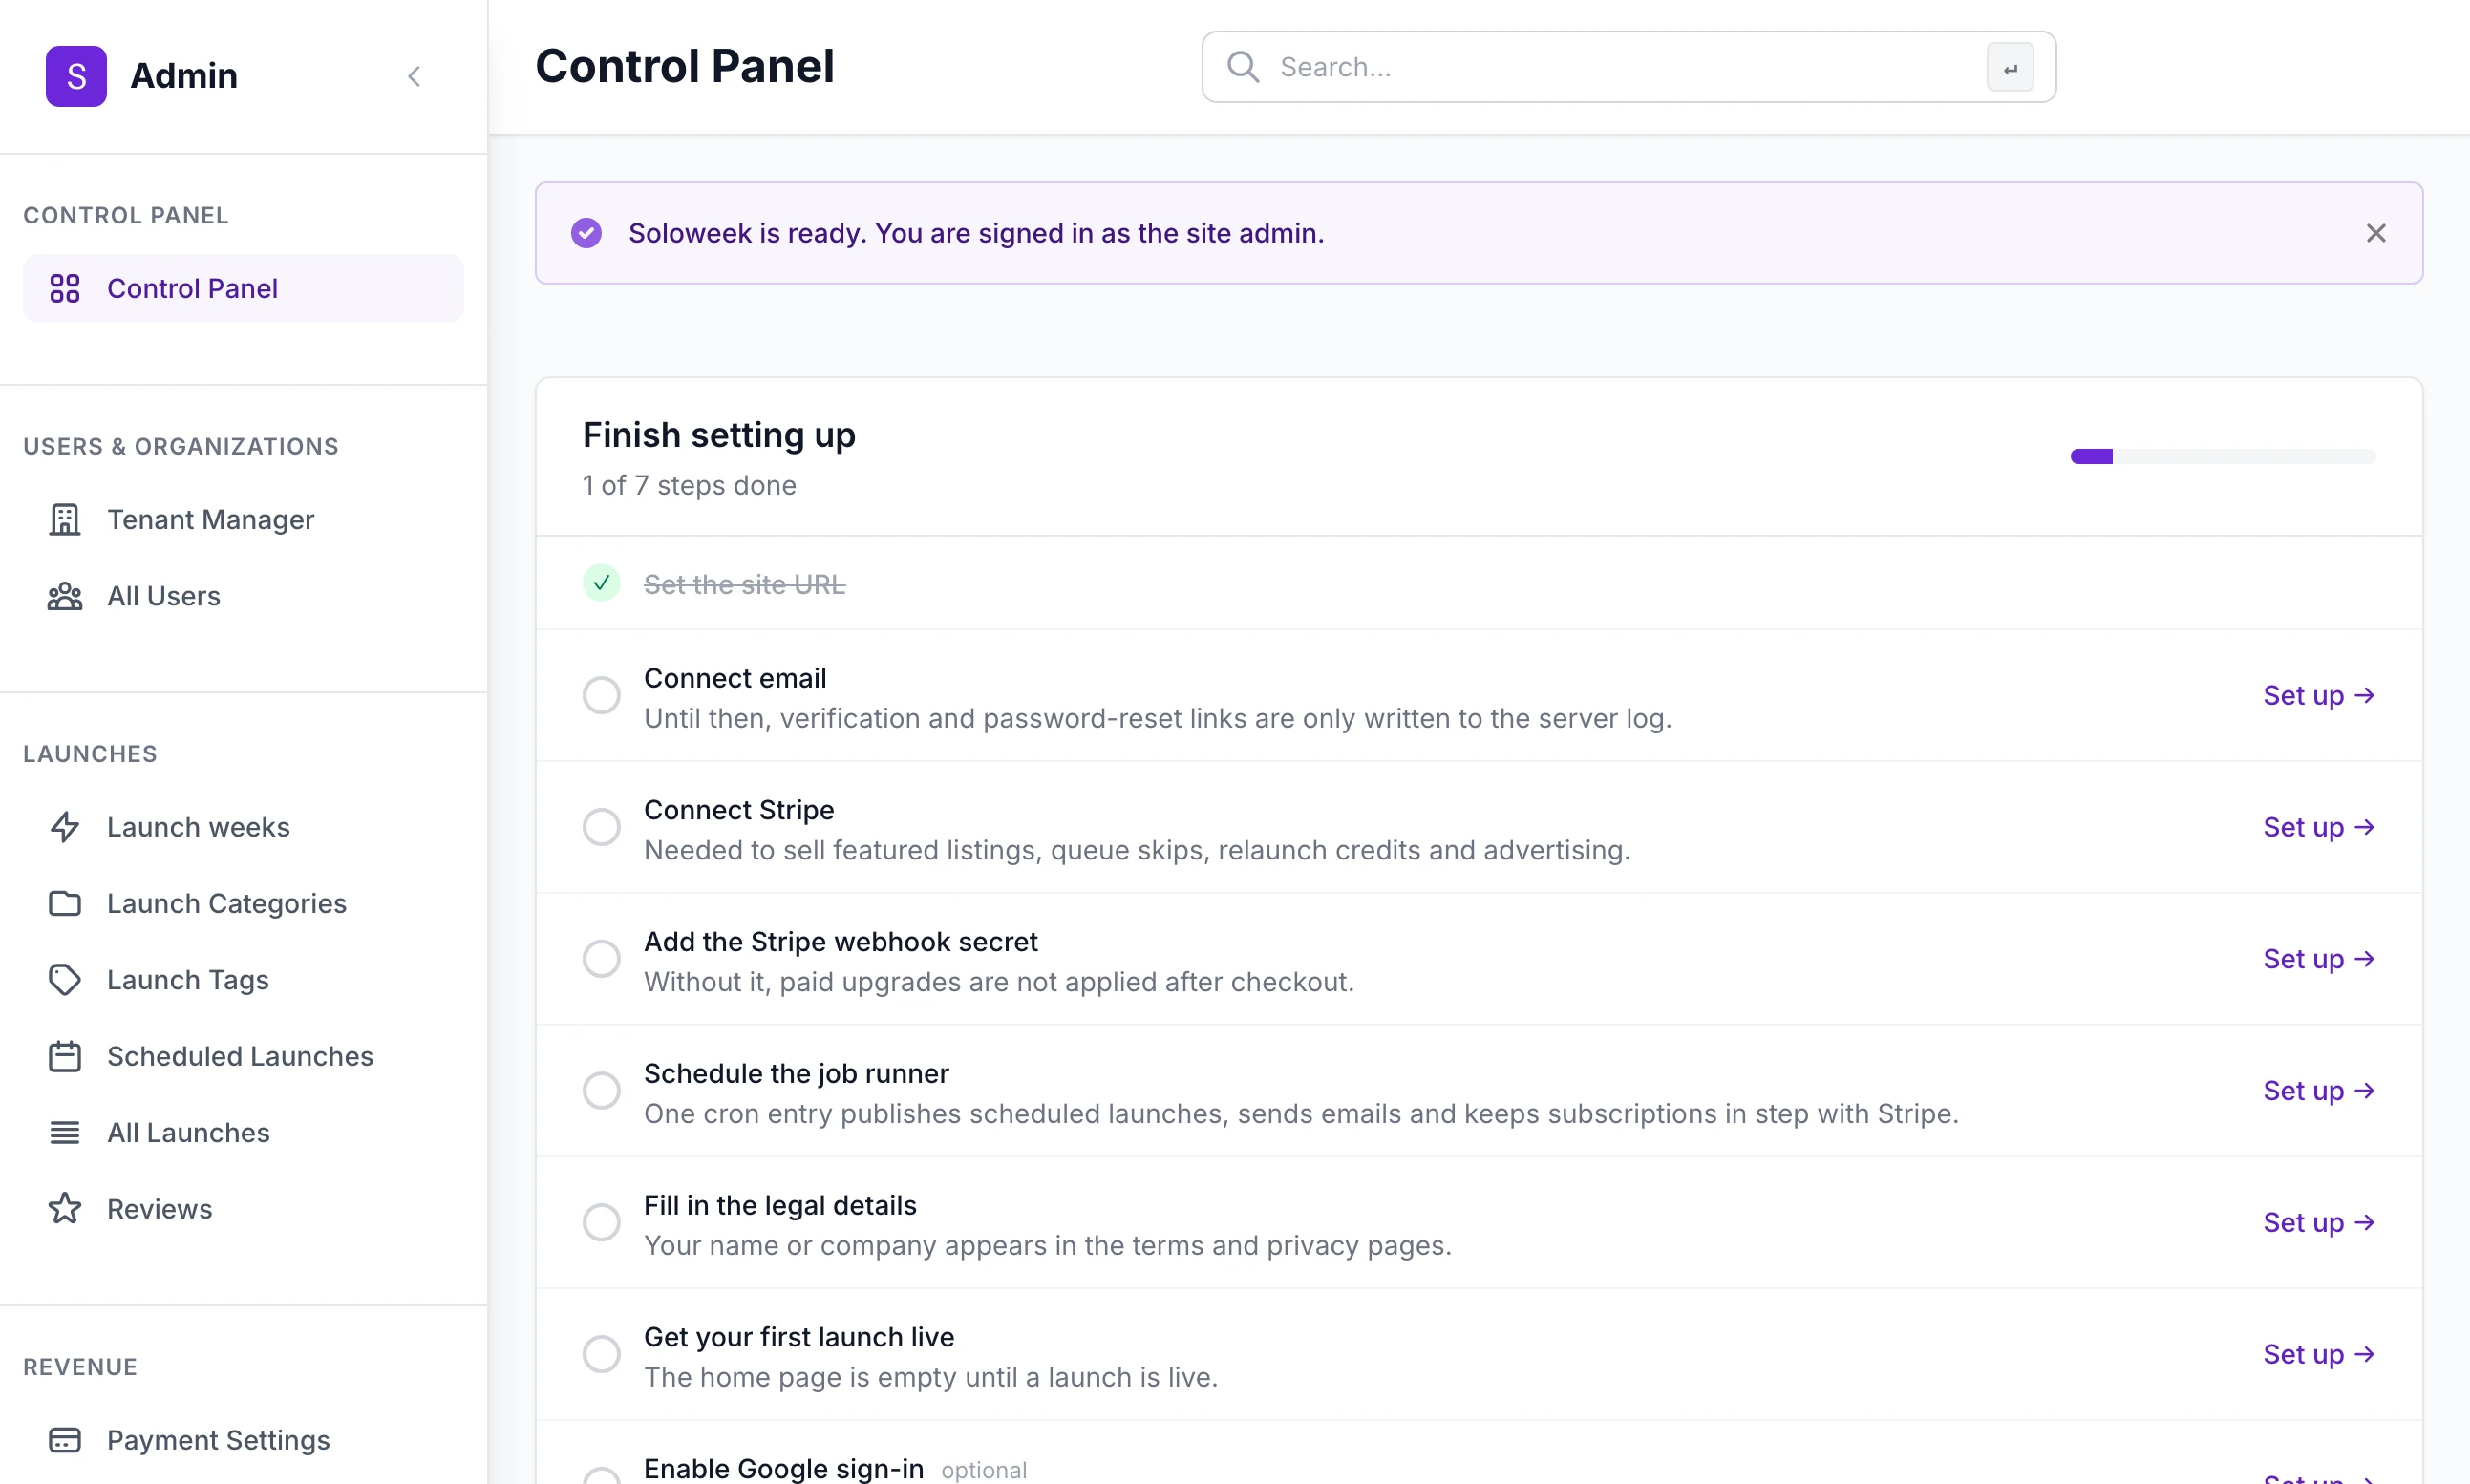
Set the site URL is ticked already, because the wizard filled it in. The rest are what stands between a new site and a public one, each with a Set up → link to the screen that does it:
Connect email, Connect Stripe and Add the Stripe webhook secret
Schedule the job runner
Fill in the legal details
Get your first launch live
Remove the demo content, if you added the example launches
Enable Google sign-in and Protect forms from bots, both marked optional
Each item ticks itself when the site finds the thing done. The list disappears once everything that is not optional is ticked. Opening day goes through it.
The example launches#
With Add example launches ticked, the wizard adds eight listings with names such as Example Notes, Sample Tracker and Demo Invoicer. They belong to a made-up account called Demo Listings, which nobody can sign in to.
They are spread across your own categories in turn, so every category has something in it.
On a weekly site they are booked like real launches. As many as you have free places in a week go live at once, in the current week. Any left over are booked for the week after. With 6 free places, six are live and two are waiting.
On a rolling site all eight are live at once.
To remove them, open System under Tools in the admin sidebar, find Demo content and click Remove demo content. Real listings and accounts are not touched. An example launch does not tick Get your first launch live on the checklist: only a real one does.
If the wizard comes back with an error#
When you click Create site the site checks everything again. If something is wrong, nothing is created, and the wizard returns to its first step with the problems listed at the top. Your answers are still there, except the two password boxes and the logo.
| Message | What to change |
|---|---|
| "Site name must be at least 2 characters." | Site name on step two |
| "Enter a valid admin email address." | Email address on step one |
| "Password must be at least 10 characters long." or "Passwords must match." | The two password boxes on step one |
| "Site address must start with http:// or https://" | Site address on step two |
| "The logo must be a PNG, JPG, GIF or WebP image." | Logo on step three |
| "Free slots per date must be between 1 and 500." | Free places per week on step five |
| "Premium slots per date must be between 0 and 500." | Paid places per week on step five |
| "Setup has already been completed." | Someone finished the wizard before you. Sign in instead. |
A price outside 0 to 100,000 is named by its internal name in the same way, for example "Feature launch price must be between 0 and 100000."
The same from the command line#
scripts/setup_site.py creates the site without a browser. It runs the same checks and writes the same things as the wizard, and it needs no setup code because it runs on the computer the site is on.
python scripts/setup_site.py --name "Soloweek" --email [email protected] --url https://example.com --item tool --items tools --categories "Money, Clients, Time, Paperwork" --demoIt asks for the admin password twice, under "Admin password (at least 10 characters):" and "Confirm password:". To run it with no questions at all, put the password in an environment variable called ADMIN_PASSWORD first. Leave out --name or --email and it asks for those too. It finishes with a line such as "Soloweek is set up."
| Option | Sets |
|---|---|
--name, --tagline, --url | Site name, tagline and site address |
--email, --first-name, --last-name | The admin account |
--color | Brand colour, as a hex colour such as #7c3aed |
--look | classic, gallery, editorial or bold |
--item, --items, --maker, --makers | The four words for a listing and its maker |
--categories | Categories, separated by commas |
--tags, --tag-name, --tag-names | Tags, and your words for one and several |
--mode | weekly or rolling |
--no-review | Rolling only: listings go live without your check |
--currency | A three-letter currency code such as eur |
--demo | Adds the example launches |
It cannot upload a logo, set the launch day, hour or places, set prices or switch an extra off. A site made this way has a drawn logo and every starting value from the tables above. Change them in the admin afterwards.
If the site has an admin already, the script changes nothing and says "Setup has already been completed - nothing to do."
- A tour of the adminWhat is behind each item in the sidebar you have landed in.
- Make it your nicheWording, categories and tags in full.
- Connect StripeThe next thing on the checklist if you plan to sell.
Can I run the wizard again?
No. Once the site has an admin, /setup shows a page-not-found page and stays that way. Every answer you gave can be changed in the admin. To see the wizard again on a practice copy, start again from nothing.
The last step says "0 to start with" beside Categories
You emptied the Categories box. The site then keeps its six starter categories, with their own icons and descriptions, and the summary counts only what was typed.
Do I have to decide the prices now?
No. Leave the starting prices, or untick everything. Nothing is on sale until Stripe is connected, and every price and tick box is on the Payment Settings page afterwards.
It asks for a setup code and I do not have one
The code is in the file instance/setup_token in the site's folder on the server, and in the server log from when the site started. A site put on a server with the kit's deploy script prints a link to the wizard with the code already in it.
Stuck on a step? Send a message.