Telegram alerts and Google sign-in
Get a message on your phone when the board needs you, answer it from the chat, and let people sign in with their Google account.
Updated 9 Oct 2026 · written for Job Lab 1.1.0
On this page
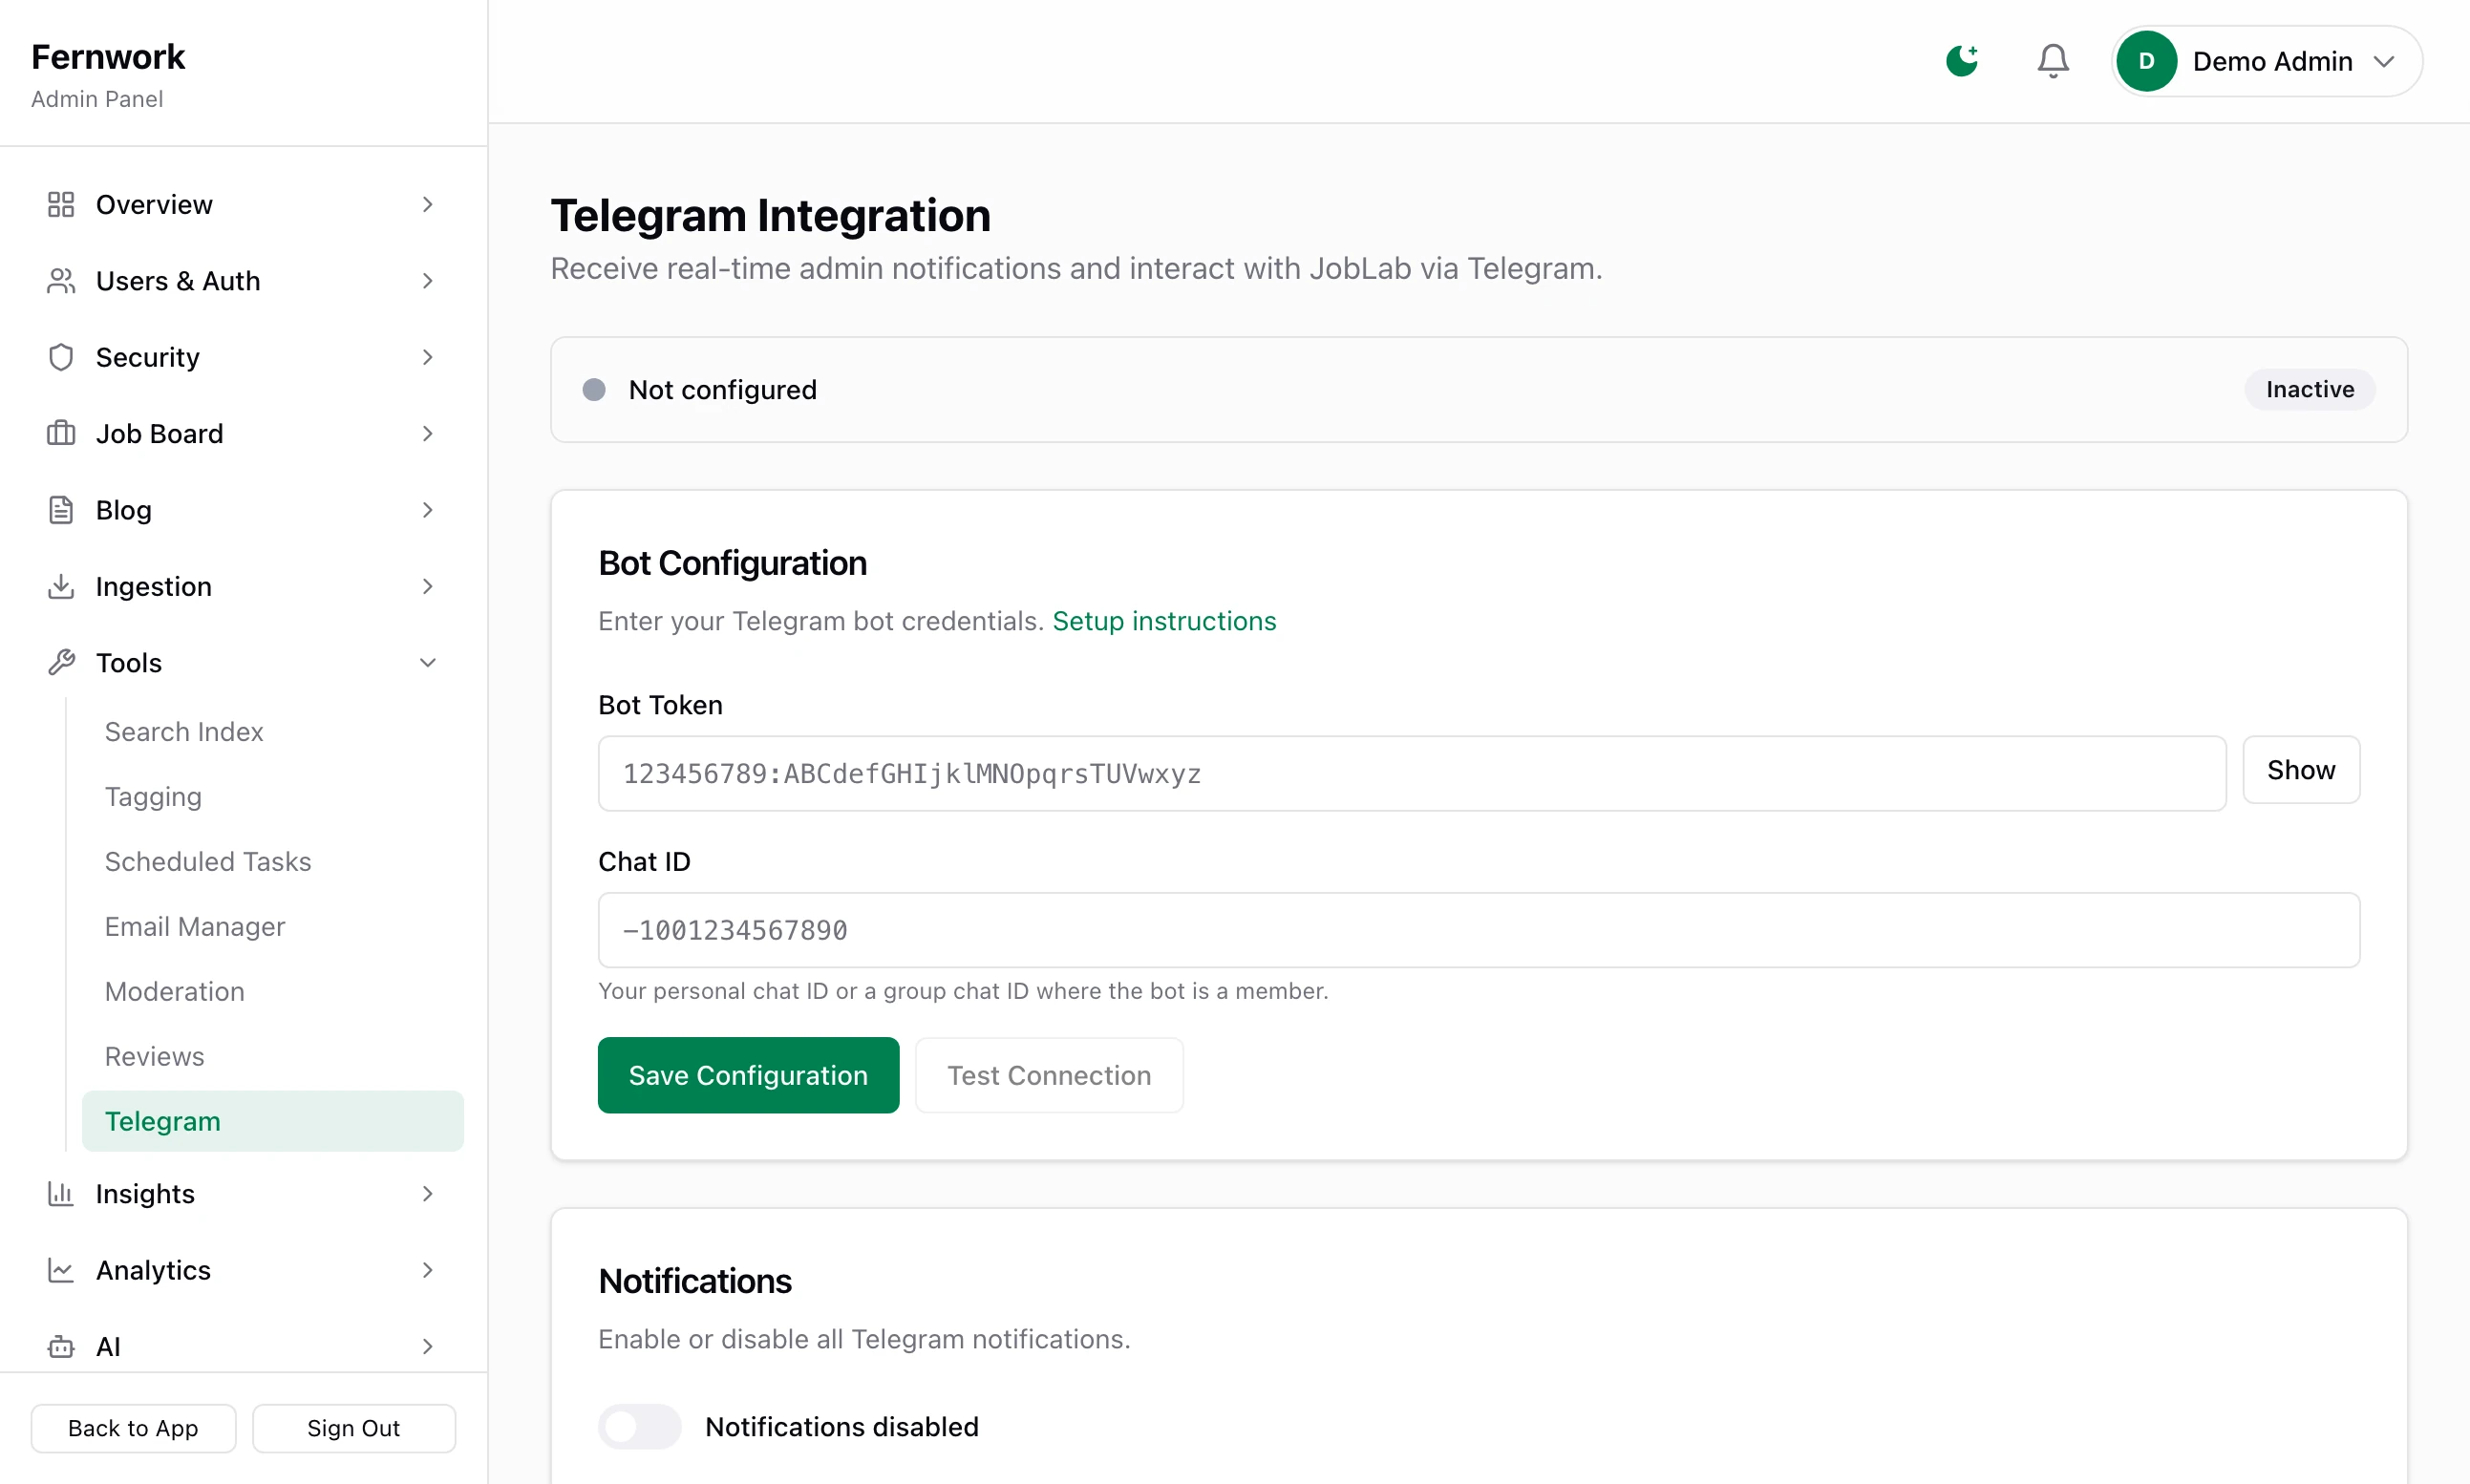
Open Telegram under Tools in the admin sidebar. The screen is headed "Telegram Integration". It connects a Telegram bot of your own that messages you when something happens on the board, and that you can ask for figures or use to approve things without opening the admin. Google sign-in, the second half of this guide, is set on a different screen. A board runs without either.
Connect a bot#
Step 1: Make a bot with BotFather
In Telegram, open a chat with @BotFather and send
/newbot. Choose a name, then a username that ends inbot. BotFather replies with a token that looks like123456789:ABCdefGHIjklMNOpqrsTUVwxyz.Step 2: Find your chat ID
Find your new bot in Telegram and send it any message. Then open this address in a browser, with your token in place of
<TOKEN>:Browserhttps://api.telegram.org/bot<TOKEN>/getUpdatesLook for
"chat":{"id":in the reply. The number after it is your chat ID. To send alerts to a group, add the bot to the group first and use the group's ID, which starts with a minus sign. Setup instructions on the screen opens the same steps.Step 3: Paste both in
Under Bot Configuration, fill in Bot Token and Chat ID.
Step 4: Click Test Connection
The test uses what you have typed, saved or not. You see "Connected successfully to @yourbot! Check your Telegram for the test message.", and the bot sends "Connected!" to the chat. "Invalid bot token" means the token is wrong. "Bot token is valid but could not send message. Check the Chat ID." means the ID is wrong or you have not yet messaged the bot.
Step 5: Switch notifications on and save
Under Notifications, click the switch so that it reads Notifications enabled, then click Save Configuration. No message confirms the save: the button reads "Saving..." and then goes back. The banner at the top reads Connected with an Active badge.
The token is stored encrypted, using the APP_SECRET from your .env file, and is never shown again. The next time you open the screen the box reads "Saved (••••wxyz). Leave empty to keep it." This screen is the only place the token is set: the site does not read it from .env. If you change APP_SECRET, the saved token can no longer be read and you type it in again.
Choose what it tells you#
Under Event Notifications every event has a switch and a Test button. Every switch starts off. Turn on the ones you want and click Save Event Settings.
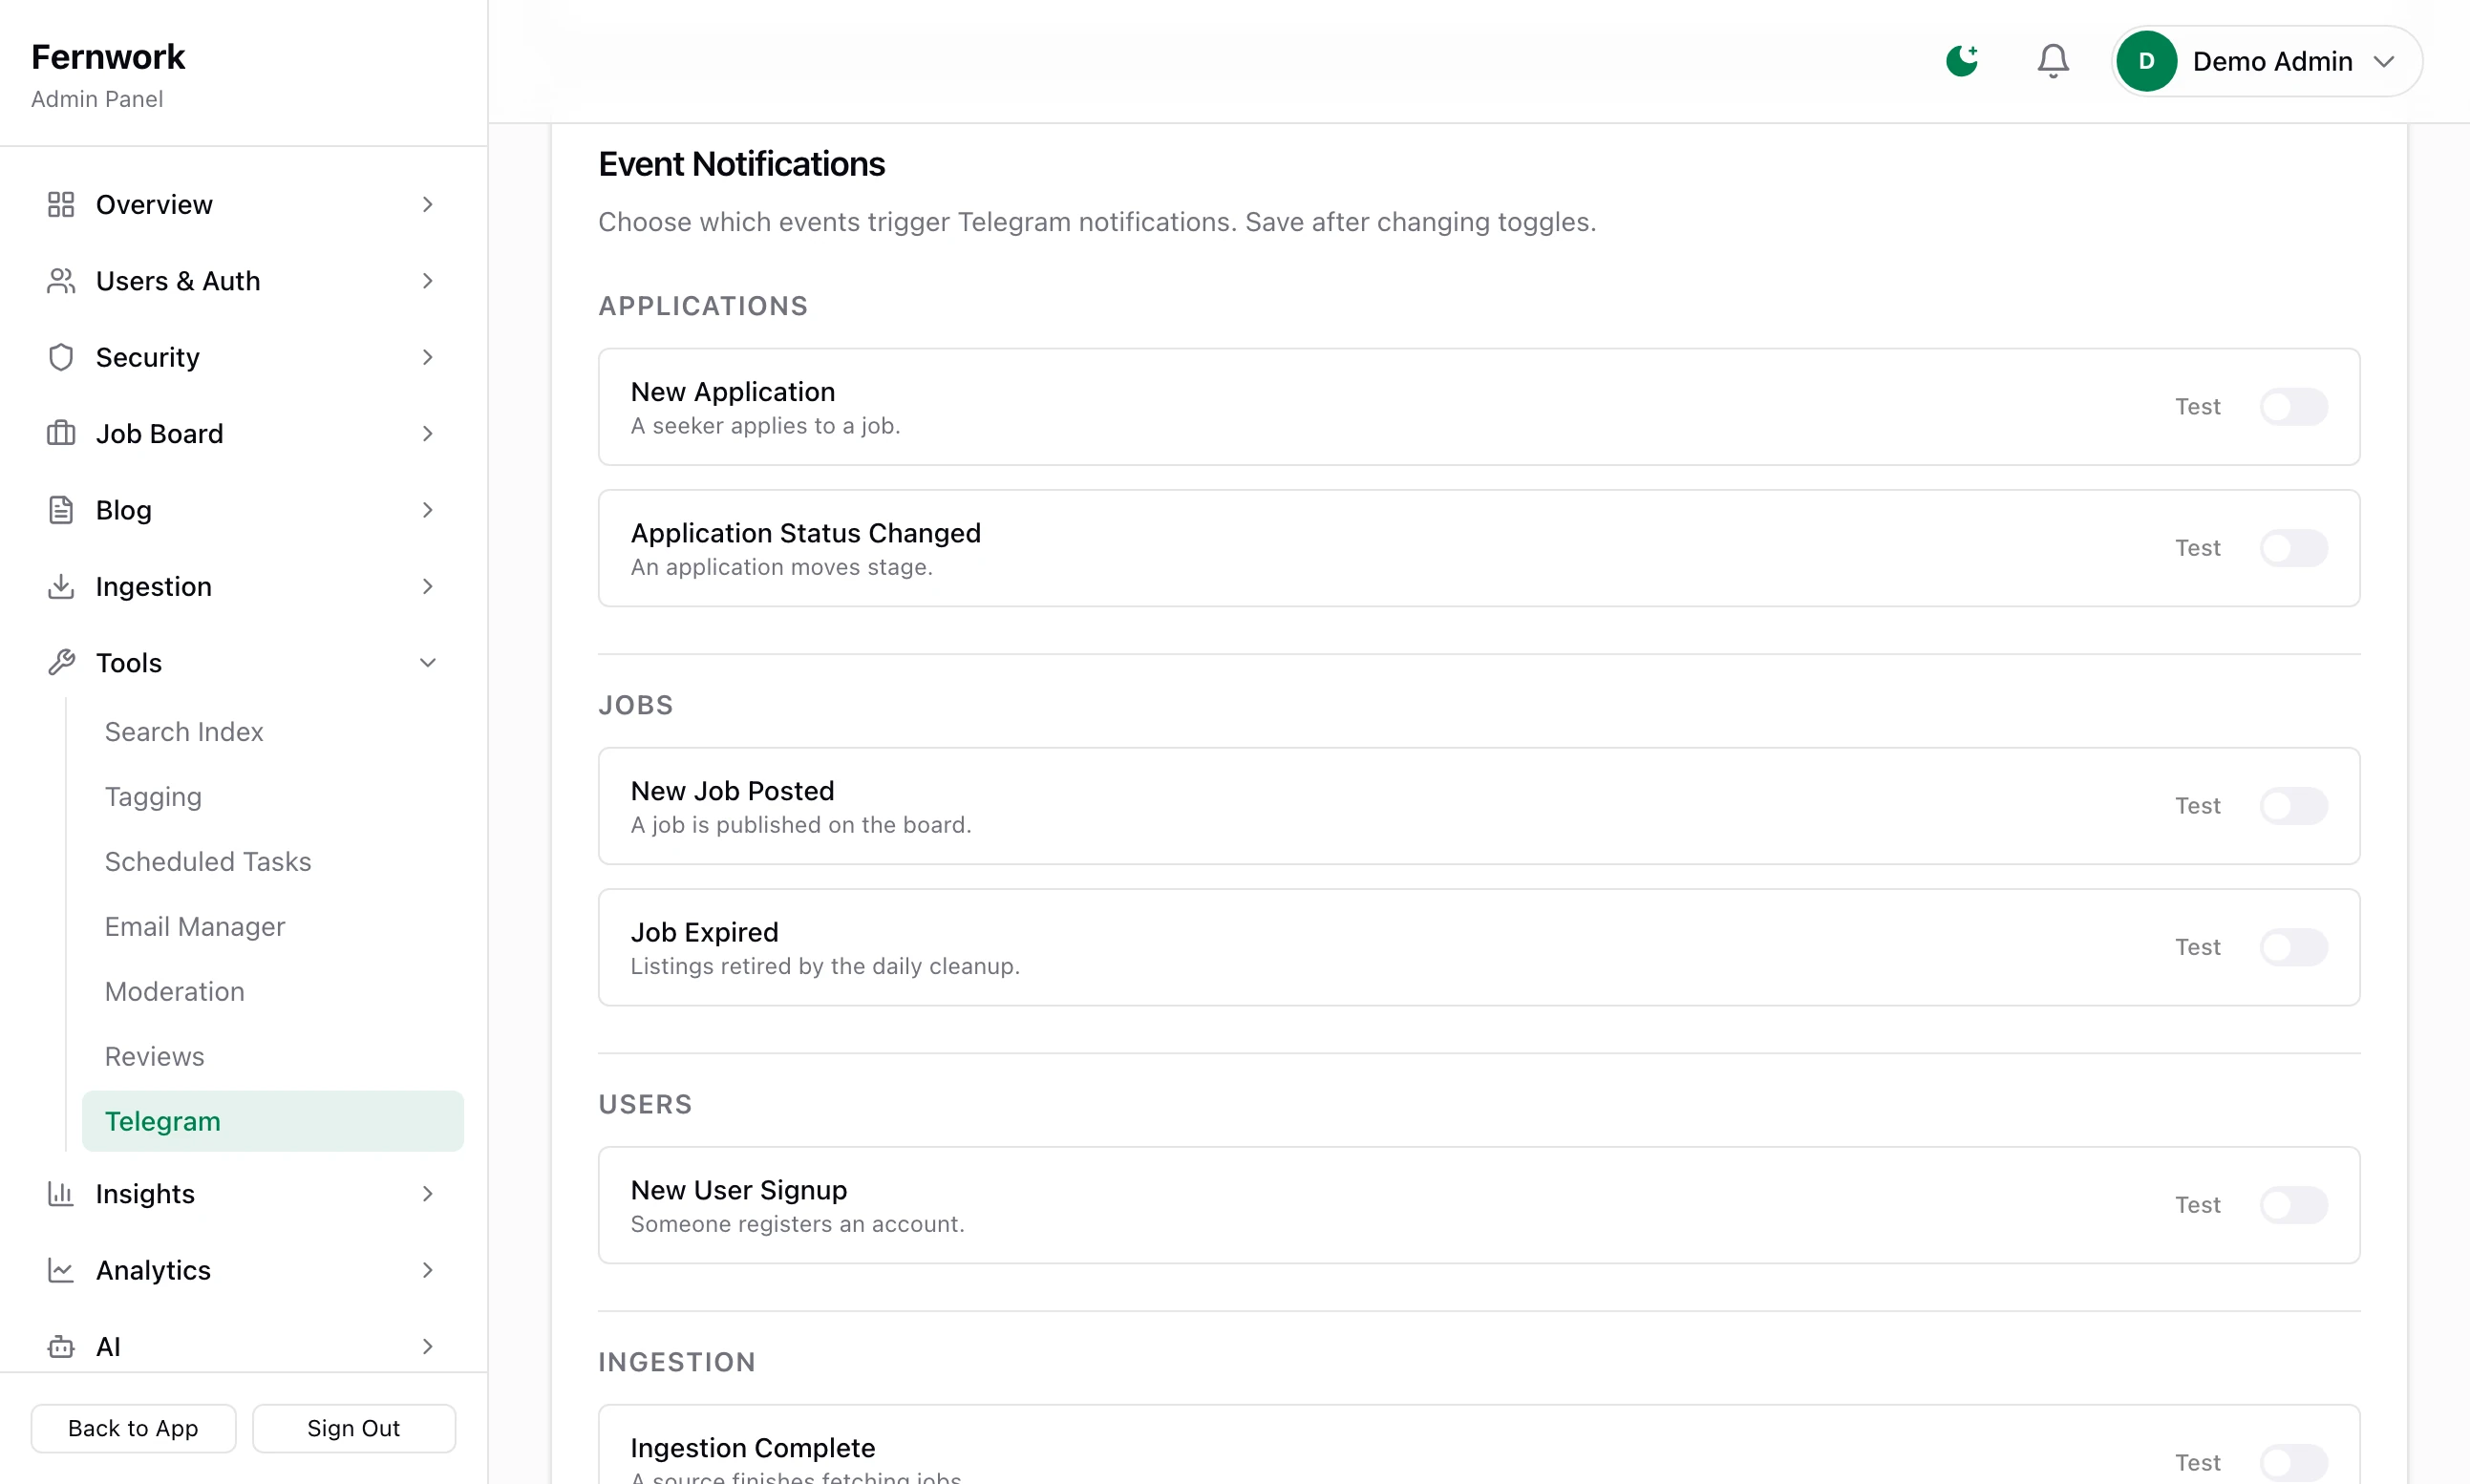
| Event | You get a message when |
|---|---|
| New Application | A job seeker applies for a job |
| Application Status Changed | An employer moves an application to another stage |
| New Job Posted | Never, in version 1.1.0: see the note below |
| Job Expired | Listings pass their expiry date and are closed |
| New User Signup | Someone registers, with the form or with Google |
| Ingestion Complete | A job source finishes a fetch |
| Ingestion Error | A job source fails, or is switched off automatically |
| Content Flagged | A visitor reports a job |
| Subscription Event | An employer's plan starts or changes |
| Advertising Order | An advertiser has paid and the order is waiting for you, with an Approve order button |
| Security Alert | An account is locked out, failed sign-ins spike, or someone is signed out by force |
| Admin Sign-in | An admin signs in. It also needs Telegram me when an admin signs in on Security, Settings |
| Autopilot Update | The AI changes source keywords or suggests board scope changes |
| AI Spend Alert and AI Budget Reached | AI spending this month passes your alert level, then your budget |
| Daily Digest | Once a day: see below |
| System Alert | A scheduled task fails or a health check changes. Marked Always on |
A Test button sends a sample marked [TEST]. Save first. A test for an event whose saved switch is off, or sent before the configuration is saved, sends nothing, and the button still reads "Sent!".
The daily digest#
With Daily Digest switched on, the task Telegram Daily Digest sends one message at 08:00 UTC. It covers the last 24 hours: new users and companies, new jobs and applications, the number of active sources, and a list of what needs your attention with a button to each admin page.
The hour cannot be changed. Scheduled Tasks under Tools offers once a day or once a week for this task, both at 08:00 UTC. The digest's Test button sends the real digest at once, and so does the /digest command.
Commands and buttons#
Notifications need nothing more than the steps above. To type commands to the bot and press its buttons, Telegram has to be able to reach your site. That connection is called a webhook, and it needs a public address that starts with https://, so it cannot be set up on your own computer.
Step 1: Check the address
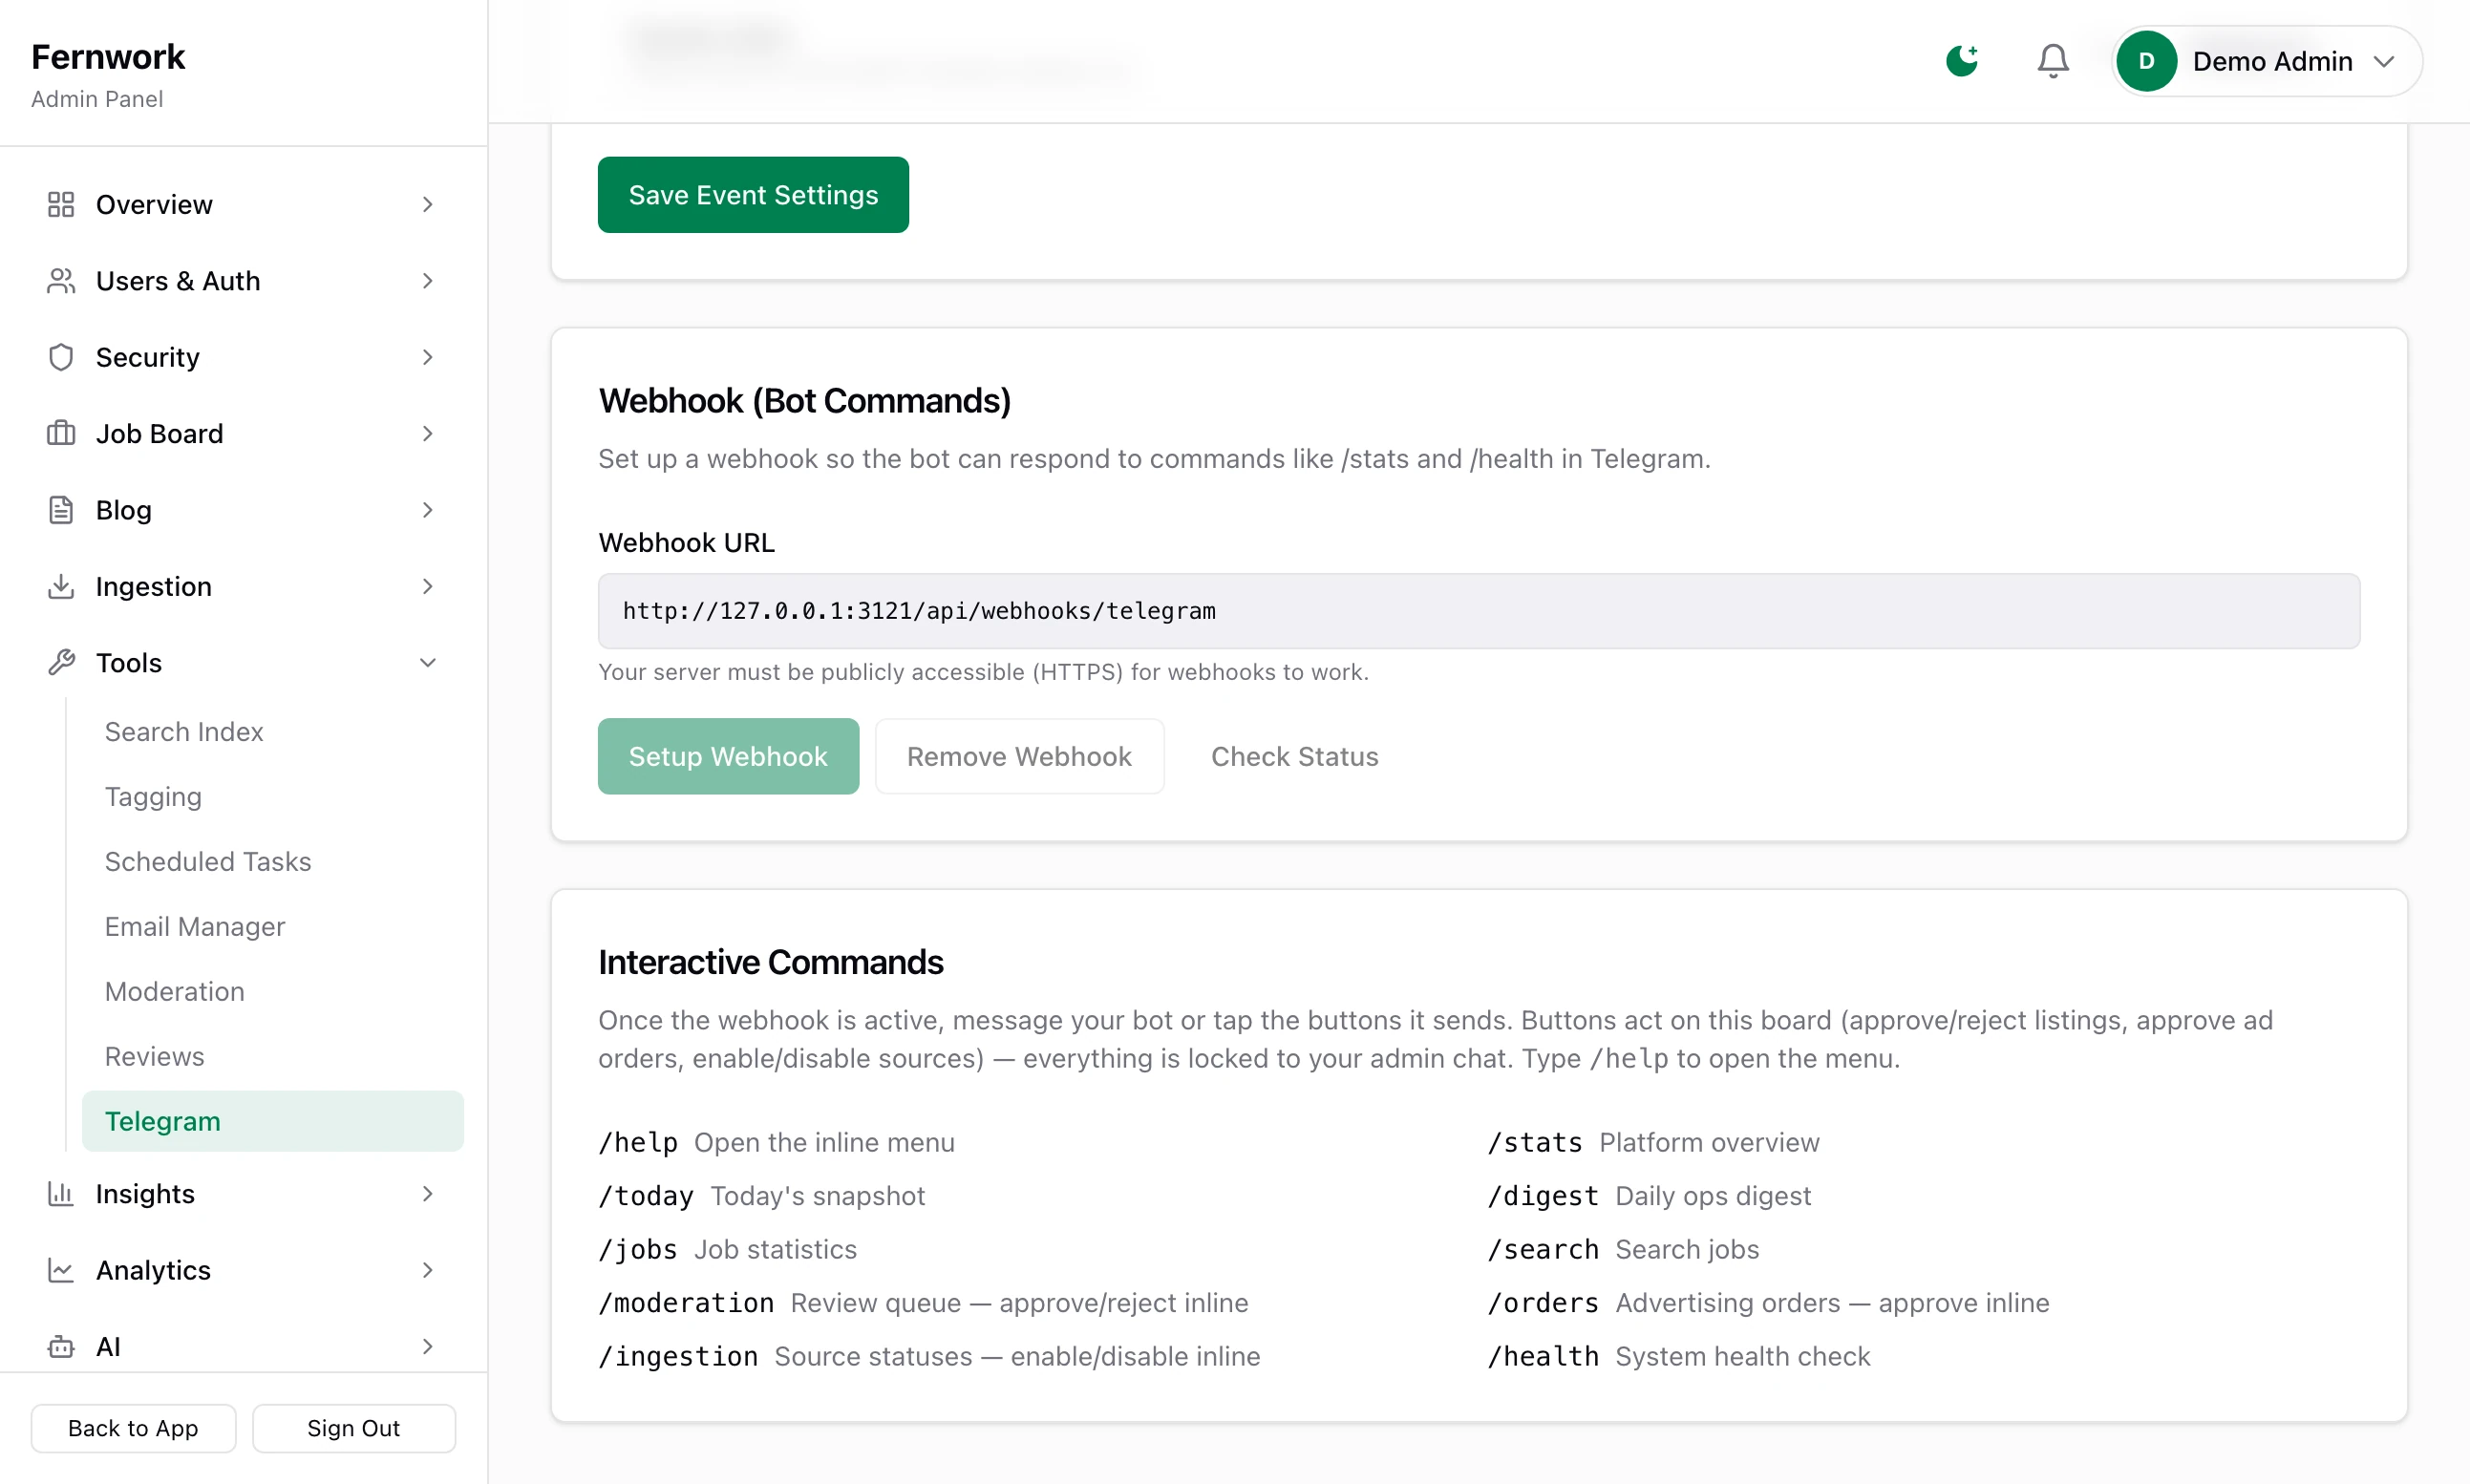
Under Webhook (Bot Commands), the Webhook URL box shows where Telegram will be sent: your site's address followed by
/api/webhooks/telegram. The address isNEXT_PUBLIC_APP_URLfrom your.envfile. If it is not your public address, correct that first: see Deploy to a server.Step 2: Click Setup Webhook
The site registers the address with Telegram and gives it a secret, which Telegram sends back with every command and button press. It also publishes the list of commands to the bot's menu. A box appears with URL: and Pending updates:.
Step 3: If nothing appears
In version 1.1.0 a refusal from Telegram is not shown. Click Check Status. URL: followed by "Not set" means the address was refused. Last error: is Telegram's most recent problem reaching your site.
Step 4: Send /help to the bot
It answers with a menu of buttons.
Remove Webhook ends commands and buttons. Notifications go on arriving.
What the bot answers#
Only messages from the saved chat are answered. If that chat is a group, everyone in the group can use the commands and buttons.
| Area | Commands |
|---|---|
| Menu | /help or /start: a button for everything below. /pending: everything waiting for a decision from you |
| Overview | /stats: totals of users, jobs, applications and companies. /today: the same, for today. /digest: the daily digest |
| Jobs | /jobs: total, published, expired and posted today. /search and some words: matching jobs |
| Applications | /recent: the last ten. /applications: the total and the last five |
| Pipeline | /ingestion: each job source and its status, with a button to switch it off or on. /moderation: up to five listings waiting for review, each with Approve and Reject. /orders: up to five advertising orders waiting for review, each with an approve button |
| People | /users: users by role. /companies: the total and the newest five |
| System | /aicost: AI spending today, this month and over 30 days. /health: the database, Redis, Meilisearch and file storage |
A button acts the moment it is pressed. Nothing asks you to confirm.
/health looks for Meilisearch at MEILI_URL and for file storage at S3_ENDPOINT, and it tests storage with MinIO's own health address. Storage from another provider can show as down here while it is working.
Google sign-in#
The sign-in and registration pages show Continue with Google only when Google's two values are both set. Until then there is no button.
Step 1: Create an OAuth client in Google
Open Credentials under APIs & Services in Google Cloud Console. Click Create credentials, choose OAuth client ID, and pick Web application as the type. If the project is new, Google has you fill in a consent screen first: the name and support email people see when they sign in.
Step 2: Give it your site's addresses
Add your site's address as an authorised JavaScript origin, and this address, with your own domain, under Authorised redirect URIs:
Redirect URIhttps://your-domain.com/api/auth/callback/googleThe Google sign-in card in Job Lab prints both addresses with your own domain in them. To try it on your own computer, add
http://localhost:3000/api/auth/callback/googleas well.Step 3: Paste the two values in
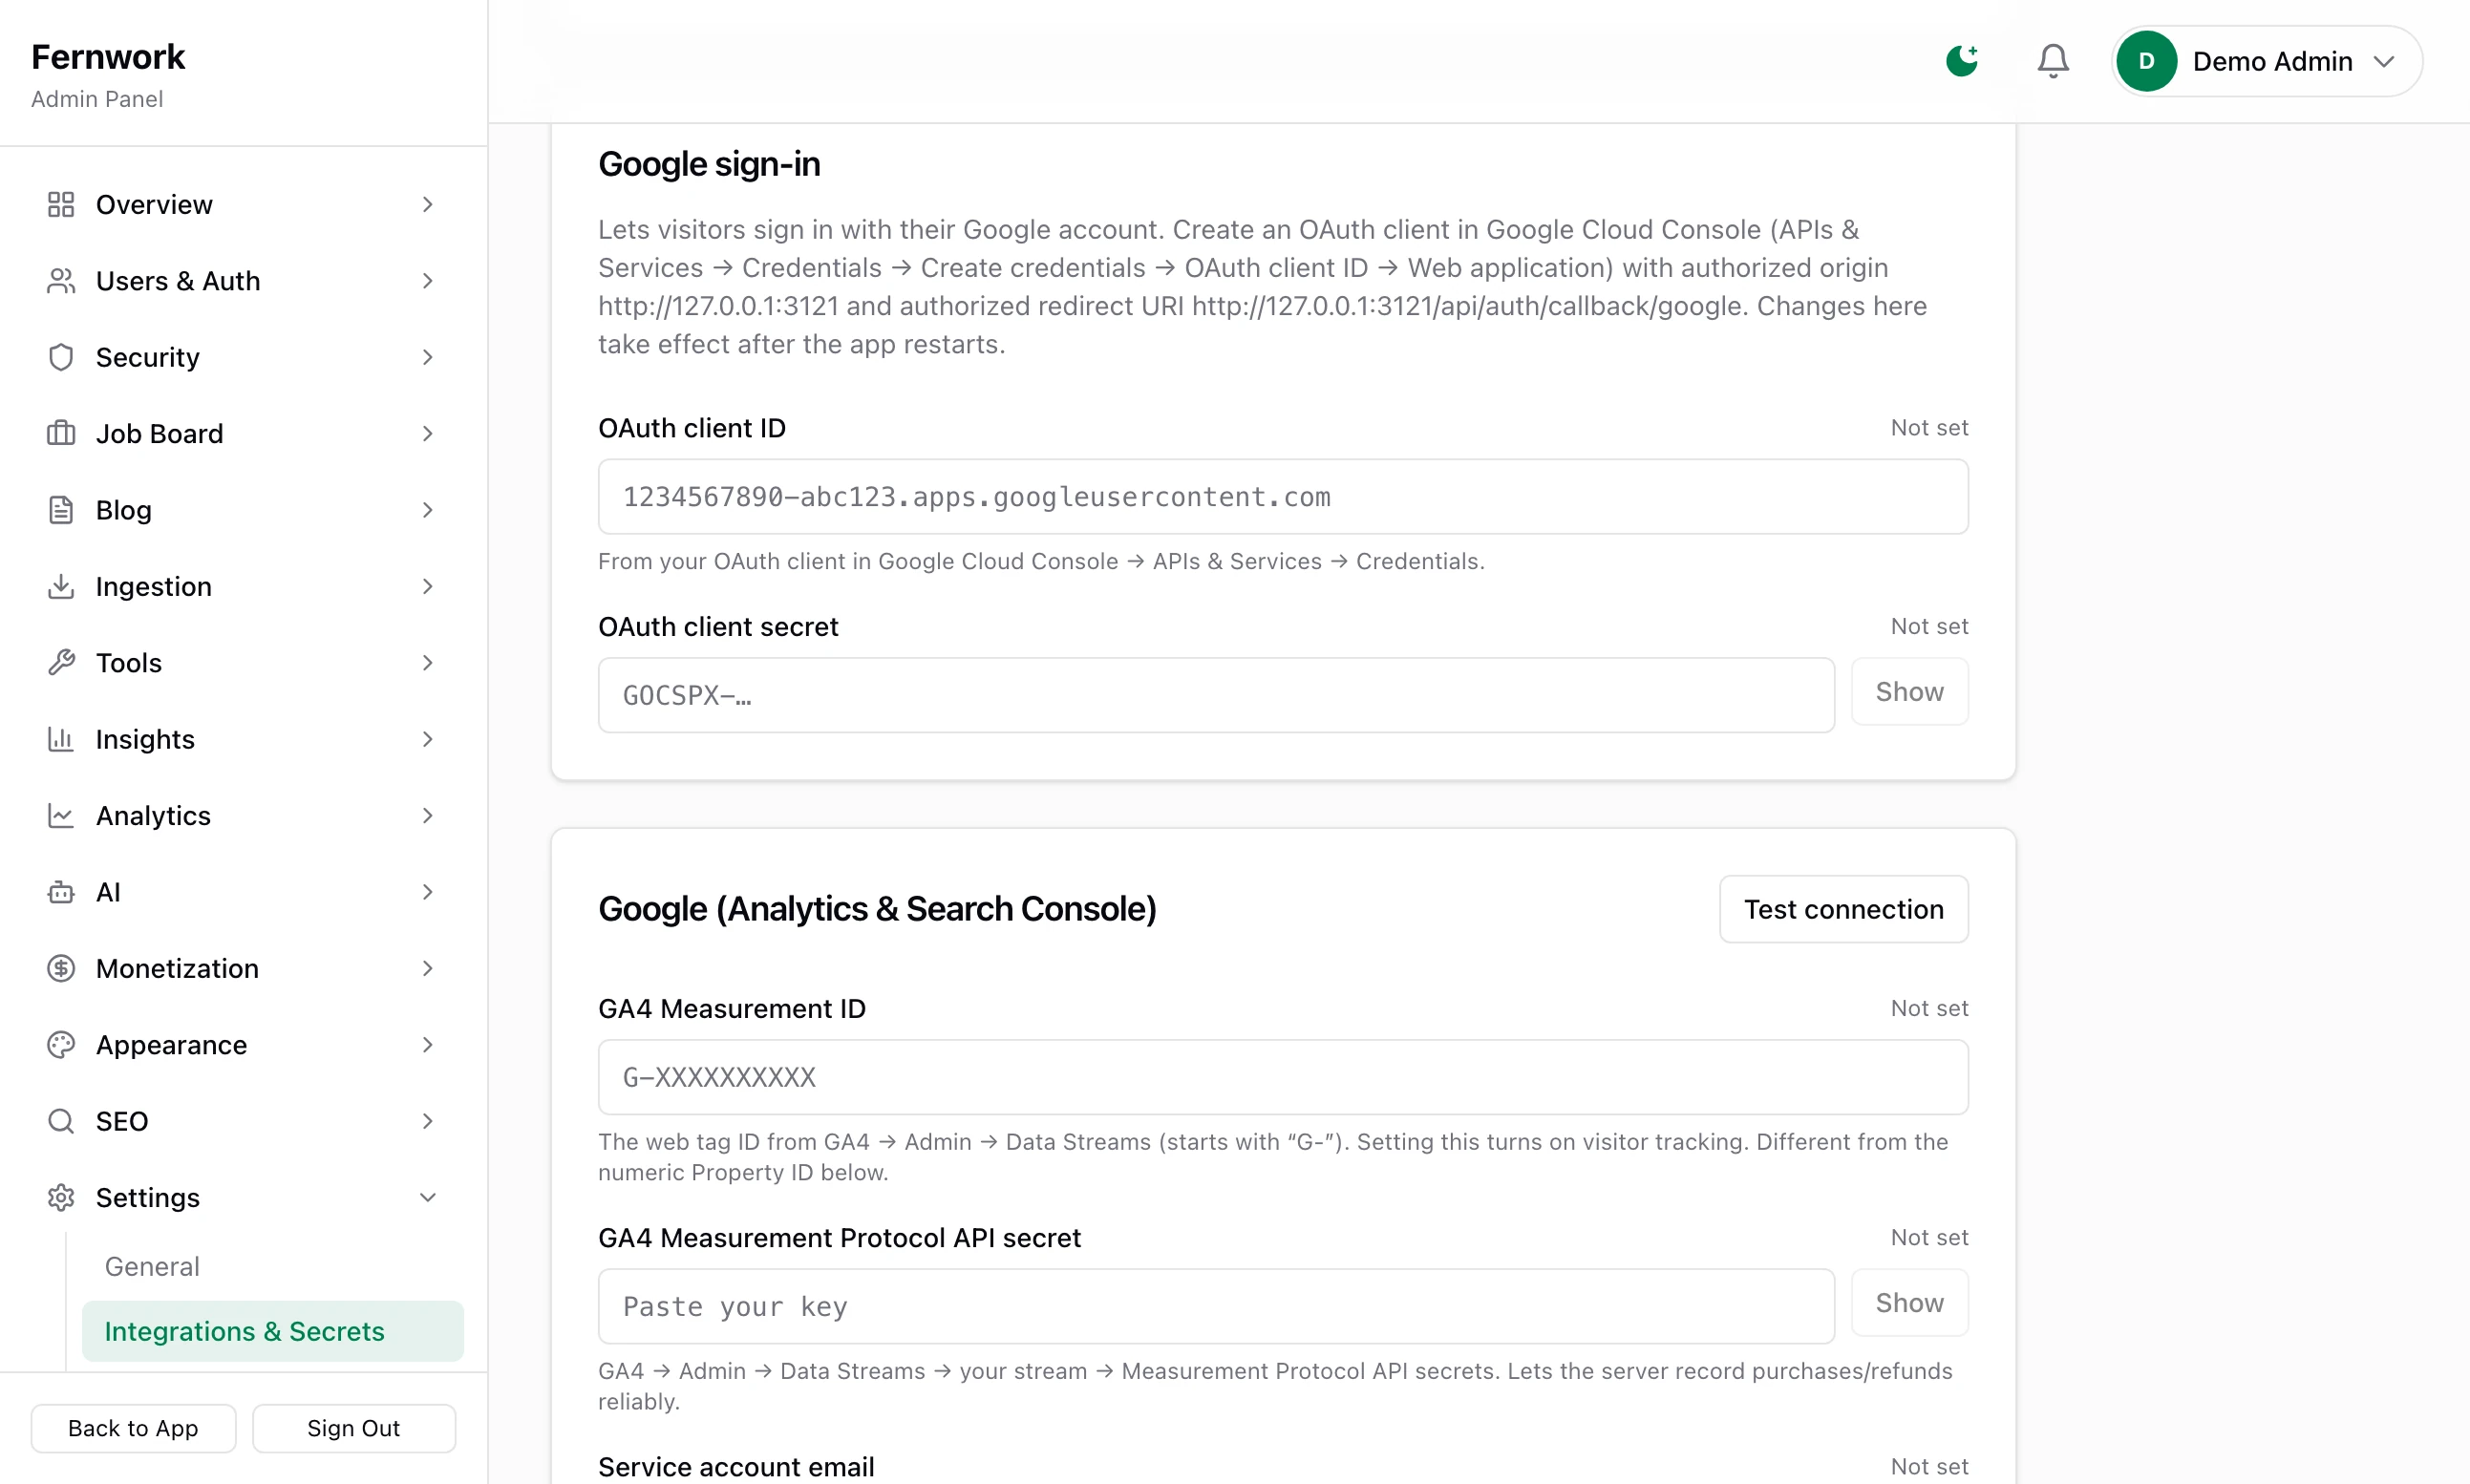
Open Integrations & Secrets under Settings and find the card Google sign-in. Paste the client ID, which ends
.apps.googleusercontent.com, into OAuth client ID, and the secret, which startsGOCSPX-, into OAuth client secret.Step 4: Click Save integrations
You see "✓ Saved. Most changes apply immediately — Google sign-in applies after the next restart. Use “Test connection” to verify." This card has no Test connection button.
Step 5: Restart the site
The two values are read when the site starts. After a restart the button is on the sign-in and registration pages. Try it in a private browser window.
The same two values can go in .env as GOOGLE_CLIENT_ID and GOOGLE_CLIENT_SECRET. A value saved on the card wins.
What a first Google sign-in does#
A new address gets an account at once: a job seeker, with the email already marked as verified. They are sent the welcome email, and you get a New User Signup message reading "New signup (Google)" if that event is on.
An address that already has a verified account is signed in to that account, and Google is linked to it from then on. That includes your own admin account.
An address that has an account whose email was never verified is refused, with "An account with this email already exists but its email address hasn't been verified. Sign in with your password and verify your email first — then you can connect Google."
A suspended account is refused, with "This account has been suspended. Please contact support."
Do TELEGRAM_BOT_TOKEN and TELEGRAM_CHAT_ID in .env do anything?
No. The site reads the token and chat ID from the Telegram screen only. The backup script on a server reads a pair with those names from a different file, .backup.env, to tell you when a backup fails: see Backups, scheduled tasks and health.
Can more than one person get the alerts?
Yes. Add the bot to a Telegram group and use the group's chat ID. Everyone in the group sees the alerts and can press the buttons, so keep the group to people you would give the admin to.
Google says "Error 400: redirect_uri_mismatch"
The redirect address in Google is not the one your site sent. Compare it with the address printed on the Google sign-in card, character for character, and check AUTH_URL in .env.
Stuck on a step? Send a message.