Make it your niche
Set the board's colours, fonts, logo, home page, menus, footer, niche wording and legal pages from the admin, one screen at a time.
Updated 9 Oct 2026 · written for Job Lab 1.1.0
On this page
Open Theme & Fonts under Appearance in the admin sidebar. It is the first of the screens that turn a new install into your board: its colours and fonts, its logo, its home page, its menus and footer, the words it uses for your niche and its legal pages. None of it needs code.
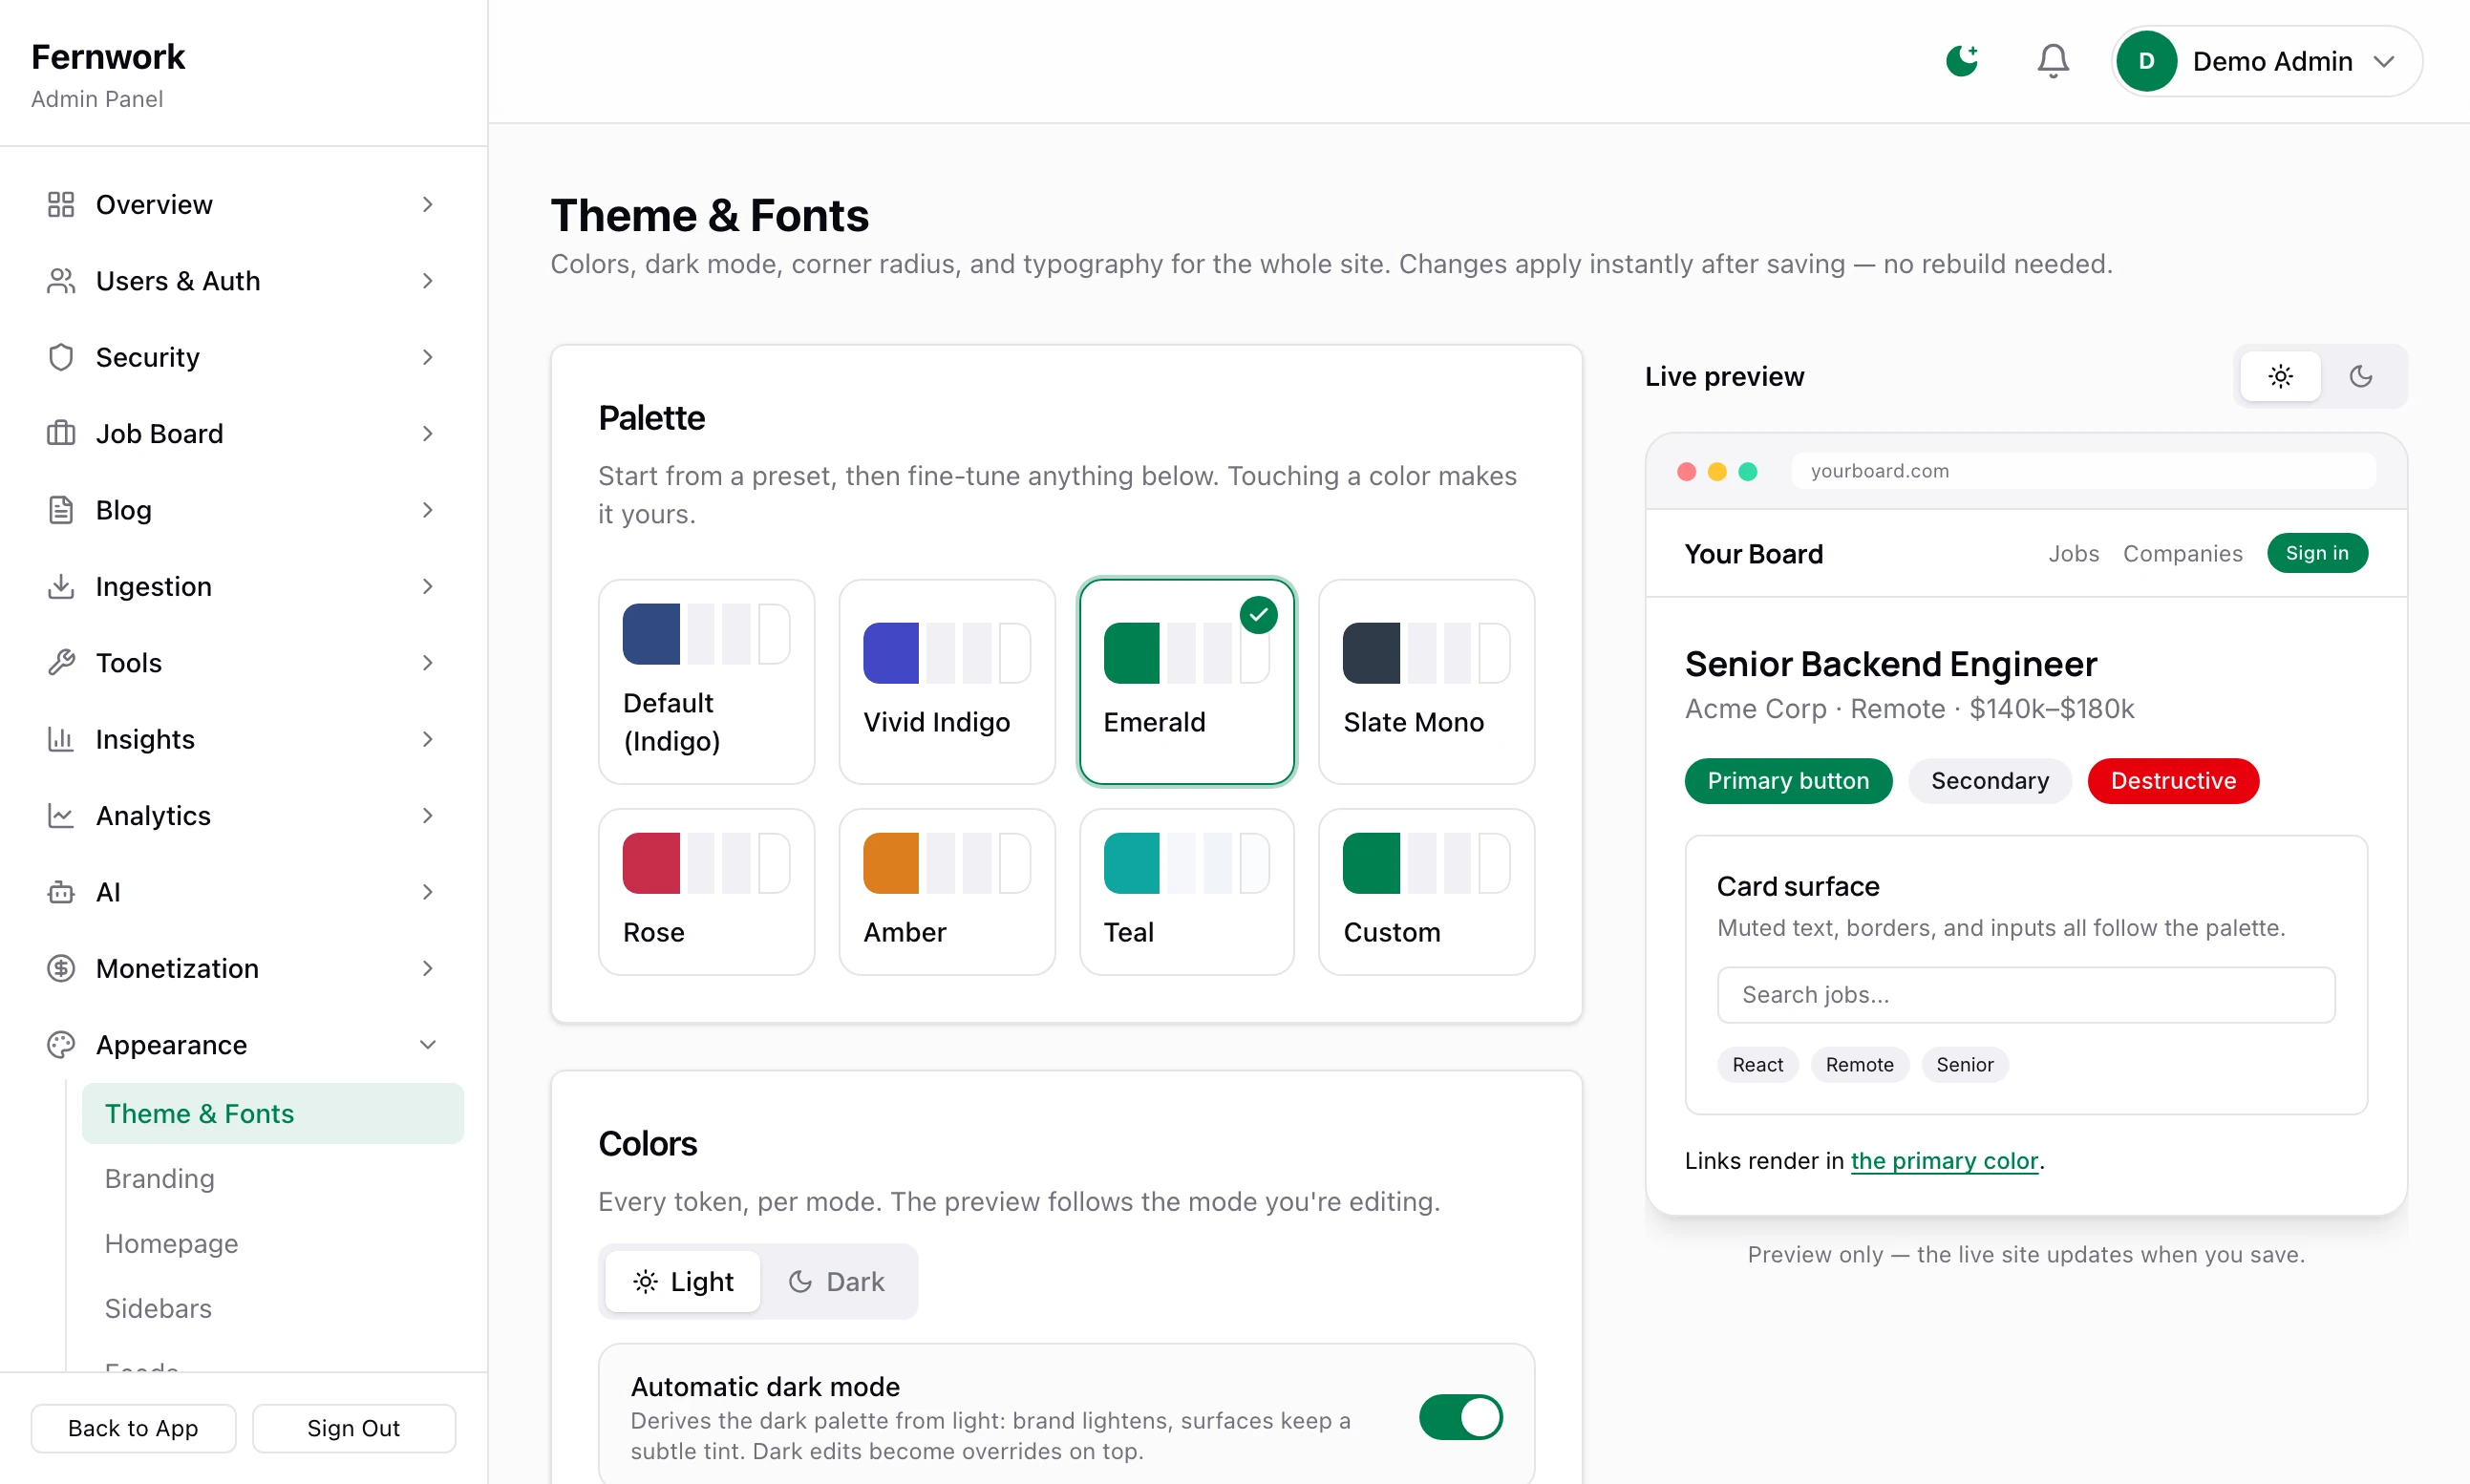
The setup wizard has already filled in some of this: the site name, a colour, the two niche words and the headline. Here you finish the job. Every Appearance screen saves the same way: change something and a bar reading Unsaved changes appears at the bottom, with Discard and a save button. The public site changes when you save.
Colours and fonts#
Step 1: Pick a palette
Under Palette, click one of the seven presets: Default (Indigo), Vivid Indigo, Emerald, Slate Mono, Rose, Amber or Teal. The Live preview on the right redraws a job card in the new colours.
Step 2: Set a colour of your own
Under Colors, click a swatch to open your browser's colour picker, or type a hex code such as
#1f7a5cbeside it. The palette changes to Custom and everything else stays as it was on screen. Primary is the one that matters most: it colours buttons and links. A colour you have changed gains a Reset link.Step 3: Check dark mode
Automatic dark mode is on to begin with: the dark colours are worked out from the light ones. Click Dark at the top of Colors to see them and to override any of them. Under Default appearance, choose what a first-time visitor gets: Follow device, Light or Dark. A visitor who has used the switch in the site's header keeps their own choice.
Step 4: Choose corners and fonts
Corner radius has five settings, from Square to Extra round, and applies to every button, card and box. Under Typography, pick a font for Headings and one for Body from the 26 in the list. Lora and Playfair Display are the two serifs.
Step 5: Click Save theme
You see "Saved — the site now wears this theme."
Reset everything to stock defaults, at the bottom of the page, puts the colours, corners and fonts back as they were on a new install.
Logo, favicon and app icons#
Open Appearance, then Branding.
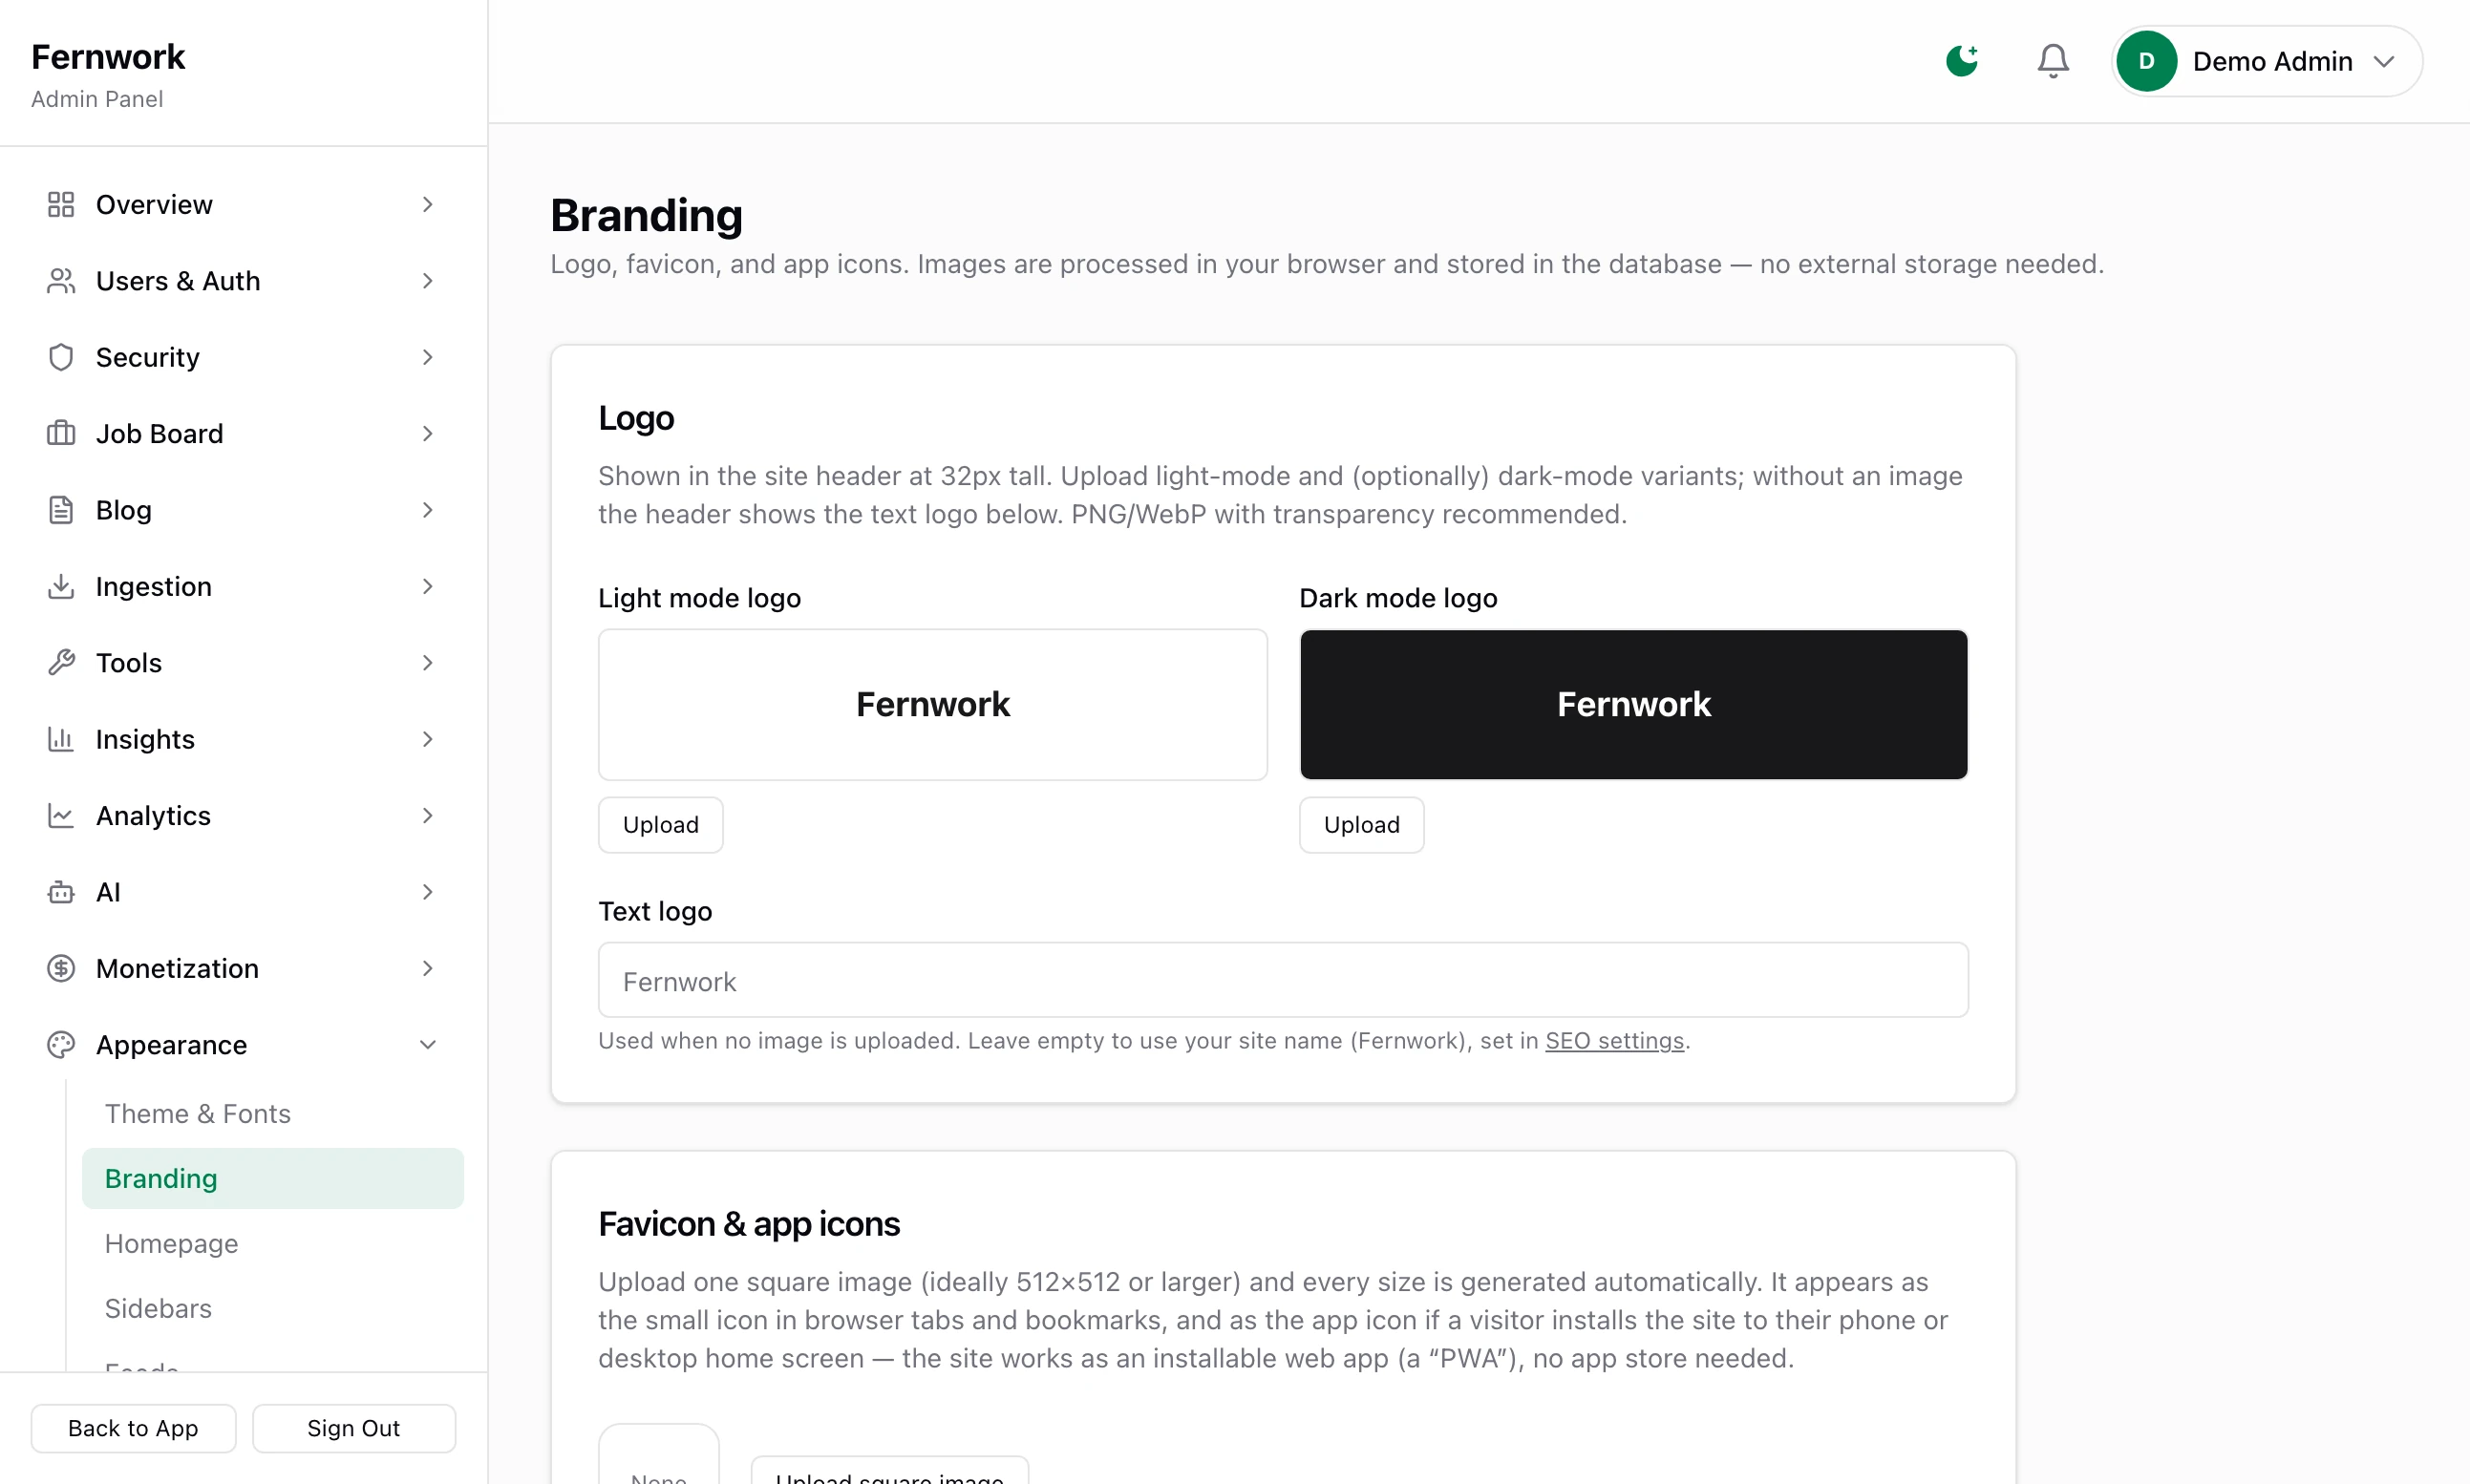
Light mode logo and Dark mode logo: click Upload under each. A logo is shown in the header 32 pixels tall, so use a wide image with a transparent background. With no dark logo, the light one is used in dark mode too.
Text logo: the words shown when there is no image. Leave it empty to use your site name.
Favicon & app icons: click Upload square image and choose one square picture, 512 by 512 pixels or larger. The icon in the browser tab, and the two sizes a phone uses when someone adds the site to their home screen, are made from it.
Click Save branding. You see "Saved — header, favicon, and manifest updated."
How the images are stored#
There is no uploads folder for these. Your browser shrinks each picture before it is sent, a logo to at most 600 by 120 pixels and the icon to 64, 192 and 512 pixels square, and the result is saved in the database as text. A backup of the database therefore includes them.
You can choose a file of up to 5 MB. After shrinking, a logo must come out under about 200 KB and the largest icon under about 300 KB. If not, you see "Logo is still too large after compression. Try a simpler or smaller image." or "Icon is too large after processing. Use a simpler square image."
Whether the header shows the image, the words or both is set on Navigation & Footer.
The home page#
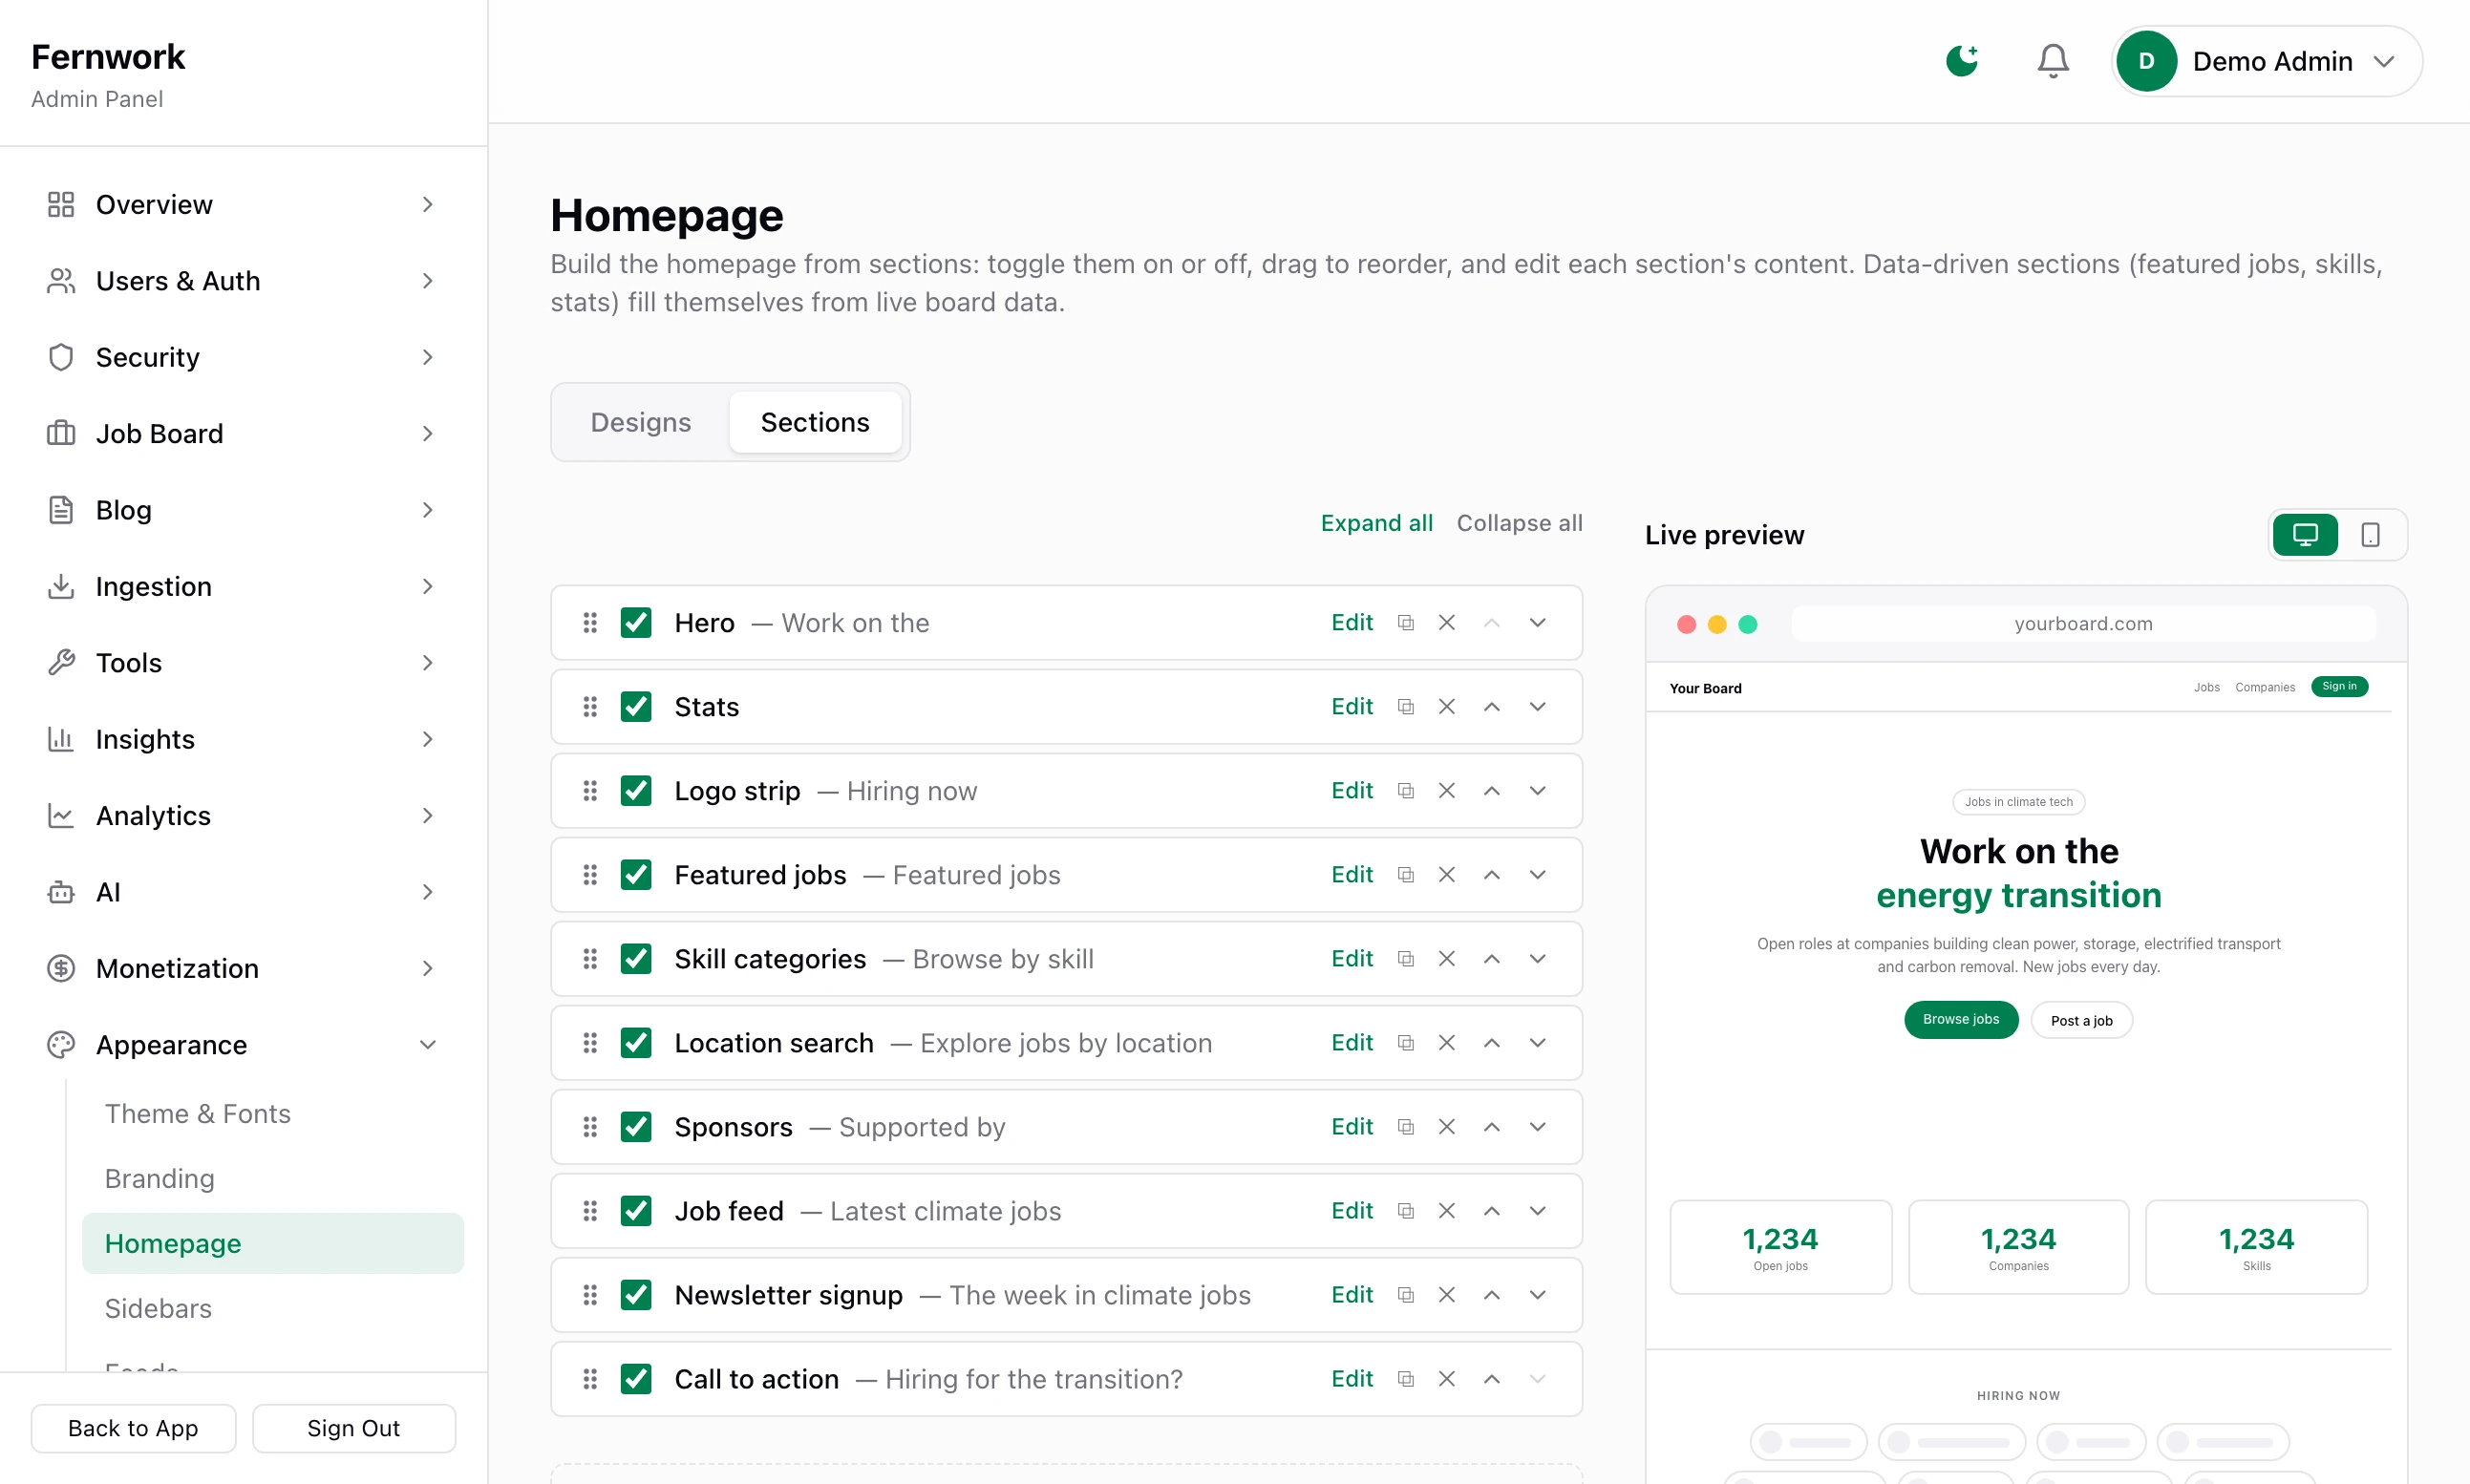
Open Appearance, then Homepage. The home page is a list of sections. The Sections tab holds the list, with a preview beside it. The Designs tab holds five ready-made layouts.
Step 1: Start from a design, if you want one
Click Designs, then Use this design on one of the five, and confirm. You see "Design loaded — review it below, then press Save homepage to go live." Nothing on the site has changed yet.
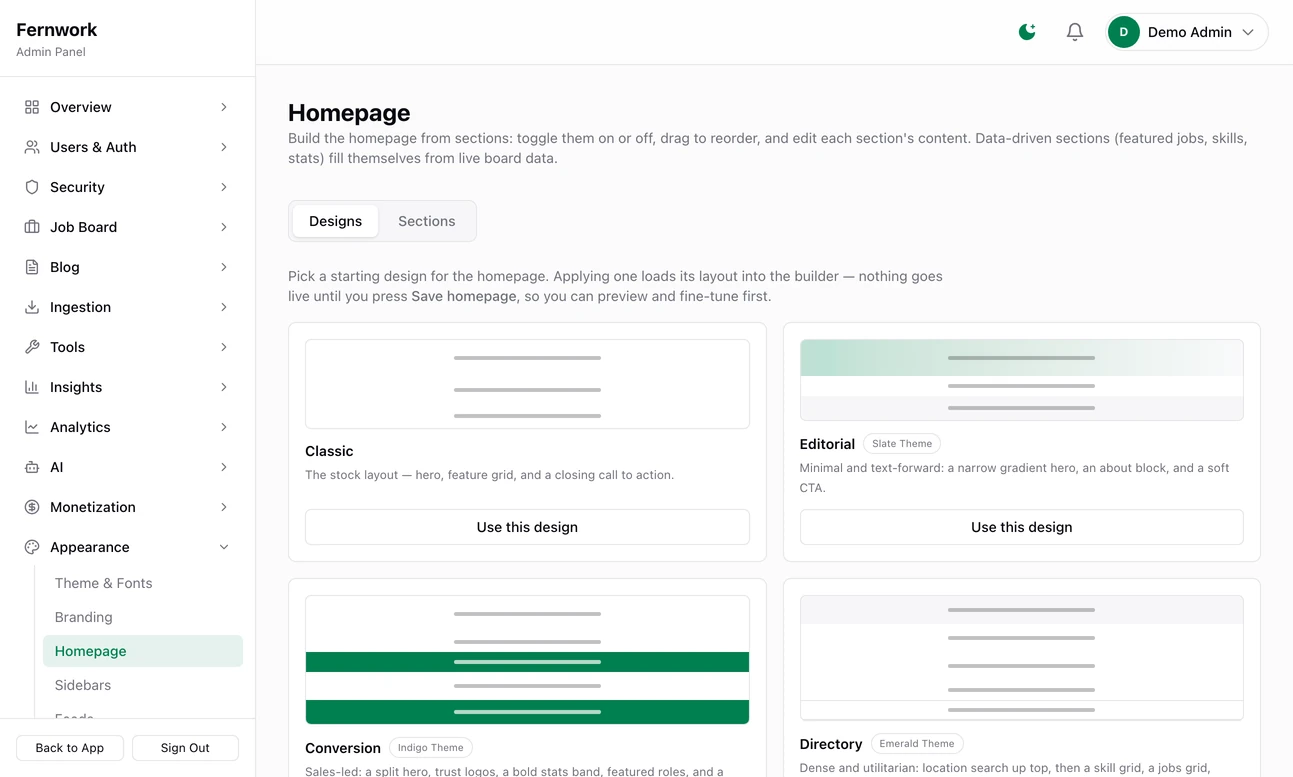
The five ready-made home page designs. Step 2: Edit a section
Back on Sections, click Edit on a row. Content holds its words, buttons and numbers. Style & layout holds its Background, Alignment, Width, Spacing and Divider and, for some sections, a Layout.
Step 3: Switch sections on and off, and put them in order
The tick box at the start of a row shows or hides that section. Drag a row to move it. The two small buttons at the end of a row duplicate it and remove it. Under Add a section, click a name to add it to the bottom of the list.
Step 4: Click Save homepage
You see "Saved — the homepage now uses this layout."
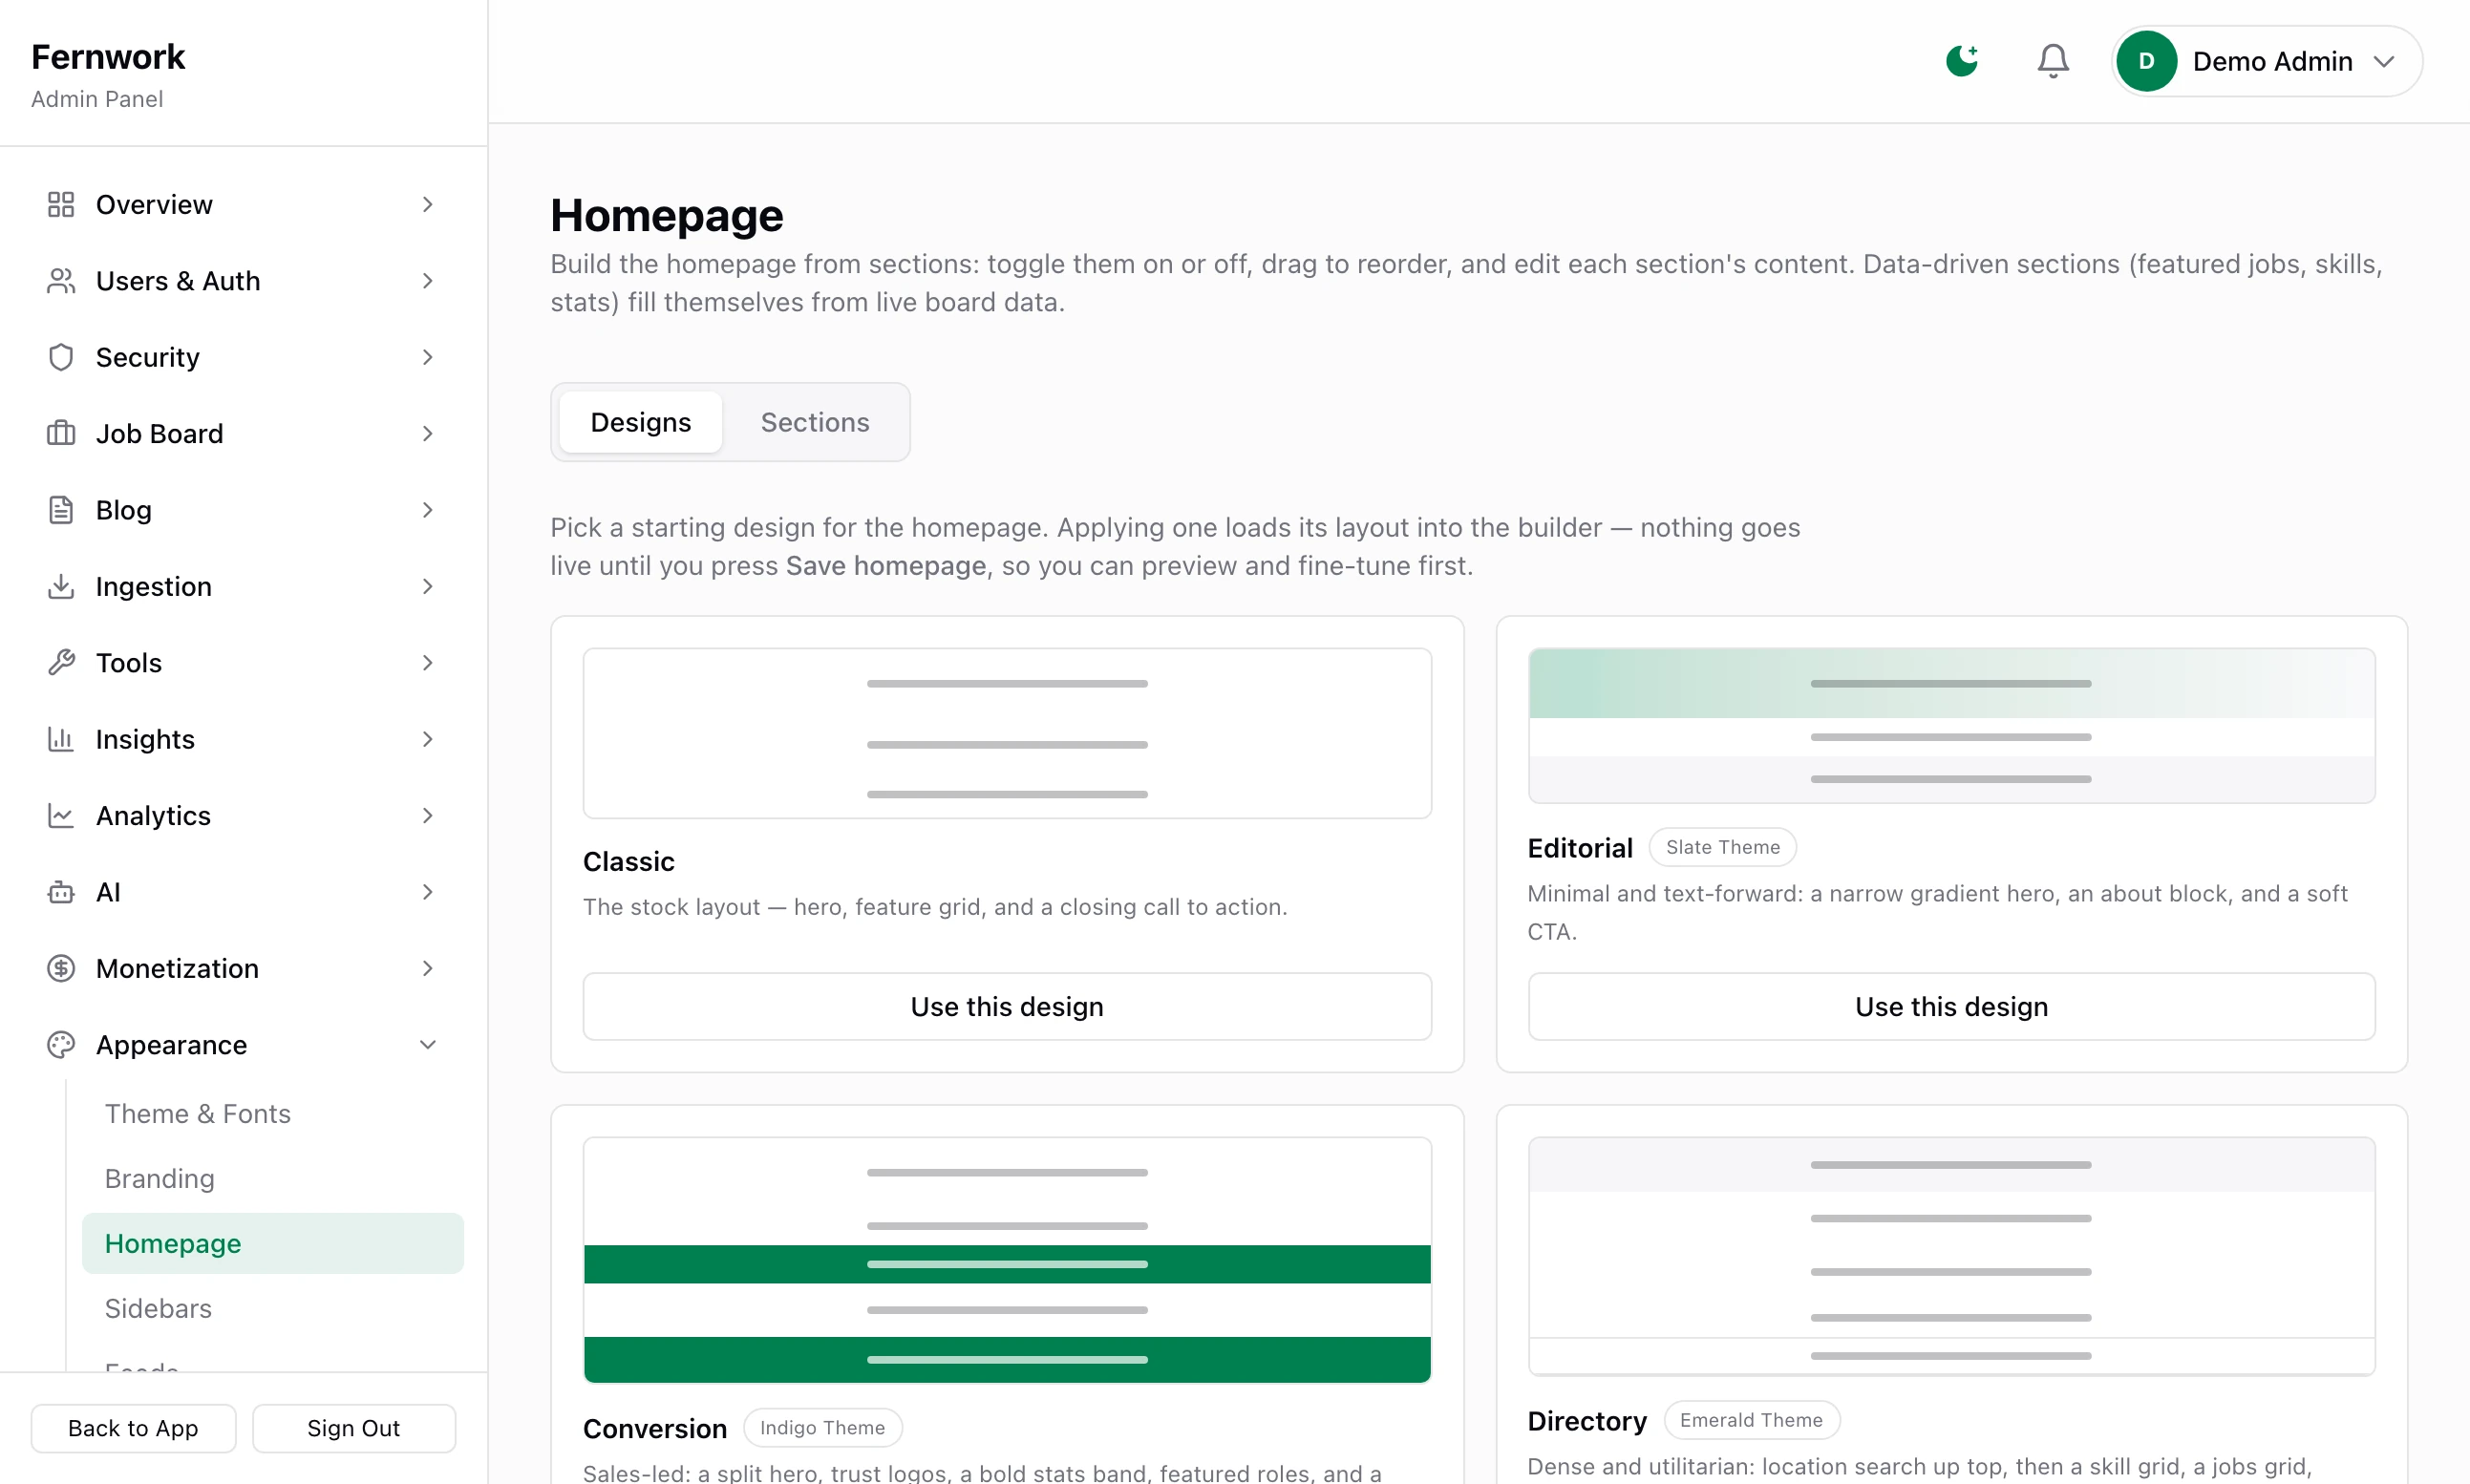
The five designs#
| Design | What it is |
|---|---|
| Classic | The layout a new install starts with: a headline, the feature grid and a closing call to action |
| Editorial | Led by text: a narrow headline, an "About this board" block and a call to action |
| Conversion | Led by selling: a headline set to one side, company logos, a band of counters, featured jobs and a call to action |
| Directory | Location search at the top, then skills, a grid of jobs, company logos and counters |
| Feed | A band of counters, then straight into the searchable job list |
The sections#
There are 17 kinds of section, all listed under Add a section.
Hero, Feature grid, Rich text, Call to action, Testimonials, FAQ, Media / image and Spacer show what you type into them. The Hero is the headline: a badge, a heading with a highlighted second line, a paragraph and one or two buttons.
Featured jobs, Job feed, Skill categories, Stats and Location search fill themselves from the board's jobs. Logo strip takes its logos from company profiles, or from files you upload.
Sponsors, Ad slot and Newsletter signup show your live sponsors, an ad unit you made under Monetization and the newsletter sign-up form.
Rich text, Ad slot, Media / image and Spacer can be added more than once. The list holds 20 sections at most.
Sidebars#
Open Appearance, then Sidebars. Every listing page is full width to begin with. Here you give a page a column down its right-hand side, built from widgets.
Choose the page with the tabs: Job feed, Locations, Types, Skills and Companies. All but the first have a Browse page (the index) and a Detail page (one country, city, type, skill or company), each with a sidebar of its own.
Tick Show a sidebar here. A starter list of widgets is already in place.
Add, edit, drag and remove widgets as you do sections on the home page. There are 15 kinds, among them Popular skills, Browse by role, Top locations, Market snapshot, Newsletter, Latest jobs, Top companies, Custom links, Sponsor and Ad slot.
or copy widgets from replaces this page's list with another page's.
Click Save sidebars. You see "Saved — each page now uses its own sidebar." A widget with nothing to show hides itself.
Feeds#
Open Appearance, then Feeds. This screen sets how the listing pages are laid out. It has nothing to do with where jobs come from: that is Add job sources.
Columns per row: 2, 3 or 4 cards across, for the Companies, Skills, Locations and Types index pages.
With sidebar: 2 or 3 across, used when that page has a sidebar switched on.
Items per page: from 3 to 60, for the company index, the job list and the job lists on skill, location, type and landing pages.
A new install shows three columns, 24 companies to a page and 20 jobs to a page. Click Save feeds. You see "Saved — feeds updated."
Header and footer#
Open Appearance, then Navigation & Footer.
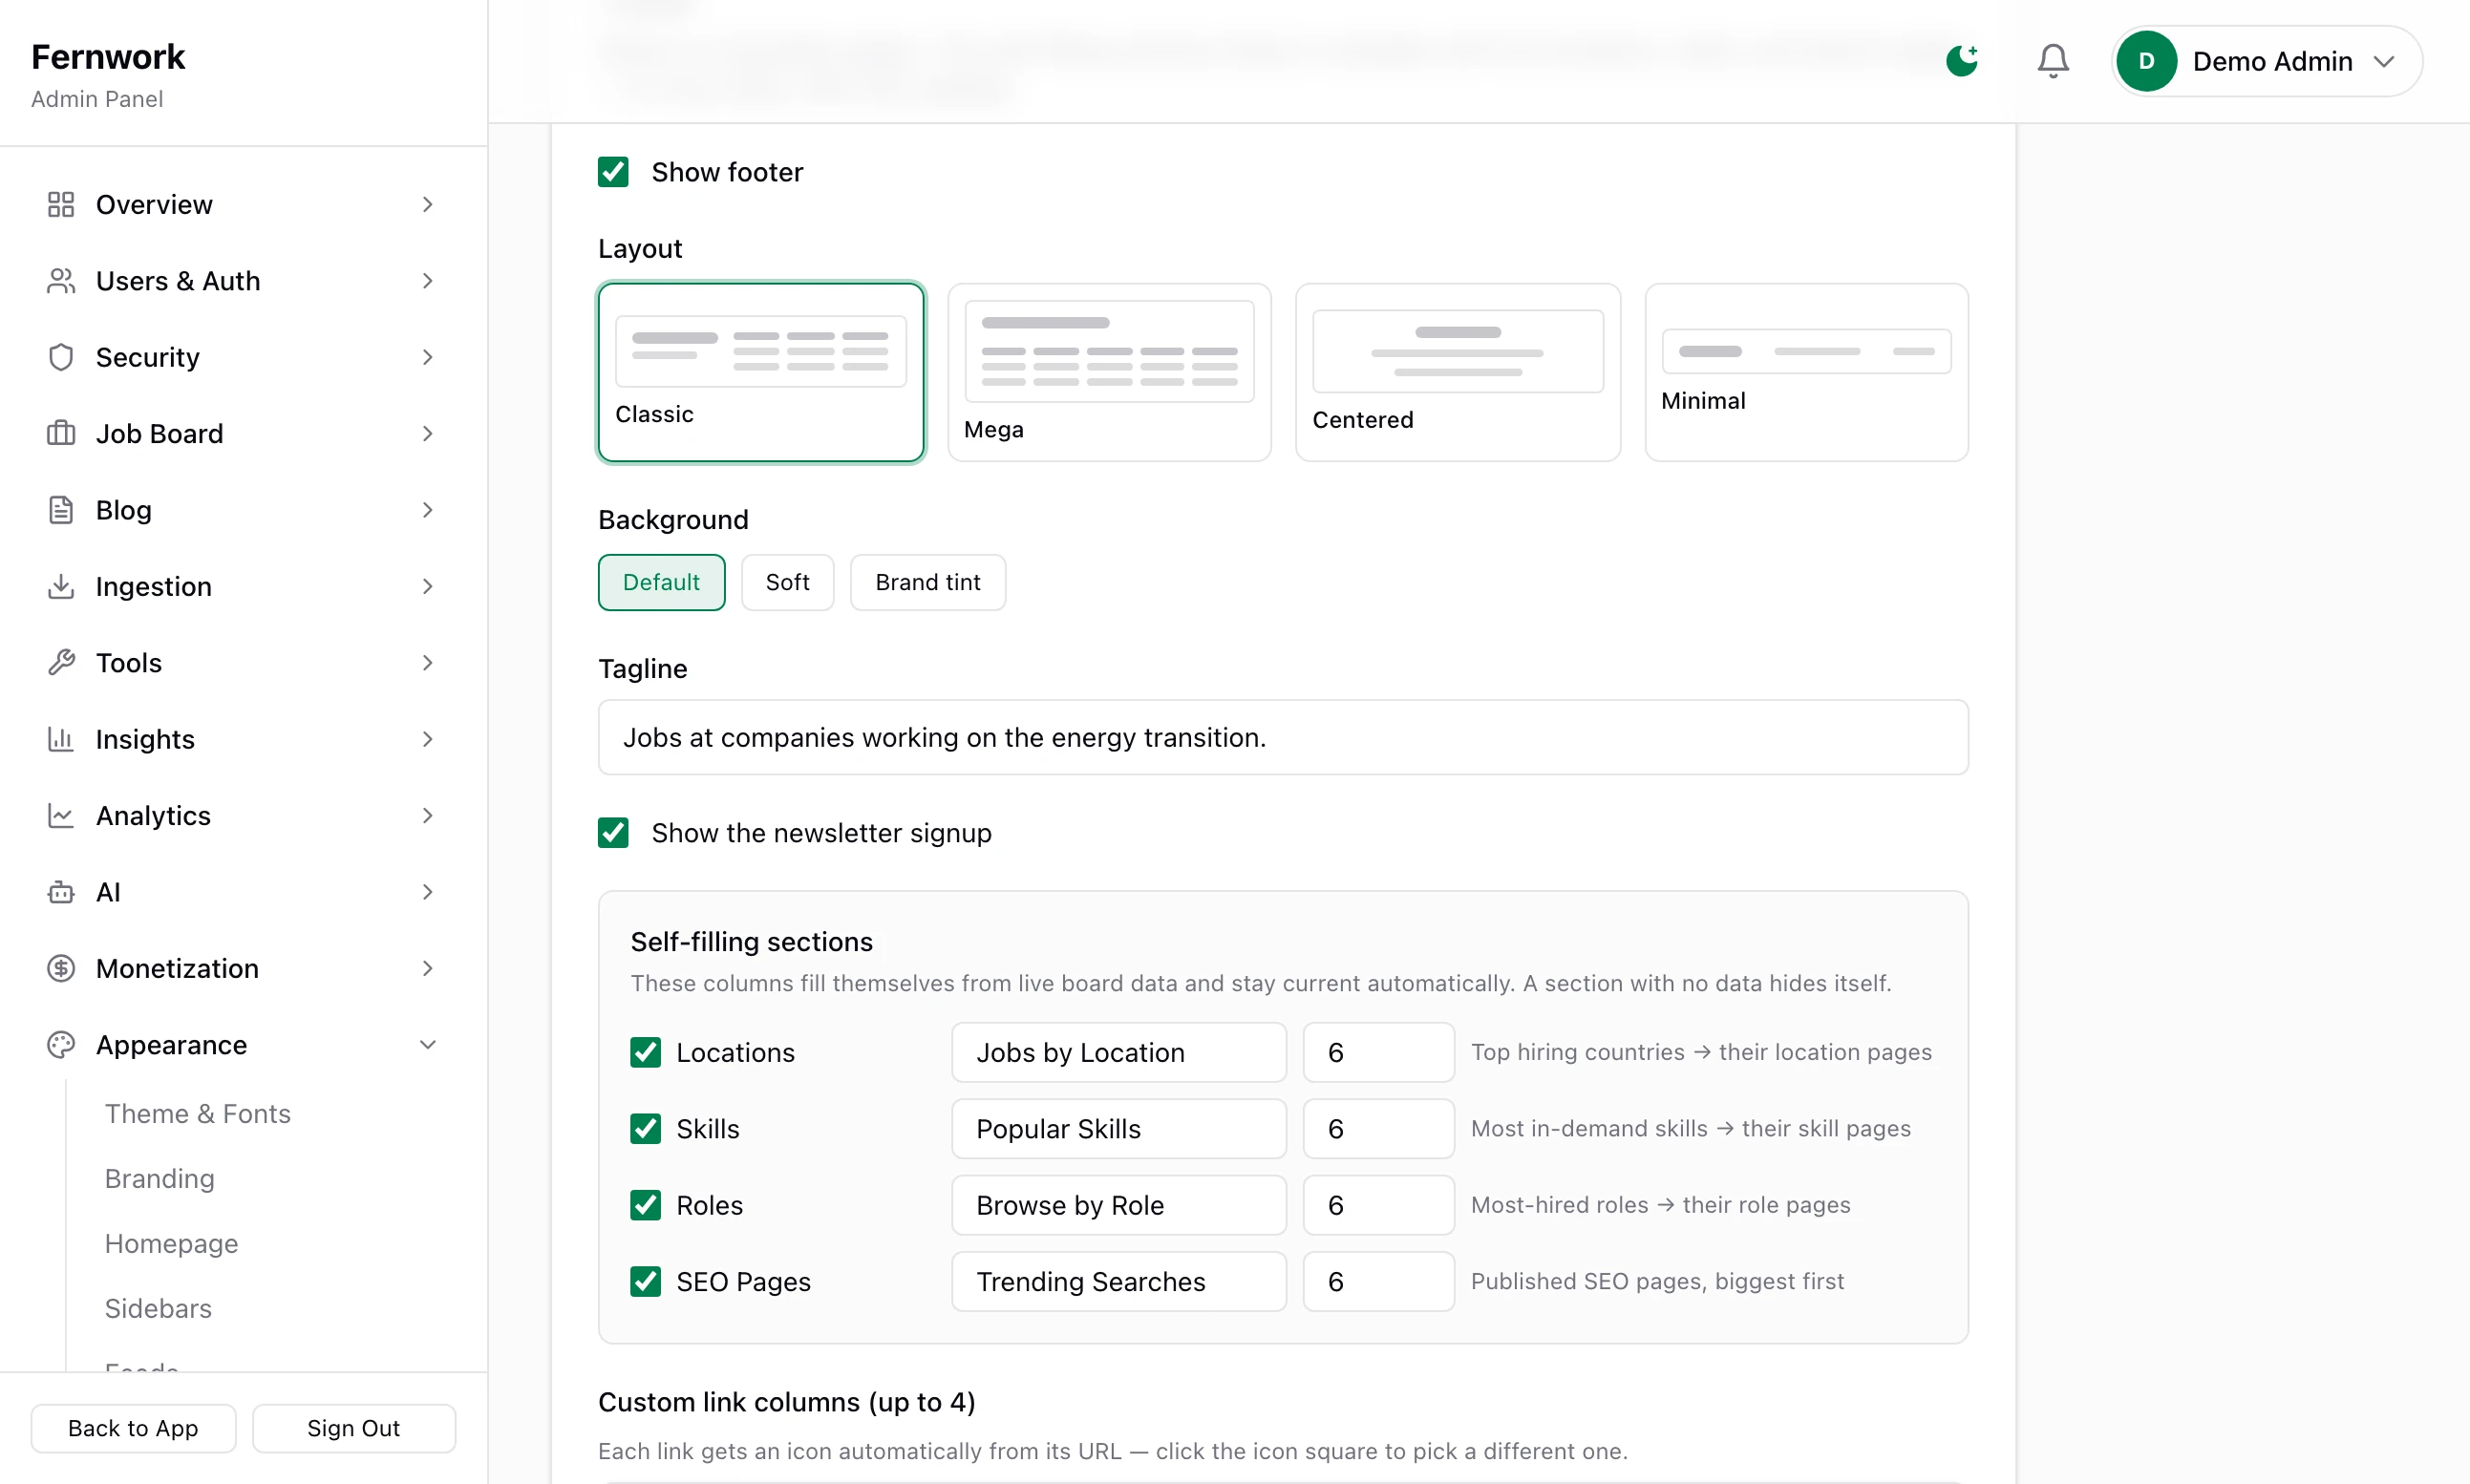
The Header and Header links cards:
Logo display: Logo only, Logo + text or Text only. Logo size runs from Small to Extra large, 24 to 48 pixels tall.
Header links: up to 8, dragged into order. + Add link adds one. Open Sub-items (dropdown) under a link and click + Add sub-item to turn it into a menu of up to 12 links.
+ Add Tools menu puts back the ready-made Tools menu if you have removed it.
The Footer card:
Show footer: untick to remove the footer from every page.
Layout: Classic, Mega, Centered or Minimal. Background: Default, Soft or Brand tint.
Tagline and Show the newsletter signup: a short line under the site name, and the sign-up form.
Self-filling sections: four columns the board fills from its own data, for locations, skills, roles and SEO pages. Each has a tick box, a title and a number of links from 3 to 12. A column with nothing to show hides itself.
Custom link columns (up to 4): your own columns, each with a title and up to 10 links.
Social links: up to 6, each a platform (x, github, linkedin, facebook, youtube or rss) and a full address.
Copyright line:
{year}and{siteName}are filled in for you. The Terms, Privacy and Cookies links always sit beside it.Show the maker's mark: a small "A DC Black product" link under the footer, crediting the software. Untick it to remove it.
Click Save navigation. You see "Saved — header and footer updated."
The name and the niche words#
Two screens under SEO hold the words that appear all over the site.
SEO, then Settings:
Site name: the name in page titles, and in the header and footer unless you have typed a Text logo.
Title template: how every page title ends, for example
%s | Fernwork. Keep the%s: it stands for the page's own title.
Click Save SEO settings. You see "Saved." The rest of that screen is covered in SEO: landing pages, indexing and Search Console.
SEO, then Generation, under Niche framing:
Adjective: the word for your niche, such as
climate. Leave it blank for none.Noun (plural):
jobs,rolesorpositions.
Together they make the phrase in the site's headings. On the board in the pictures they give "Climate Jobs" on the job list and "Climate Jobs in United Kingdom" on a location page. The Preview line shows the address and heading a landing page for one skill would get.
Click Save generation config. You see "Saved — click Generate to apply." Location pages change at once. Landing pages already made keep their old addresses until the next run: click Generate landing pages now to do it straight away.
Legal pages#
Open Settings, then Legal Pages. Terms of Service, a Privacy Policy and a Cookie Policy are live from the first run at /terms, /privacy and /cookies, with standard wording for a job board built from your site name and four details:
Company or legal name: who operates the site. Left empty, your site name is used.
Governing law: the country or state whose law applies to your terms.
Contact email for legal and privacy requests: left empty, your support email is used.
Last updated: shown at the top of all three pages. Left empty, no date is shown.
Below them is a box for each page. Paste your own wording into a box to replace the standard page, as plain text of up to 40,000 characters with a blank line between paragraphs. Click Save legal pages. You see "Legal pages saved".
Currency and support email#
Open Settings, then General, and look under Platform Settings.
Support Email: where replies go when someone answers an email from the board. It is also shown on the advertising page and used on the legal pages when they have no contact email of their own. The board's own warnings are emailed to it when Telegram alerts are not set up.
Site Currency: one of 20 currencies. Every price you sell in uses it: plans, featured jobs and ad placements.
Click Save Settings. You see "Settings saved successfully."
What still needs code#
Three things are not settings in version 1.1.0 and need a developer: adding a font beyond the 26 in the list, changing the five job types and five experience levels, and rewording the emails the board sends.
I uploaded a logo and the header still shows the name
Check that you clicked Save branding, and that Logo display on Navigation & Footer is not set to Text only.
Stuck on a step? Send a message.