Make it your niche
Give the site its name, trade, headline, logo, colours and categories, then clear out the sample content the setup wizard left.
Updated 7 Oct 2026 · written for Local Lab 1.2.1
On this page
Open Site Settings from the top of the Admin Dashboard to change what the site is called, what trade it covers and how it looks. The settings are on five tabs down the left: General, Appearance, Features, Revenue and Footer. This guide covers four of them. Revenue has its own guide.
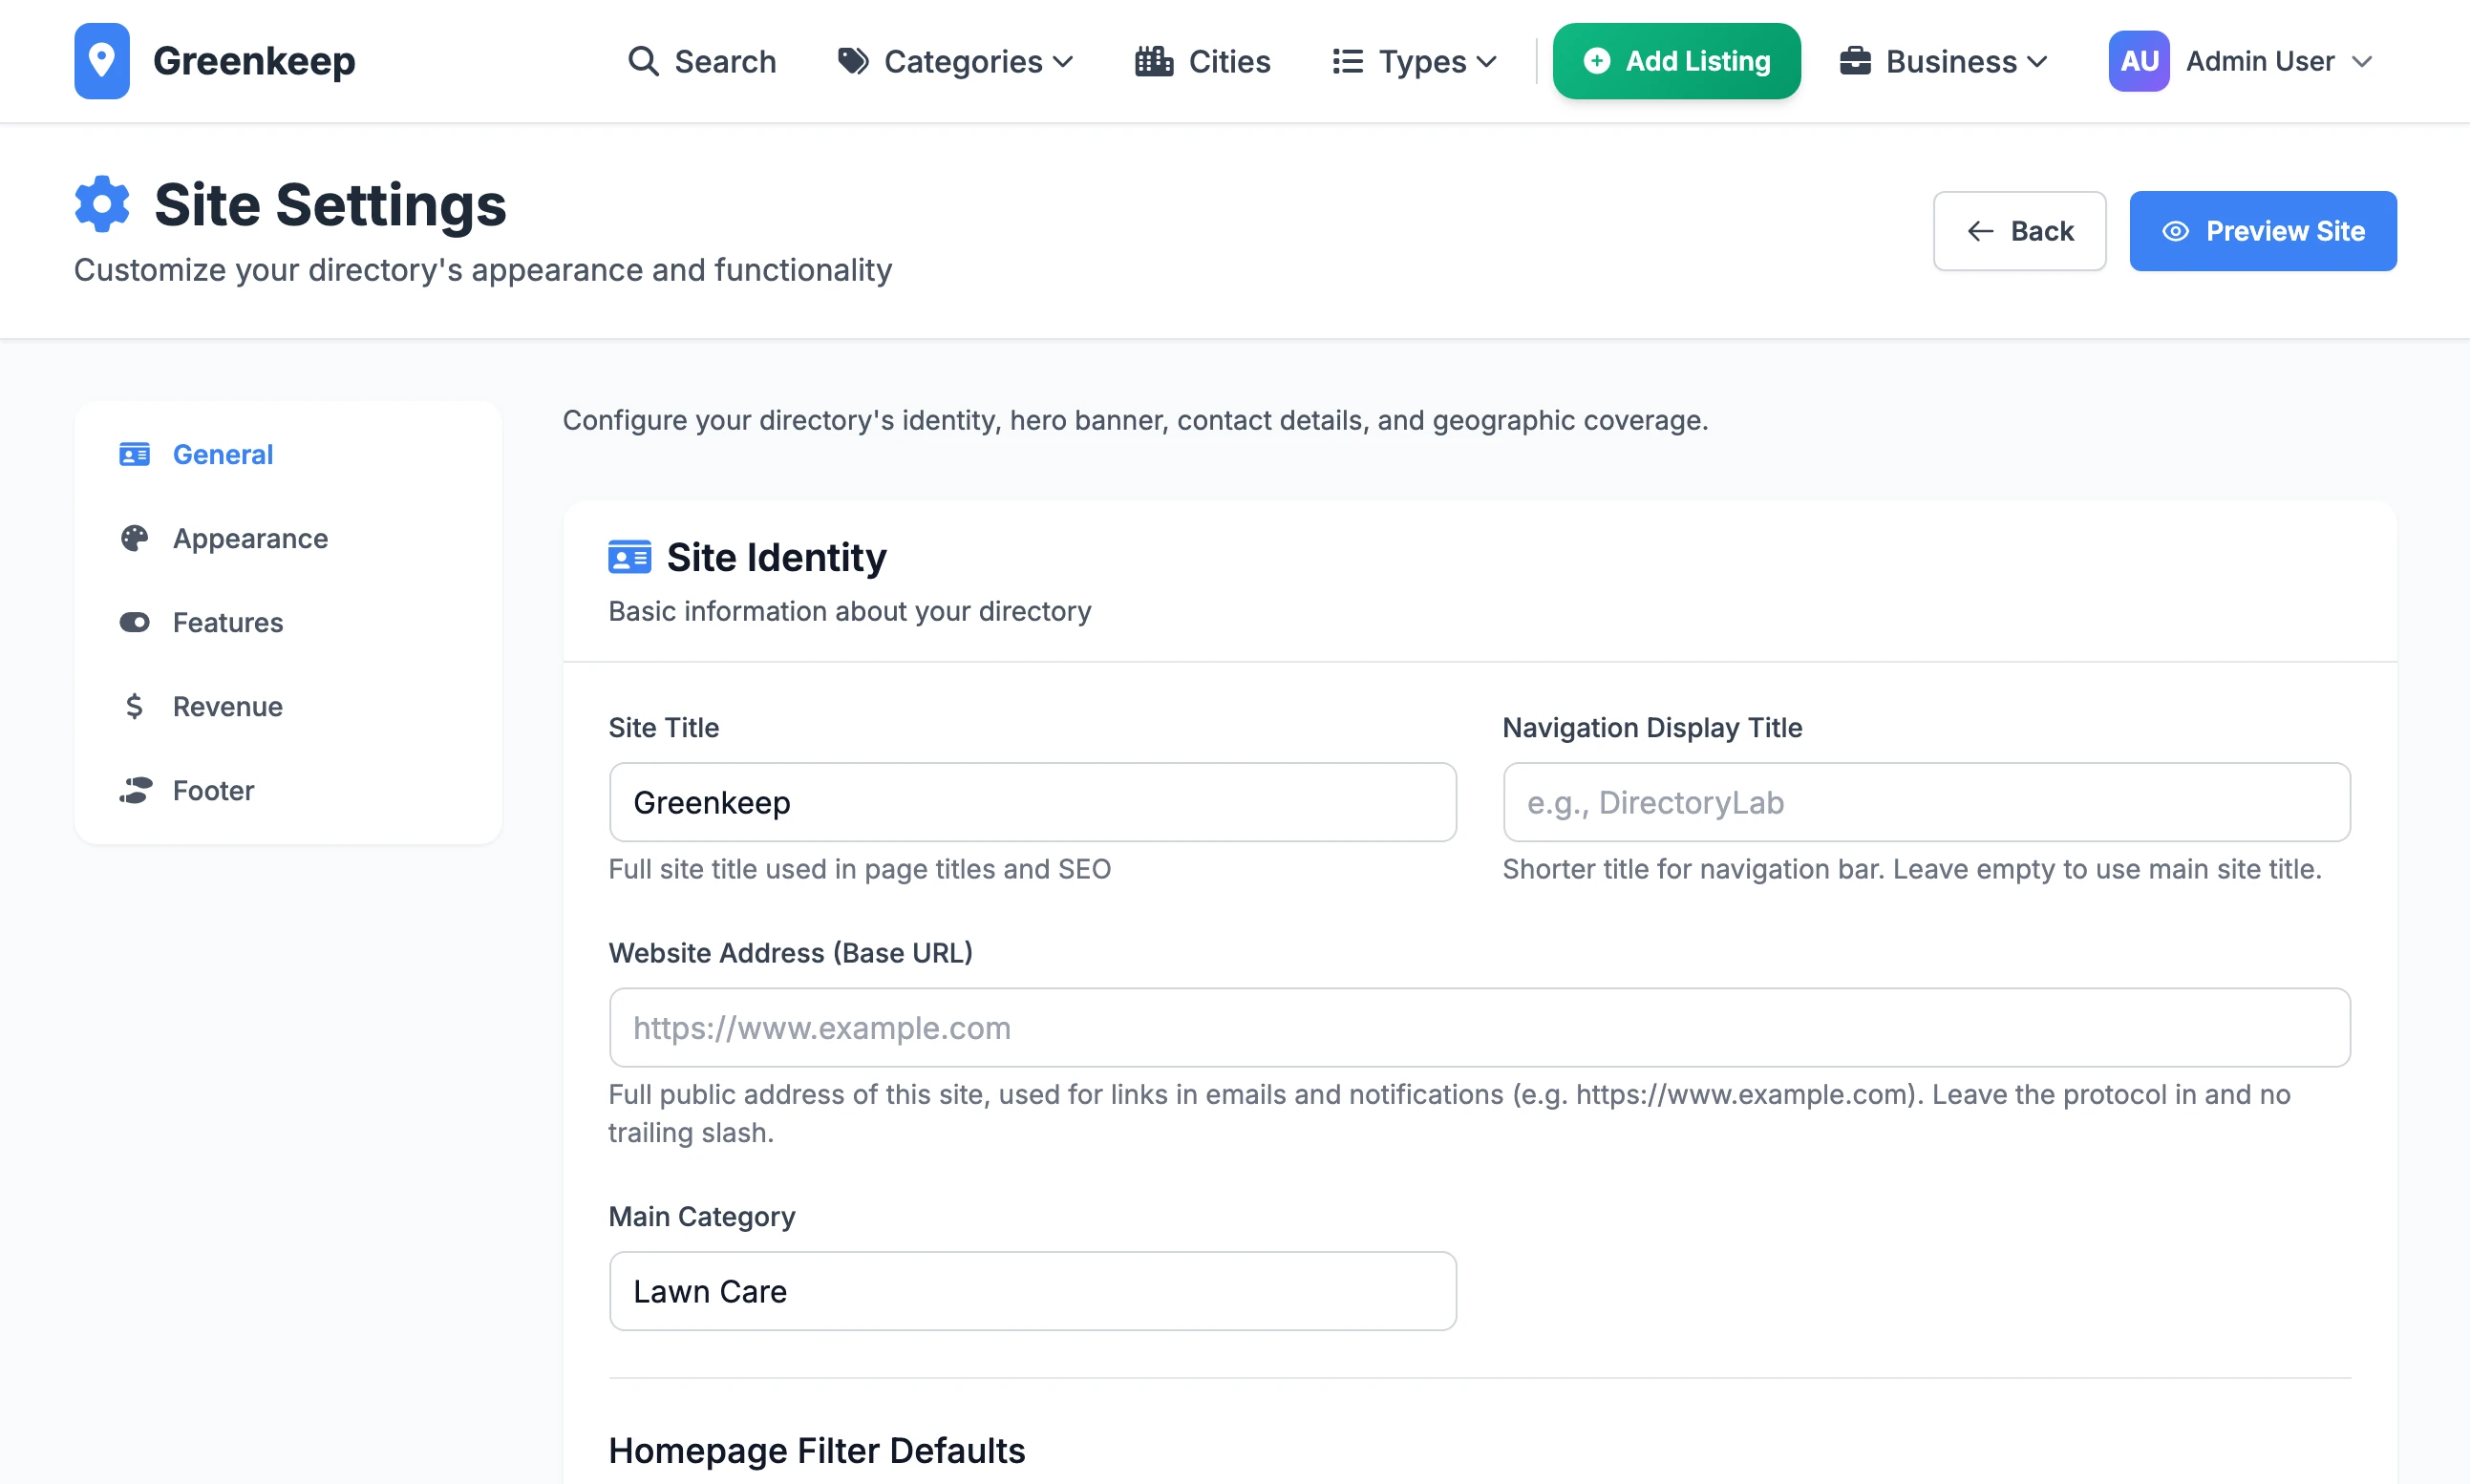
The five tabs are one form. Save Settings, at the bottom of every tab, saves all five at once, so you can move between tabs before you save.
The first pass#
Step 1: Name the site
On General, under Site Identity, set Site Title. It is used in page titles and in the top corner. If it is long, put a shorter one in Navigation Display Title for the top corner only.
Step 2: Set the trade
Main Category is your trade, written the way it should read in a heading. With
Lawn Care, the page for Austin is headed "Lawn Care in Austin" and the list on the home page is headed "All Lawn Care".Step 3: Write the headline
Under Hero Banner & Key Details Section, Hero Title is the large heading on the home page and Hero Subtitle is the line under it. Type
{main_category}or{site_title}anywhere in either and it is swapped for the real thing.Step 4: Add your logo
Under Site Logo, choose an image file. Do the same under Favicon for the small icon in the browser tab.
Step 5: Choose colours and fonts
On the Appearance tab, set the six colours and the two fonts. Each font has a live preview.
Step 6: Click Save Settings
Then use Preview Site, at the top of the page, to see the result.
General#
Site Identity#
Site Title: the full name, used in page titles.
Navigation Display Title: a shorter name for the top corner. Leave it empty to use the Site Title.
Website Address (Base URL): the public address of the site, such as
https://www.example.com, with no slash on the end. Links in the emails the site sends are built from it. Leave it empty until the site has its address.Main Category: the trade. See the warning above.
Primary Category and Primary Type, under Homepage Filter Defaults: the words shown in the two filter menus on the home page before a visitor picks anything. They do not filter the list.
Show Title on Desktop and Show Title on Mobile: untick both to show the logo with no name beside it.
Site Title Color, Site Title Font and Navigation Title Font Size: the look of the name in the top corner, with a live preview.
Site Description: one or two sentences about the site. The footer uses it when its own About text is empty.
Logo and favicon#
Site Logo takes a JPG, PNG, GIF or WebP file of up to 5 MB. It replaces the map pin in the top corner. Site Logo URL is the alternative: the web address of an image hosted elsewhere.
Favicon takes a PNG or JPG of up to 5 MB. The site crops it square and makes the icon in six sizes. The largest is 512 by 512 pixels, so upload a square image at least that big. Transparent areas turn white. Favicon URL is the alternative.
Hero Banner & Key Details Section#
Hero Title and Hero Subtitle: the home page headline. Leave the title empty and it reads "Find the Best" followed by your Main Category.
Key Details Background Color and Key Details Section Height: despite the section's name, these two style the band at the top of each business page, not the home page.
Contact & Social Media#
Contact Email, Contact Phone, Contact Address and the four profile links (Facebook URL, Twitter URL, Instagram URL, LinkedIn URL) are shown in the footer. Social Media Icons Color colours the icons.
Geography Configuration#
Available Countries limits which countries listings can be in. Leave every box unticked to allow all the countries your directory has. Countries and cities are added on Cities.
Appearance#
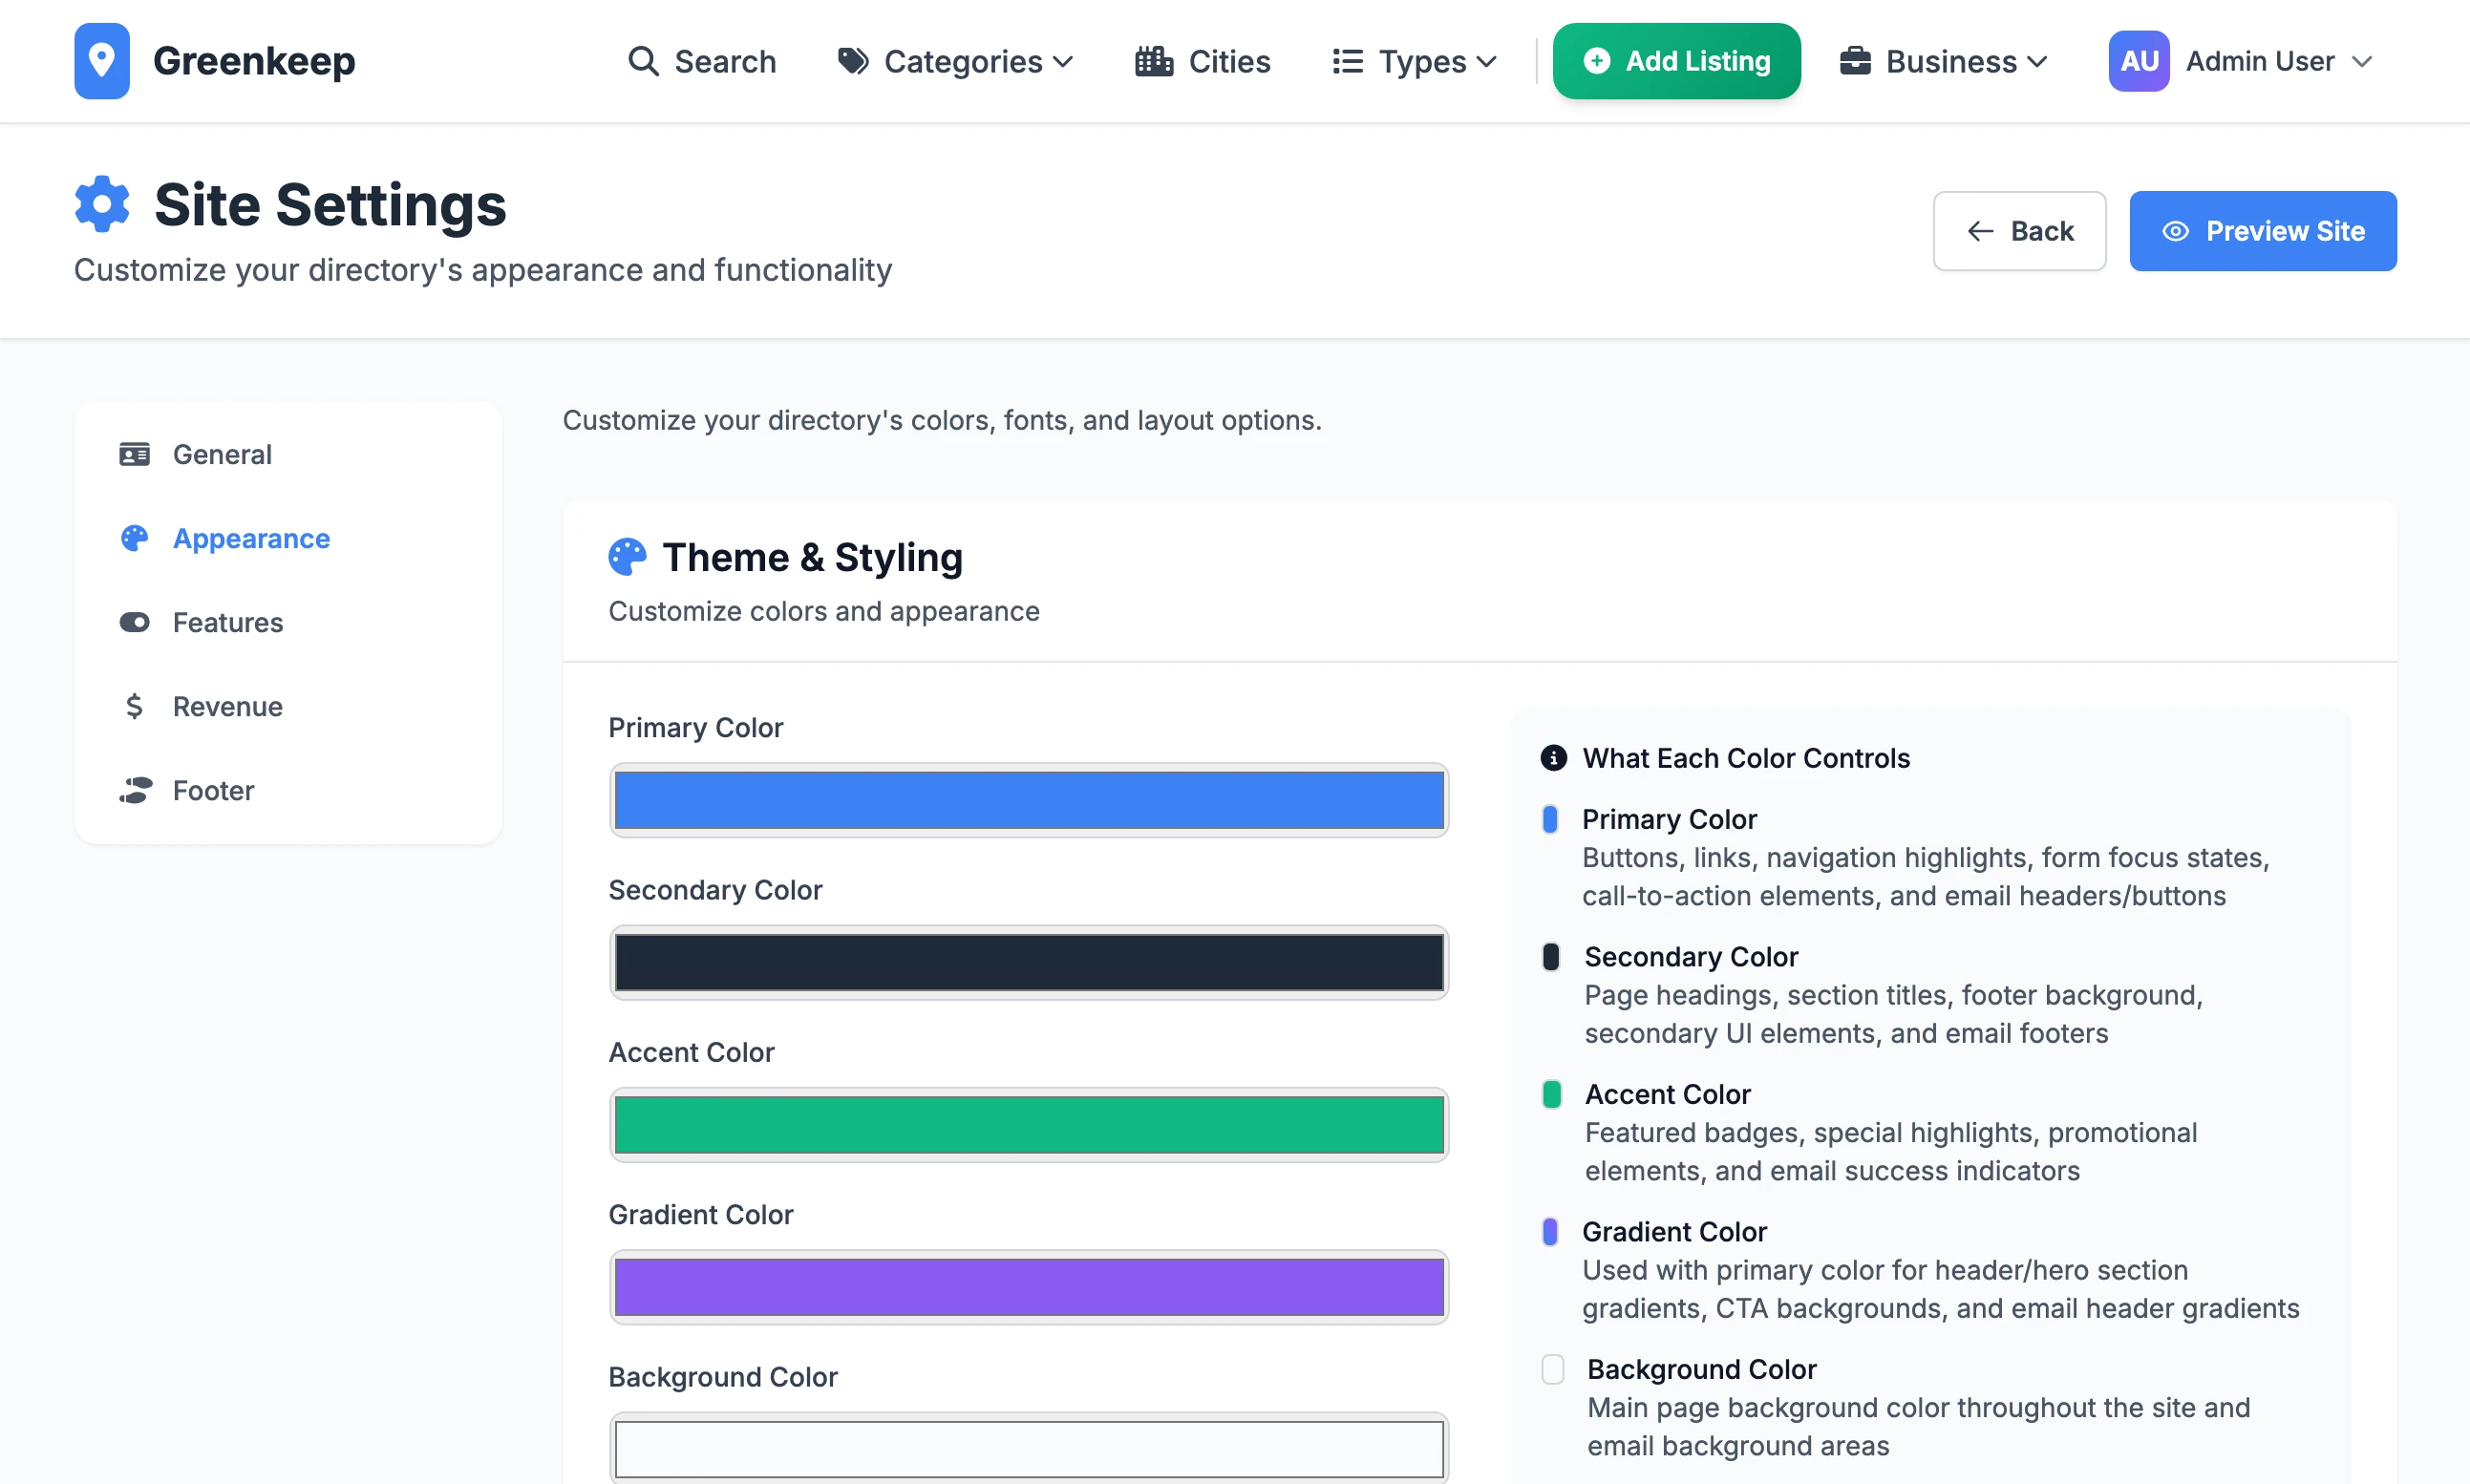
Under Theme & Styling there are six colours. The page explains each one under What Each Color Controls:
| Colour | Used for |
|---|---|
| Primary Color | Buttons, links and highlights in the menu. |
| Secondary Color | Page headings, section titles and the footer background. |
| Accent Color | Featured badges and other highlights. |
| Gradient Color | Blended with the primary colour behind the home page headline and the call-to-action bands. |
| Background Color | The page background. |
| Text Color | Body text. |
The same colours are used in the emails the site sends.
Primary Font is for body text, buttons and forms. Heading Font is for titles, headings and the menu. There are 30 to choose from, and both start as Inter.
Homepage Layout: Full Width, Left Sidebar or Right Sidebar. A new site is Full Width.
Card Layout Style: Featured Image Cards put a business's picture across the top of its card. Logo Compact Cards are smaller and show its logo. A new site uses Logo Compact Cards.
Features#
Items Per Page: how many businesses on each page of a list, from 6 to 50. It starts at 12.
Listings Per Row: how many cards across, from 1 to 6. It starts at 3.
Enable Reviews, Enable Ratings and Enable Pricing: switch those parts of a business page on or off.
Require Listing Approval: when ticked, a listing an owner submits waits for you. Untick it and new listings go live at once.
Show Categories Section on Homepage, Show Categories Filter in Sidebar, Show Types Section and Filtering and Show Types Filter in Sidebar: hide the parts you do not use. A directory with no use for types can untick both type boxes.
Show Email on Listing Pages: whether a business's email address is shown to the public.
USP Section Title: the heading over a business's selling points. It starts as "Why Choose Us".
Custom Fields Section Title and Enable Custom Fields: see Custom fields.
Footer#
Footer Layout: three choices. About + Links + Contact is the one a new site has. About + Two Link Columns swaps the contact column for a second column of links. About + Links + More Links has four columns: about, two of links and contact.
Footer About Title and Footer About Text: the first column. Empty text falls back to your Site Description.
Footer Contact Title: the heading over your contact details.
Footer Copyright Text: leave it empty for "© year Site Title. All rights reserved." To put a link in it, write
[Link Text](https://example.com).First Links Column Title and Second Links Column Title, then Add Link to Column 1 and Add Link to Column 2: up to ten links in each column, each with a text and a URL.
Footer Background Color, Footer Text Color and Footer Title Color.
Show Social Media Links: the icons for the profiles you entered on the General tab.
Categories#
Open Categories under Quick Actions. Categories are the services within your trade. A business can be in more than one, and each category has its own public page.
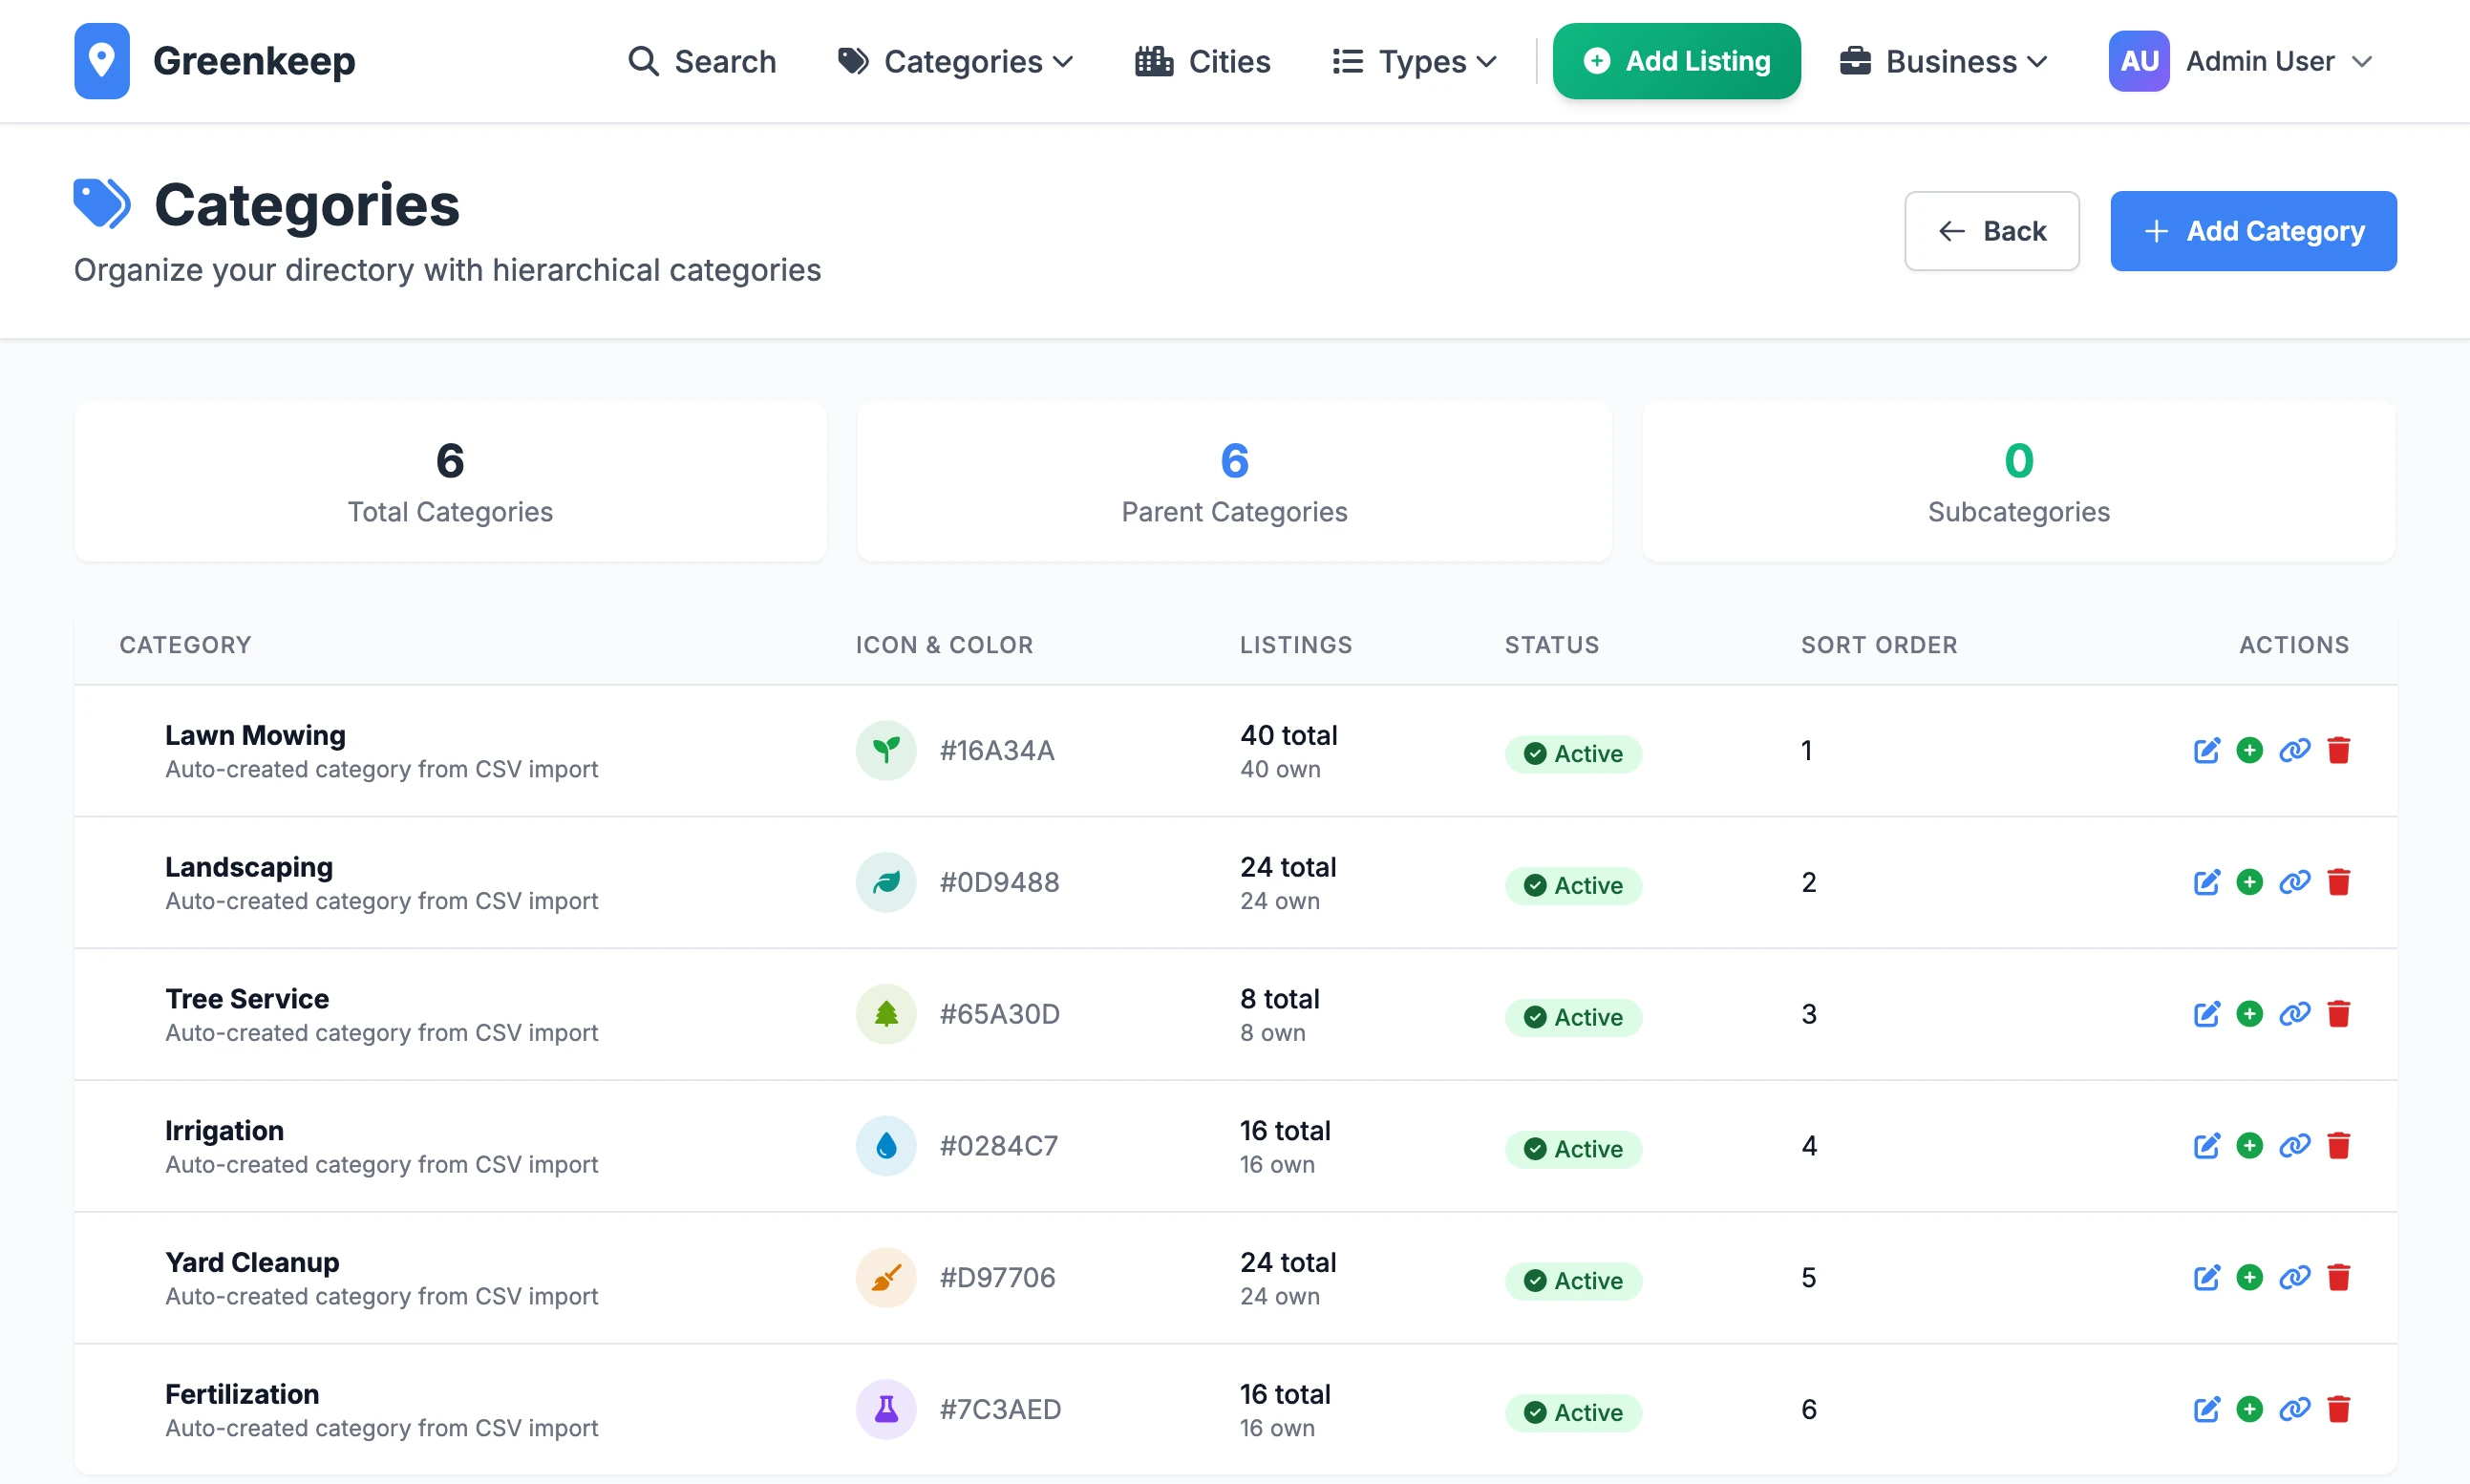
Click Add Category:
Category Name: what visitors see.
Parent Category: leave it on -- Top Level -- for a main category, or pick a parent to make a subcategory. There are two levels only.
Font Awesome Icon Class: the icon, for example
fas fa-leaf. The Popular icons buttons fill it in for you.Category Color: the colour of the category's badge.
Sort Order: lower numbers come first.
Active: untick to hide the category from visitors without deleting it.
In the list, each row has icons to edit, add a subcategory, Assign All Listings and delete. Click a row's Active or Inactive pill to switch it. Assign All Listings adds the category to every live listing and removes nothing.
Deleting a category#
The delete icon opens a box with three choices:
| Choice | What happens |
|---|---|
| Delete category only | The category goes. Its listings are kept and lose this category. |
| Delete category AND its listing(s) | The category and every listing in it are deleted for good, with their reviews, prices and selling points. |
| Delete the listing(s) only | The category stays and every listing in it is deleted. |
Deleting a parent deletes its subcategories too. A category that a customer's quote request points at cannot be deleted: you are told how many lead requests reference it. Delete those requests on Leads first.
Types#
Open Types under Quick Actions. A type is a second label that cuts across categories: the wizard adds Independent, Franchise and Mobile. A business can have more than one, and visitors can filter by them.
Add Type has the same fields as a category, without a parent: Type Name, Description, Font Awesome Icon Class, Type Color, Sort Order and Active.
A type can be deleted only when no listing uses it. Until then its row has no delete icon.
Custom fields#
A custom field is an extra question on the listing form, such as "Years in Business" or "Licence Number". The answers are shown in the sidebar of the business page, under the Custom Fields Section Title.
Custom Fields is not in Quick Actions. Open Site Settings, choose the Features tab and click Manage Custom Fields, then Add Custom Field:
Field Name: the label.
Field Type: Text Input, Text Area, Number, Email, URL or Select Dropdown. For a dropdown, type the choices in Select Options with commas between them.
Placeholder Text and Help Text: hints for the person filling it in.
Required Field: the listing form will not submit until it has an answer.
Sort Order and Active.
The field appears on the listing form in the admin and on the form business owners use. Each field has an Add button beside it on the form, so one business can give several answers to the same question.
Clear out the sample content#
The setup wizard left three sample listings, five categories, three types and five cities. Remove them in this order.
Step 1: Delete the three sample listings
Open Listings and tick Premier Pro Services, CityWide Solutions and Elite Mobile Services. Then click Delete in the bar above the table.
Step 2: Rename or delete the five categories
On Categories, edit Residential, Commercial, Emergency, Maintenance and Consultation into the services of your trade, or delete them and add your own.
Step 3: Sort out the types
On Types, keep Independent, Franchise and Mobile if they fit. With the sample listings gone, the ones you do not want can be deleted.
Step 4: Remove cities you will not cover
On Cities, tick the starter cities you do not need and click Delete Selected. A city with listings is skipped.
I changed a colour and nothing changed
Click Save Settings at the bottom of the tab, then reload the public page. A save that worked shows "Site settings updated successfully!" at the top. If you do not see it, a box somewhere did not pass its check, for example an Items Per Page outside 6 to 50. The message is in red under that box, which may be on another tab.
Can I have more than two levels of category?
No. A category is either top level or a subcategory of a top-level one.
Where do I change page titles for search engines?
On SEO under Quick Actions. See SEO settings and page templates.
Stuck on a step? Send a message.