Sell featured listings
Three paid placements, on the home page, in a city and in a category. How to price them, connect them to Stripe, and what you and your buyers see.
Updated 8 Oct 2026 · written for Local Lab 1.2.0
On this page
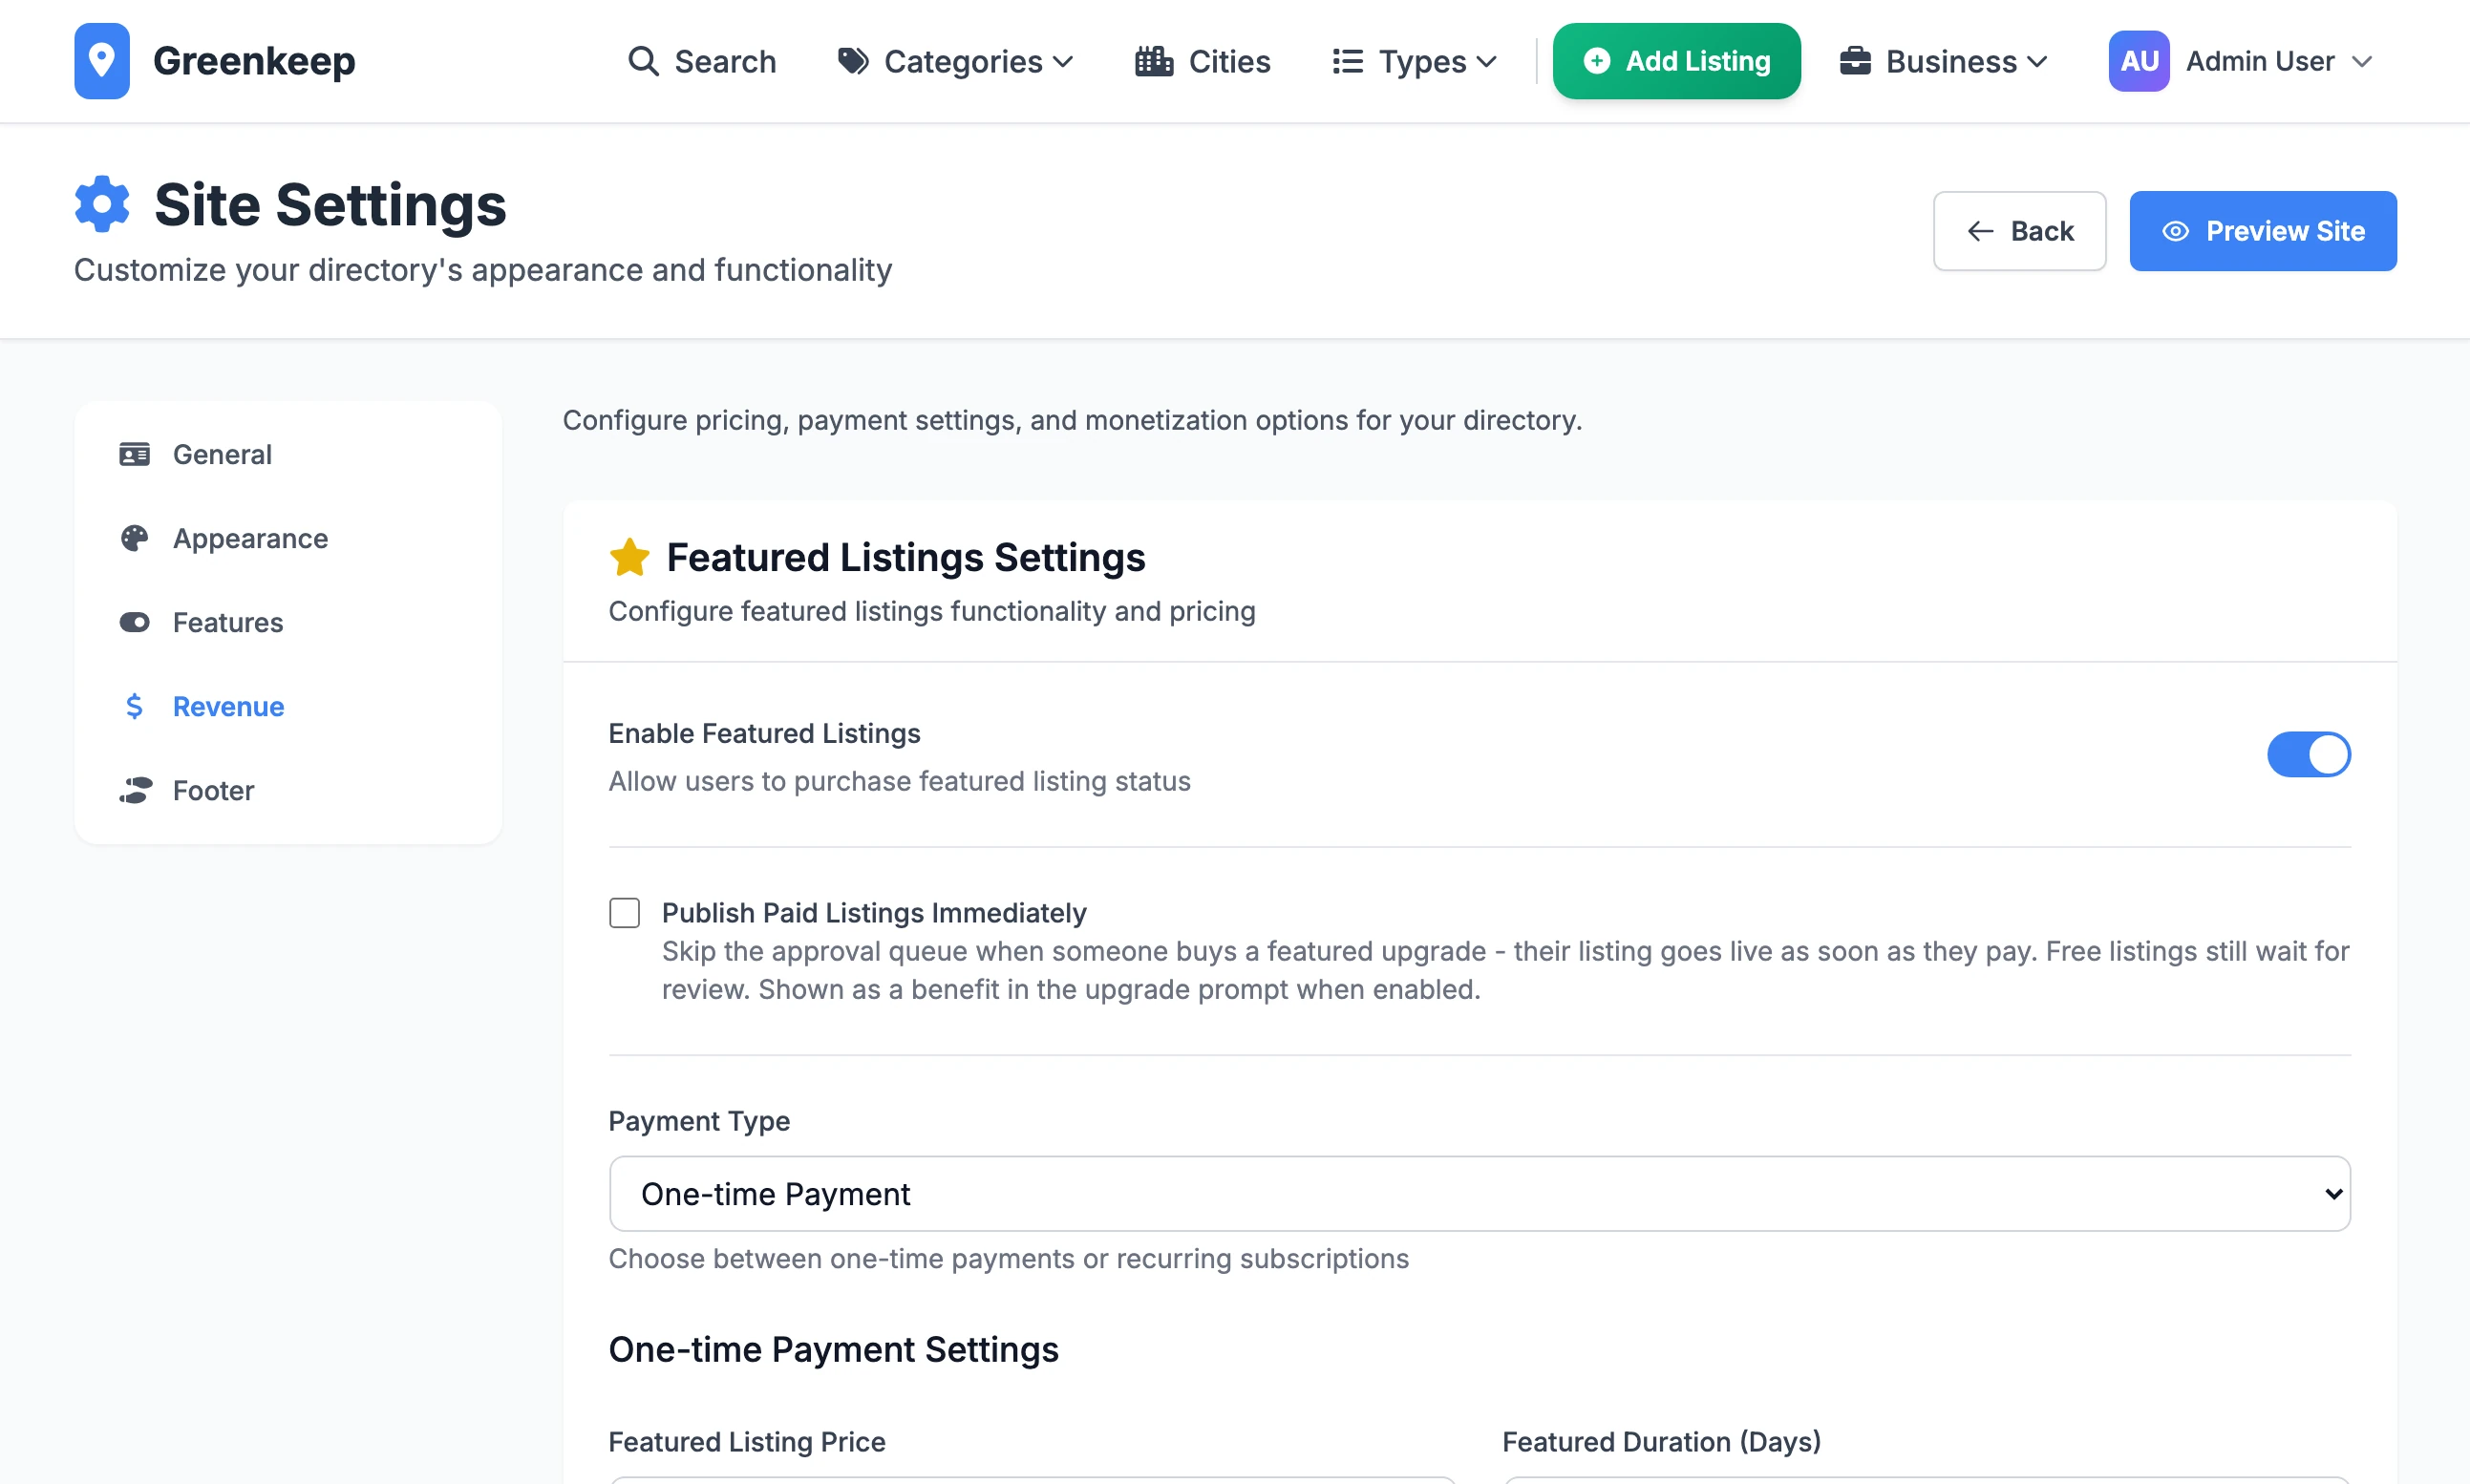
Open Site Settings from the top of the Admin Dashboard and choose the Revenue tab to switch on featured listings and set their prices. A business owner pays to be shown first; Local Lab takes the payment through Stripe, puts the listing at the top and takes it down again when the time is up.
The three placements#
| Placement | Where the listing is shown first | Badge | To begin with |
|---|---|---|---|
| Homepage featured | The main list on the home page, and ahead of ordinary listings on city and category pages too | Featured, with a star | On. 3 places, 29.99 for 30 days |
| City featured | The pages for one city | Featured, with a map pin | On. 2 places in each city, 9.00 for 30 days |
| Category featured | The pages for one category | Sponsored | Off. 2 places in each category, 9.00 for 30 days |
Each one can be sold as a one-time payment for a number of days, or as a subscription that renews until it is cancelled. The number of places is a limit you set: when they are all taken, nobody else can buy one until a place frees up. That scarcity is what makes a place worth paying for.
Before you start#
You need a Stripe account with its keys saved in Local Lab: see Connect Stripe. They go further down the Revenue tab under Stripe API Keys, and saving them asks for your admin password.
Set up a placement#
These steps use homepage featured. City and category featured have the same fields under their own headings further down the tab.
Step 1: Create the price in Stripe
Local Lab does not create anything in Stripe for you. In your Stripe dashboard, add a product called something like "Homepage featured listing" and give it a price:
a One-off price if you will sell a number of days, or
a Recurring price, monthly or yearly, if you will sell a subscription.
Copy the price's ID. It starts with
price_. Create your prices has the clicks, and where Stripe keeps the ID.Step 2: Switch it on
On the Revenue tab, under Featured Listings Settings, turn on Enable Featured Listings.
Step 3: Choose how it is paid for
Set Payment Type to One-time Payment or Monthly Subscription. The subscription fields appear when you choose it.
Step 4: Type the price and the length
Featured Listing Price and Featured Duration (Days) for a one-time payment.
Subscription Price and Subscription Interval for a subscription.
Step 5: Set the number of places
Max Featured Listings is how many businesses can be homepage featured at once, from 1 to 20. Check Currency and Currency Symbol while you are here.
Step 6: Paste in the Stripe price
Under Stripe Configuration, paste the ID into Stripe Price ID (One-time) or Stripe Price ID (Subscription), whichever matches your Payment Type.
Step 7: Click Save Settings
The button is at the bottom of the page. The placement is on sale from the next page anyone loads.
What a business owner sees#
An owner who is signed in finds a way to feature their listing in several places: a Feature This link on their dashboard, a Feature button on My Listings, and Feature This Listing on their own public page. All of them lead to the same page.
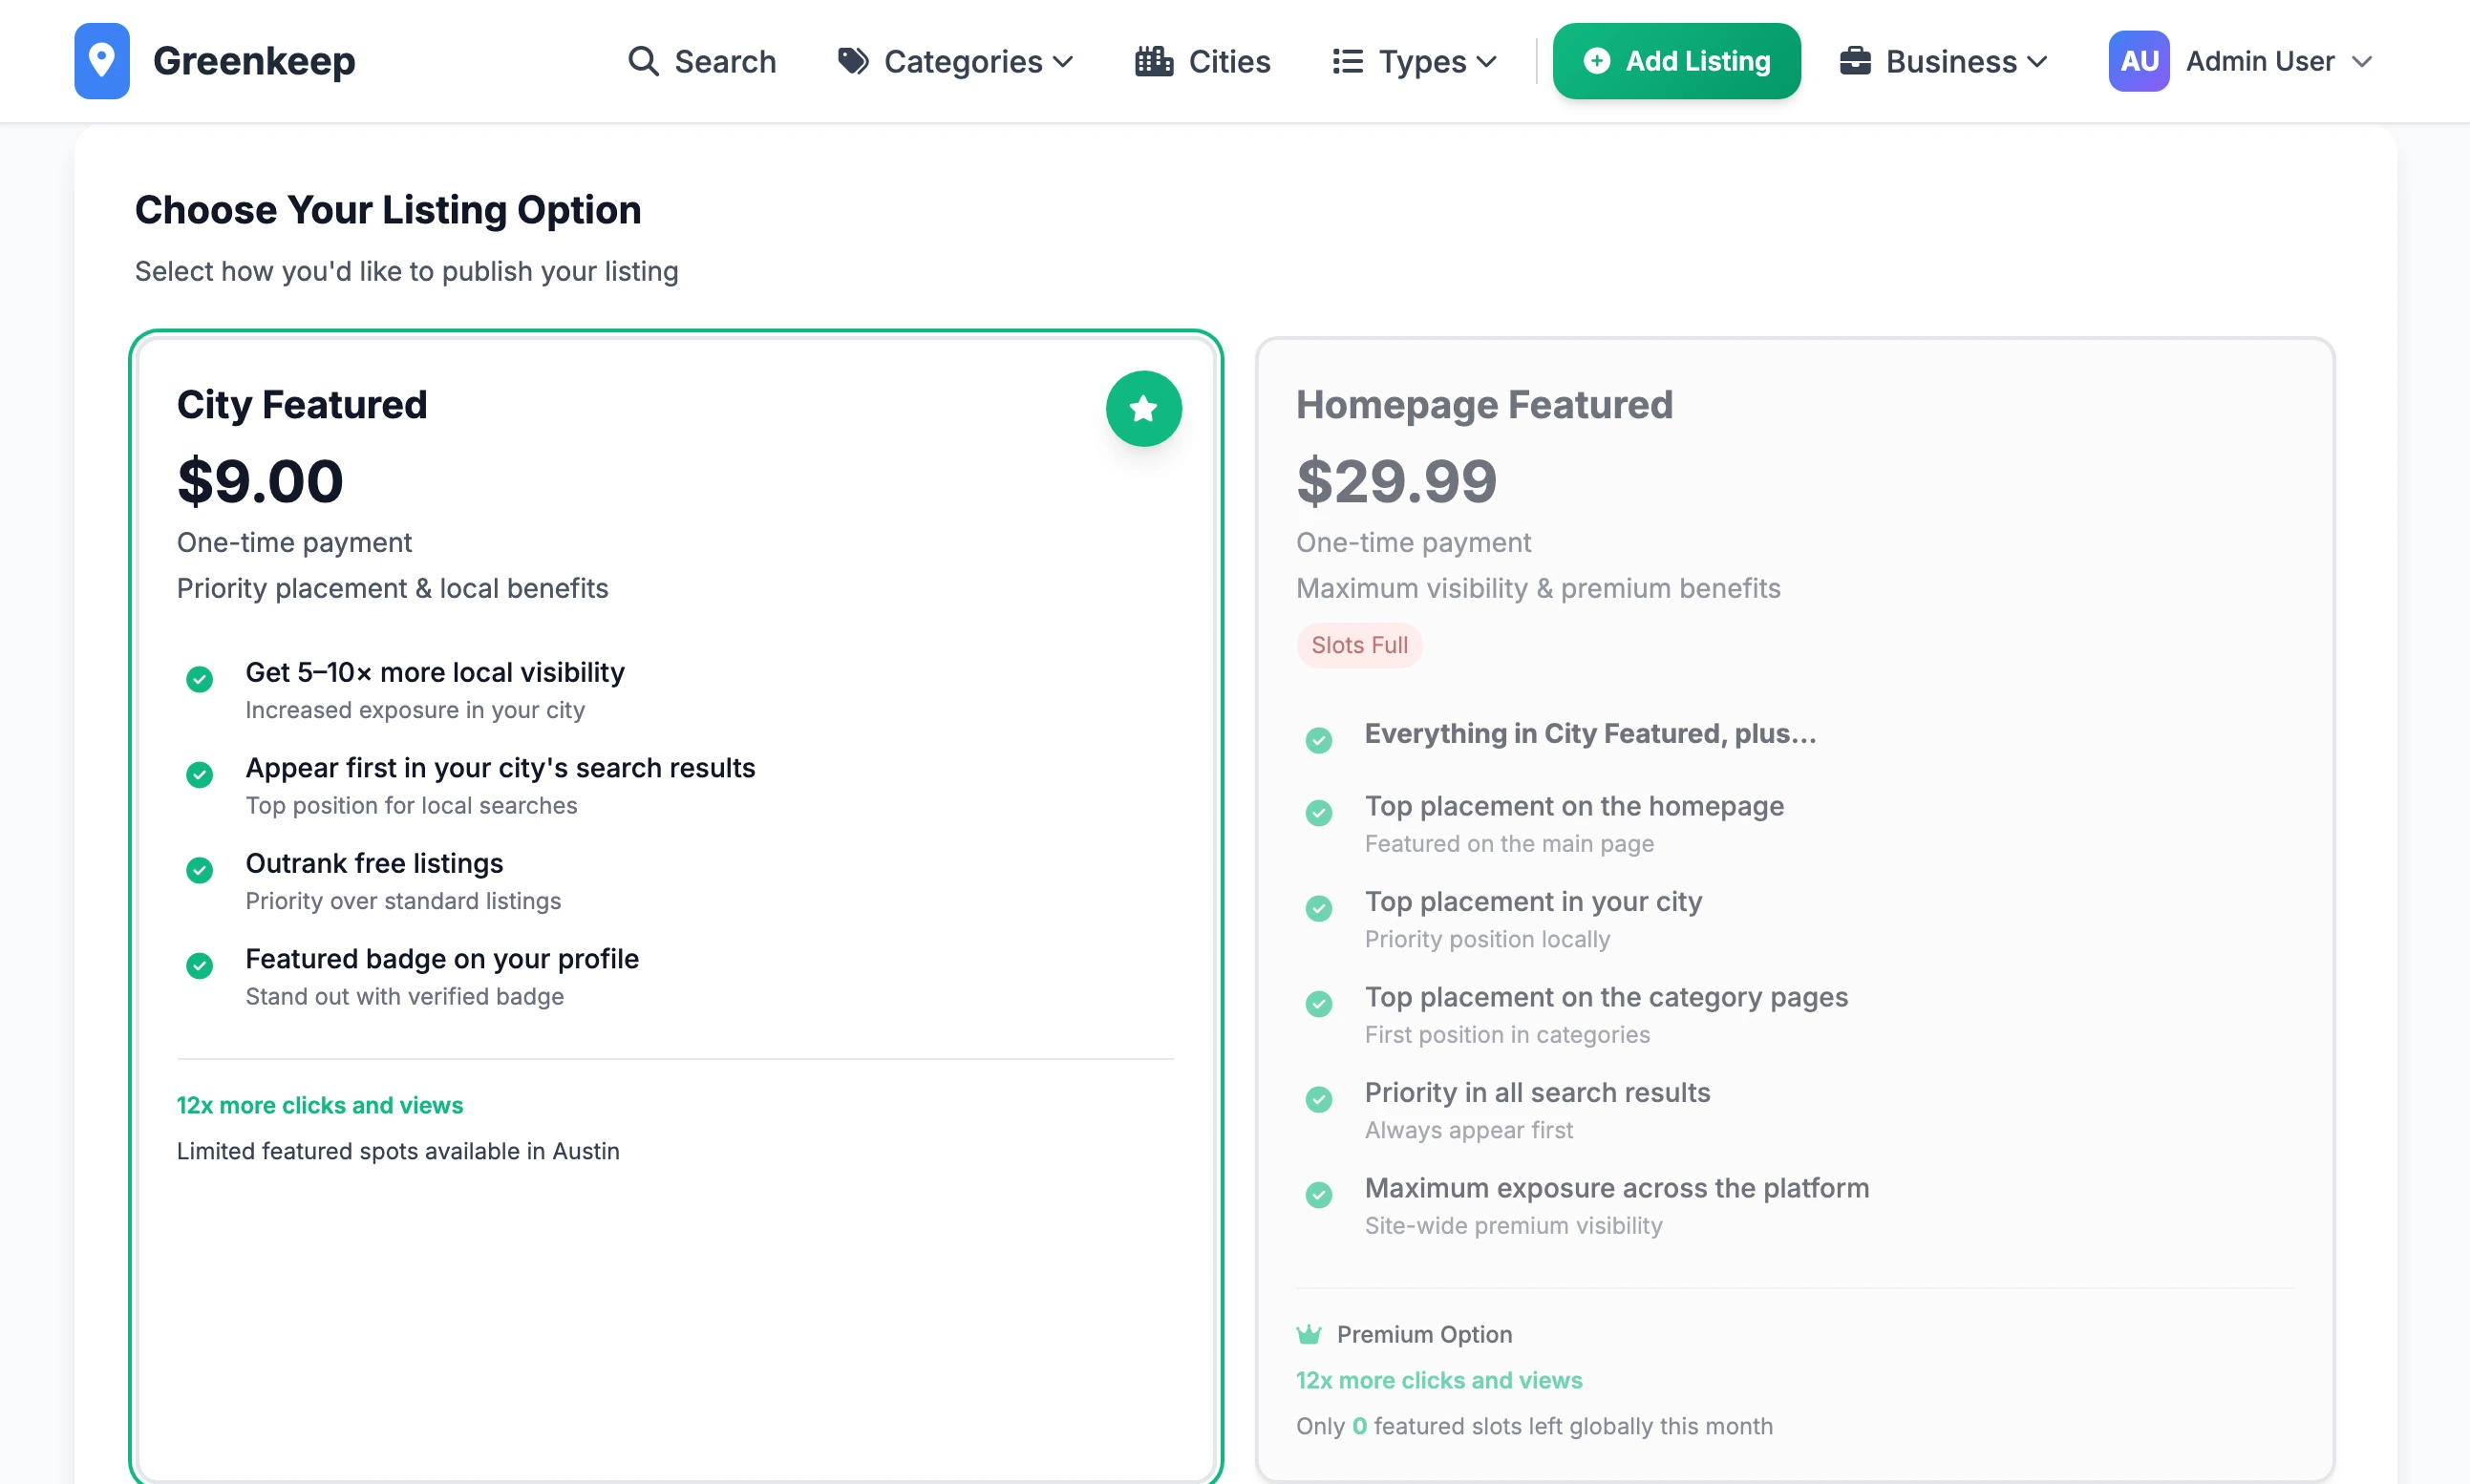
There is a card for each placement you have switched on, with your price and whether it is a one-time payment or a subscription.
A placement with no places left is greyed out and marked Slots Full. There is no waiting list.
The button at the bottom names what they chose, for example Publish City Featured Listing. It takes them to Stripe to pay by card.
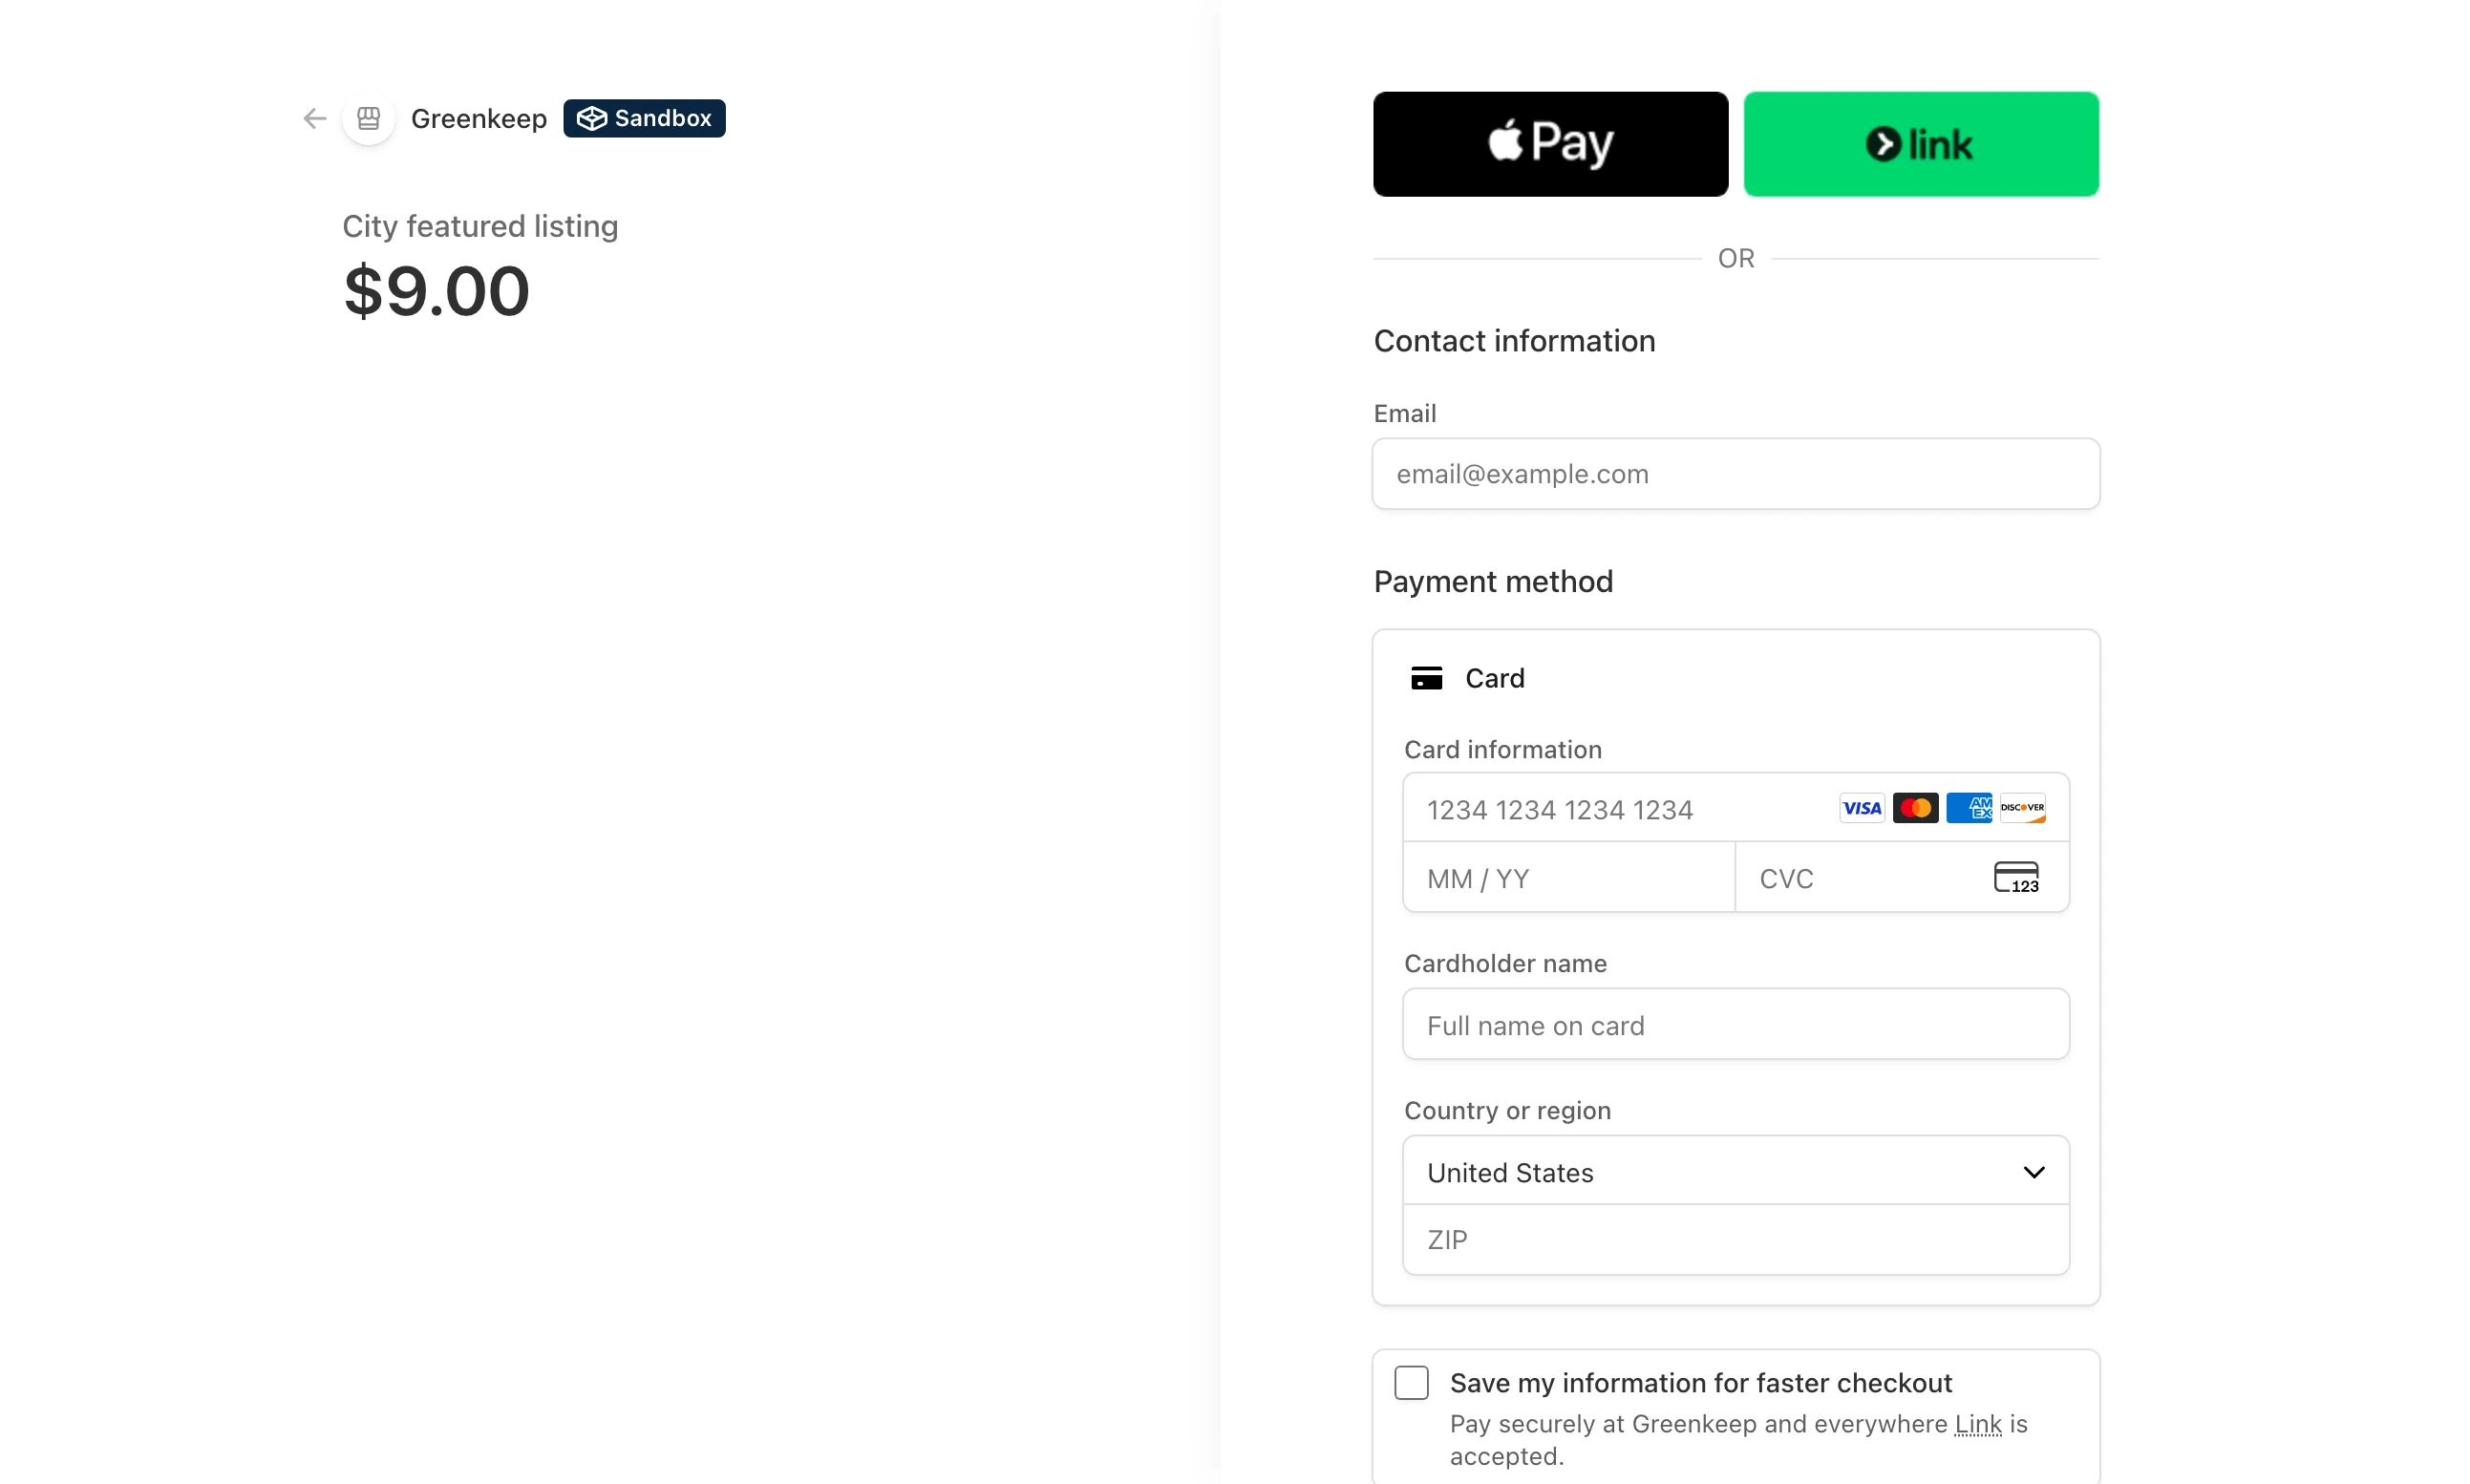
When they come back from Stripe the listing is featured straight away, under a message such as "Congratulations! Your listing is now featured in Austin for 30 days."
Where featured listings show#
Homepage featured listings take the first places in the main list on the home page, with a Featured badge. They are not in a separate strip: they come first.
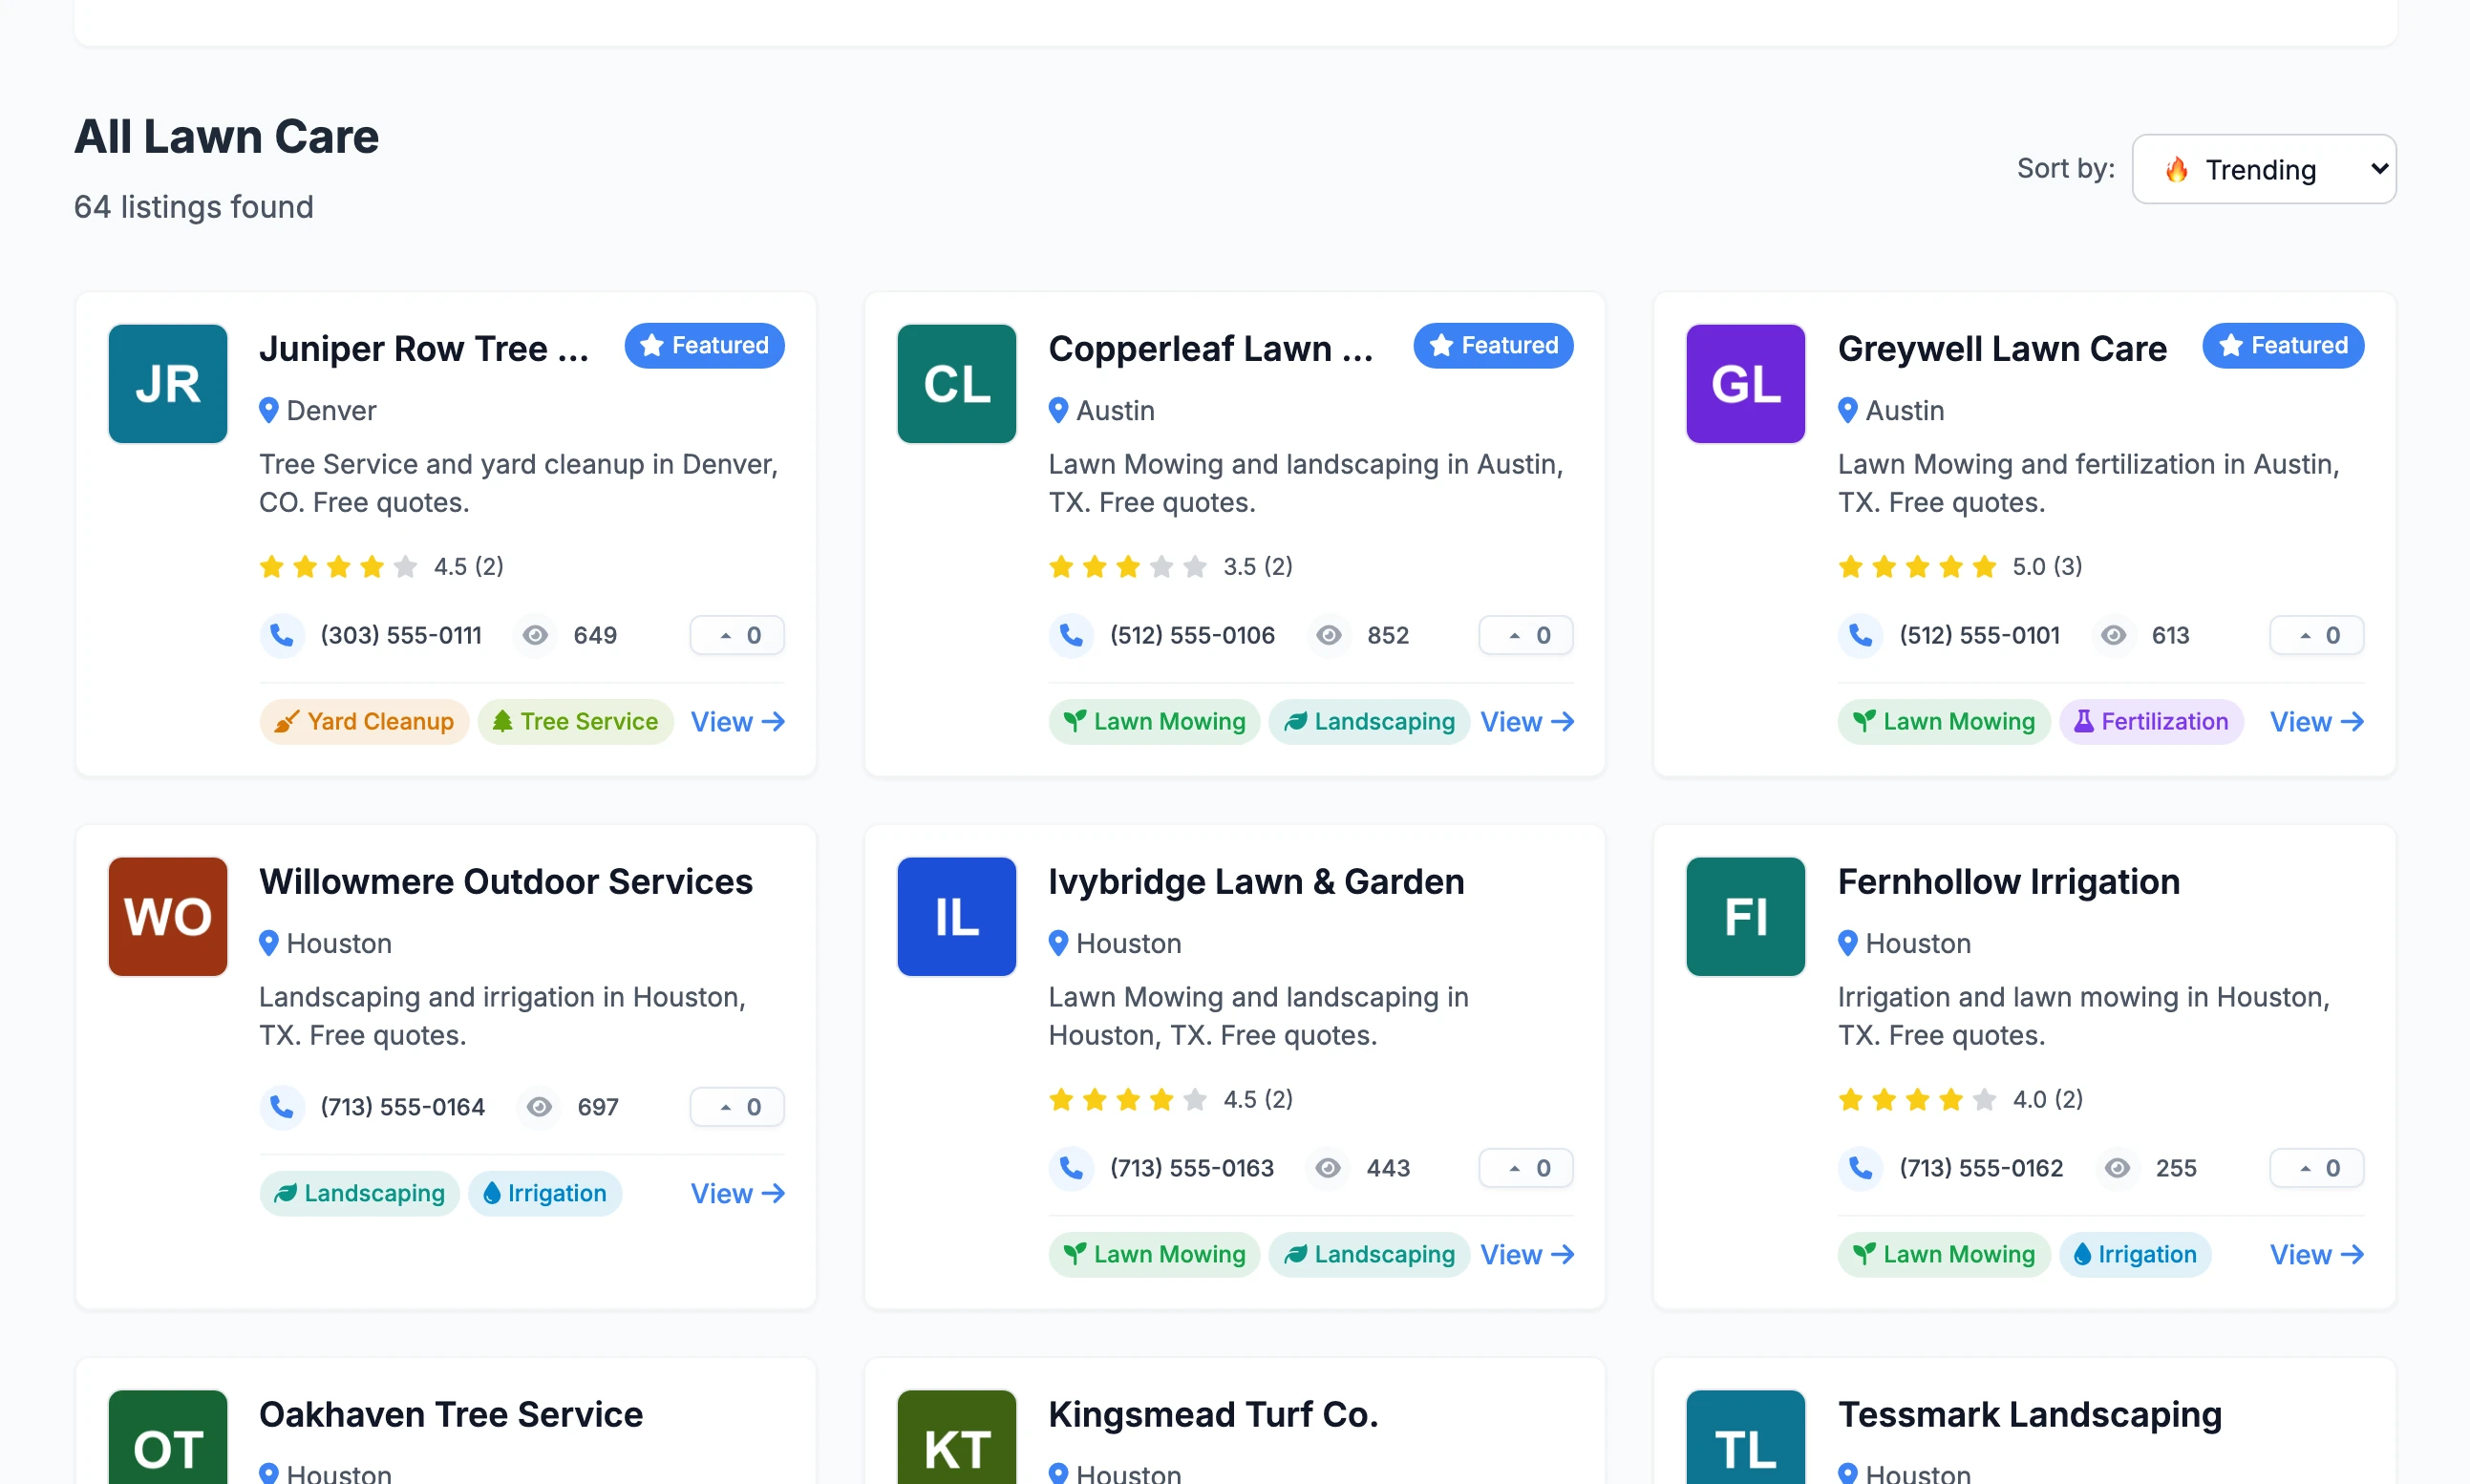
On a city page the order is: businesses sponsoring the category being viewed, then city featured, then homepage featured, then everyone else. On a category page it is category featured, then homepage featured, then everyone else. The Sponsored badge shows only on the pages of the category that was paid for.
Keep track of them#
Open Featured under Quick Actions.
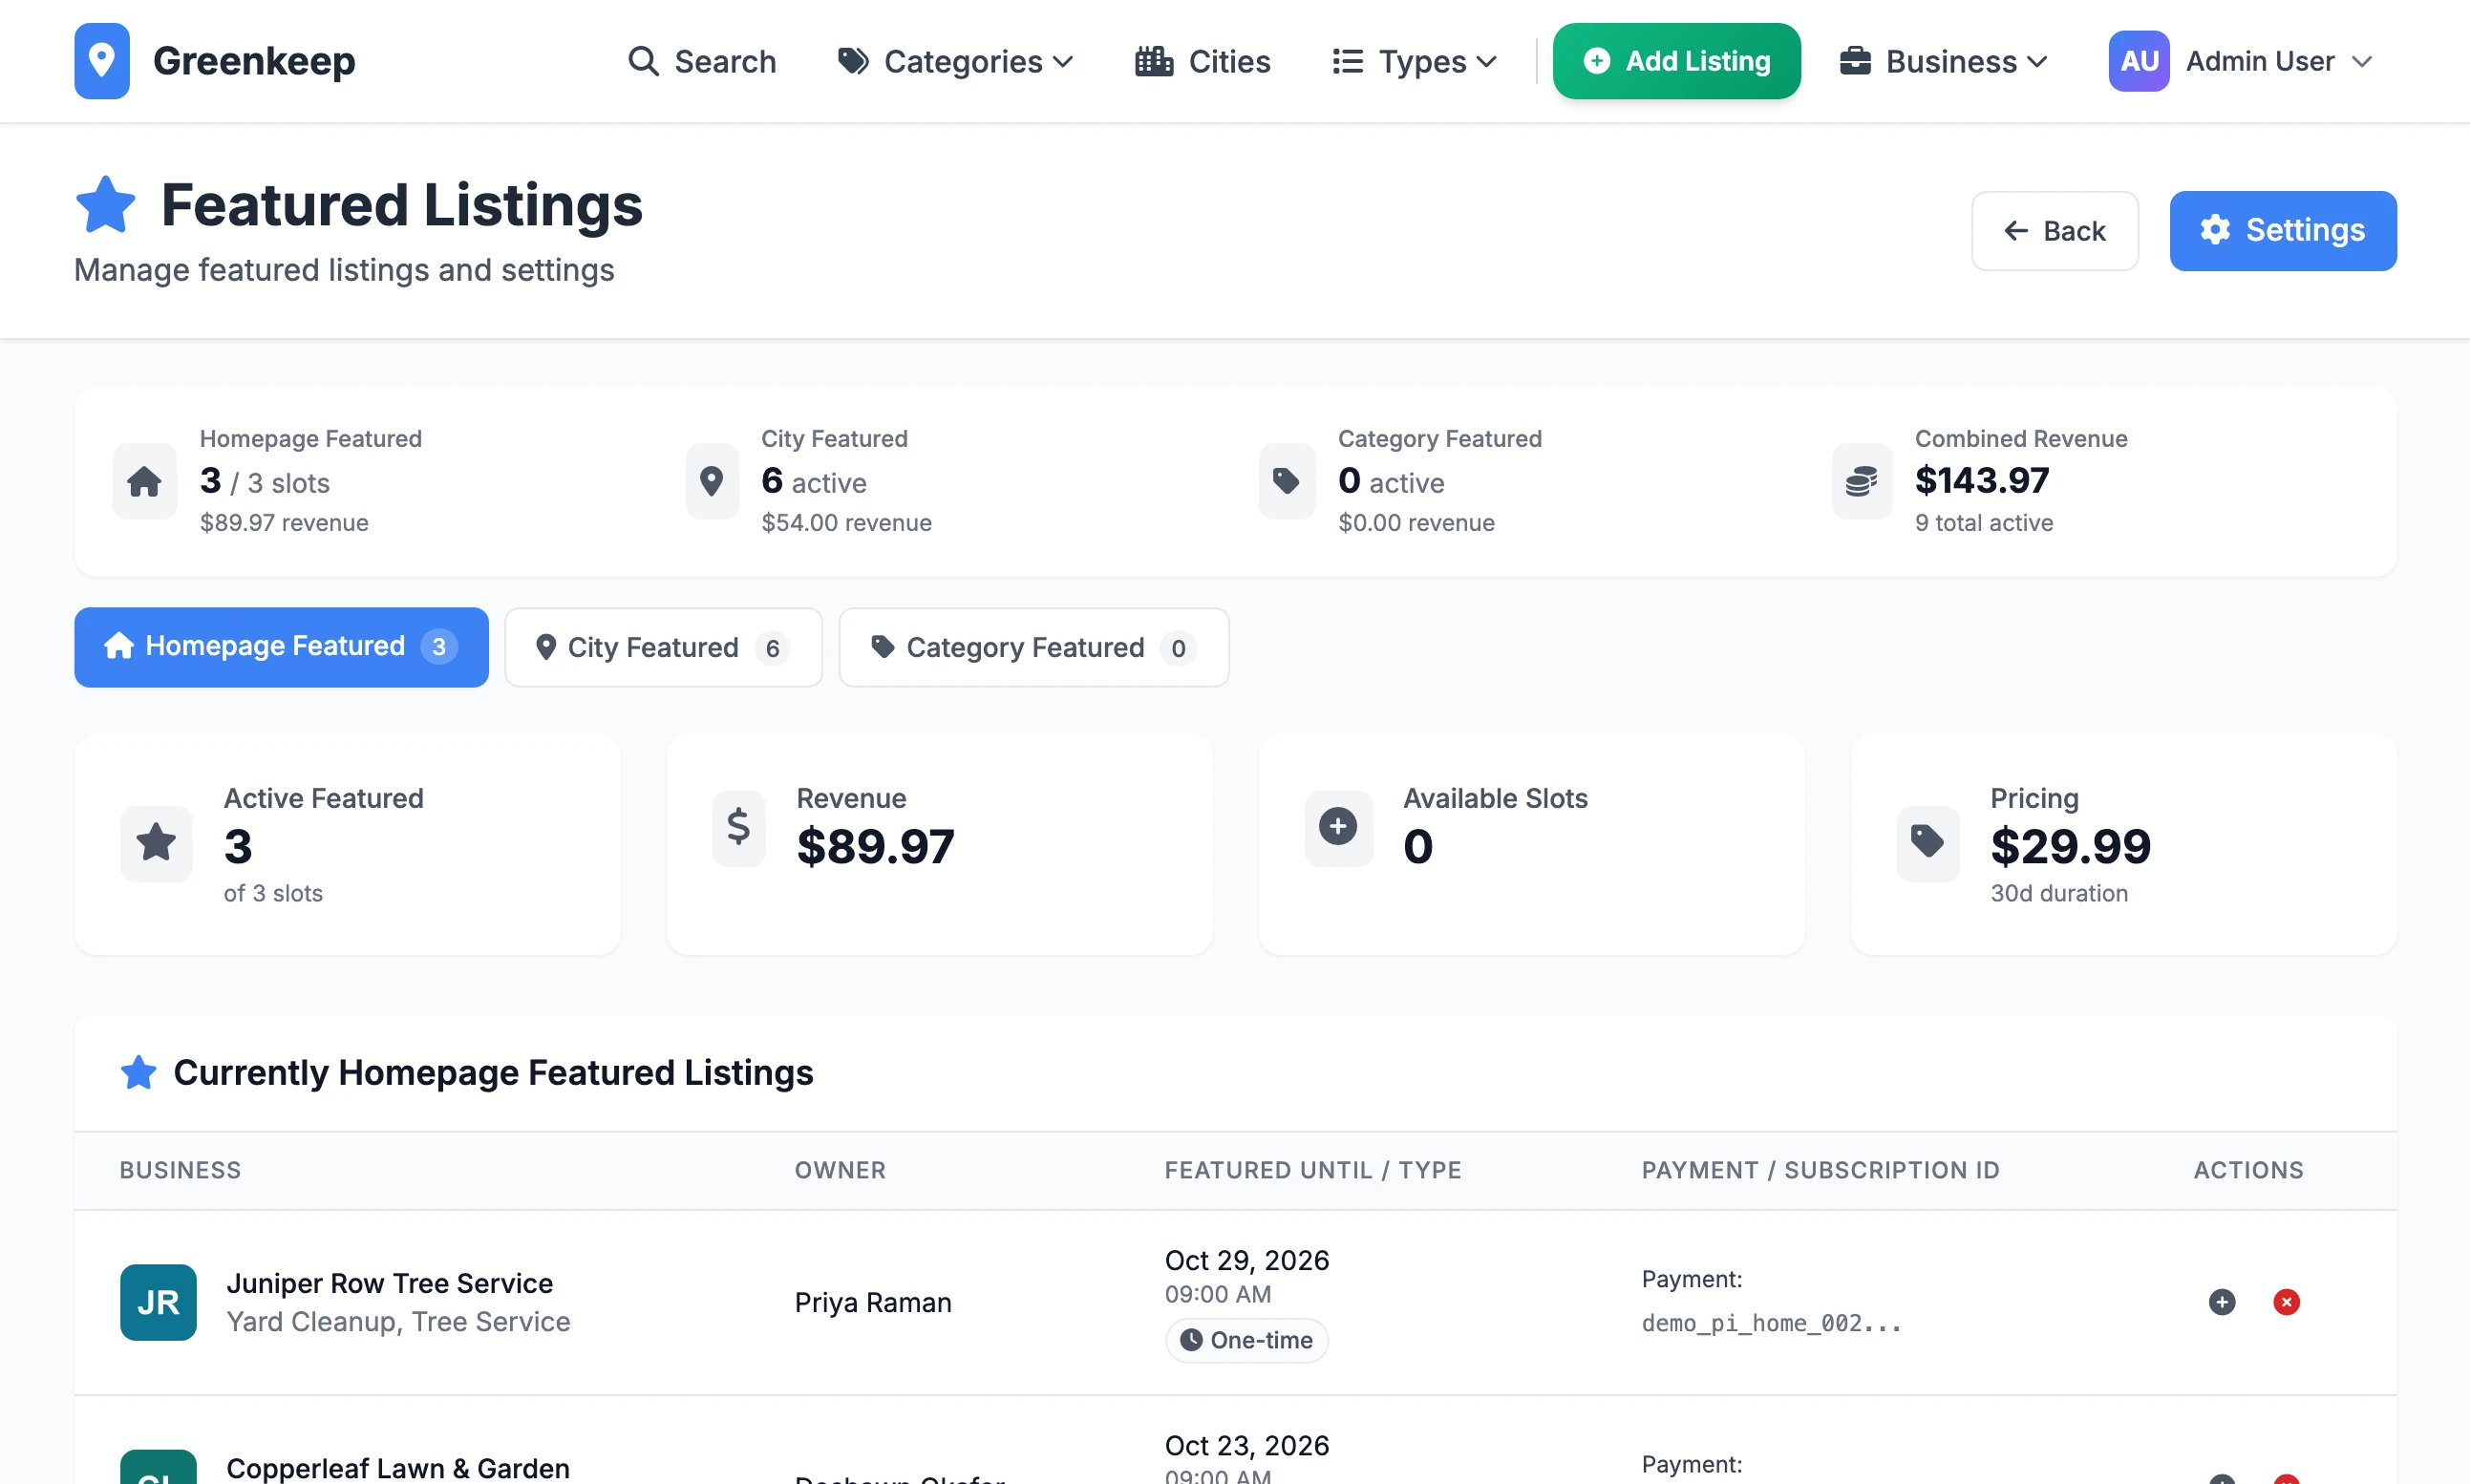
The three tabs are Homepage Featured, City Featured and Category Featured, each with a count.
The cards show how many places are taken, the revenue, the places still free and the current price.
The table lists each featured business with its owner, when it ends, whether it was a one-time payment or a subscription, and the Stripe payment it came from.
The plus icon on a row extends a one-time placement by your configured number of days.
The red cross removes the placement. On a subscription it also cancels the subscription in Stripe at once.
Below that, Deactivated Featured Listings History lists placements that have ended, with a Re-activate button on each.
When a placement ends#
A one-time placement ends when its days run out. Its place is free for someone else from that moment.
A subscription stays featured for as long as it is paid.
If the subscription is cancelled, the listing stays featured until Stripe ends the subscription, which is the end of the period already paid for. In version 1.2.1 it then stays featured for a further 30 days, because Local Lab cannot read the paid-up date from Stripe. To end it sooner, use the red cross on the Featured page.
A renewal keeps the listing featured. In version 1.2.1 the renewal payment is not added to your sales figures: see Connect Stripe.
If a payment fails, nothing changes at first. If Stripe gives up and marks the subscription unpaid or cancelled, the placement is removed.
A refund you give in Stripe is recorded in your sales figures, but it does not remove the placement. Remove it yourself with the red cross on the Featured page.
Feature a listing for free#
To give a placement away, or to make the site look lived-in on day one, open the listing from Listings in the admin.
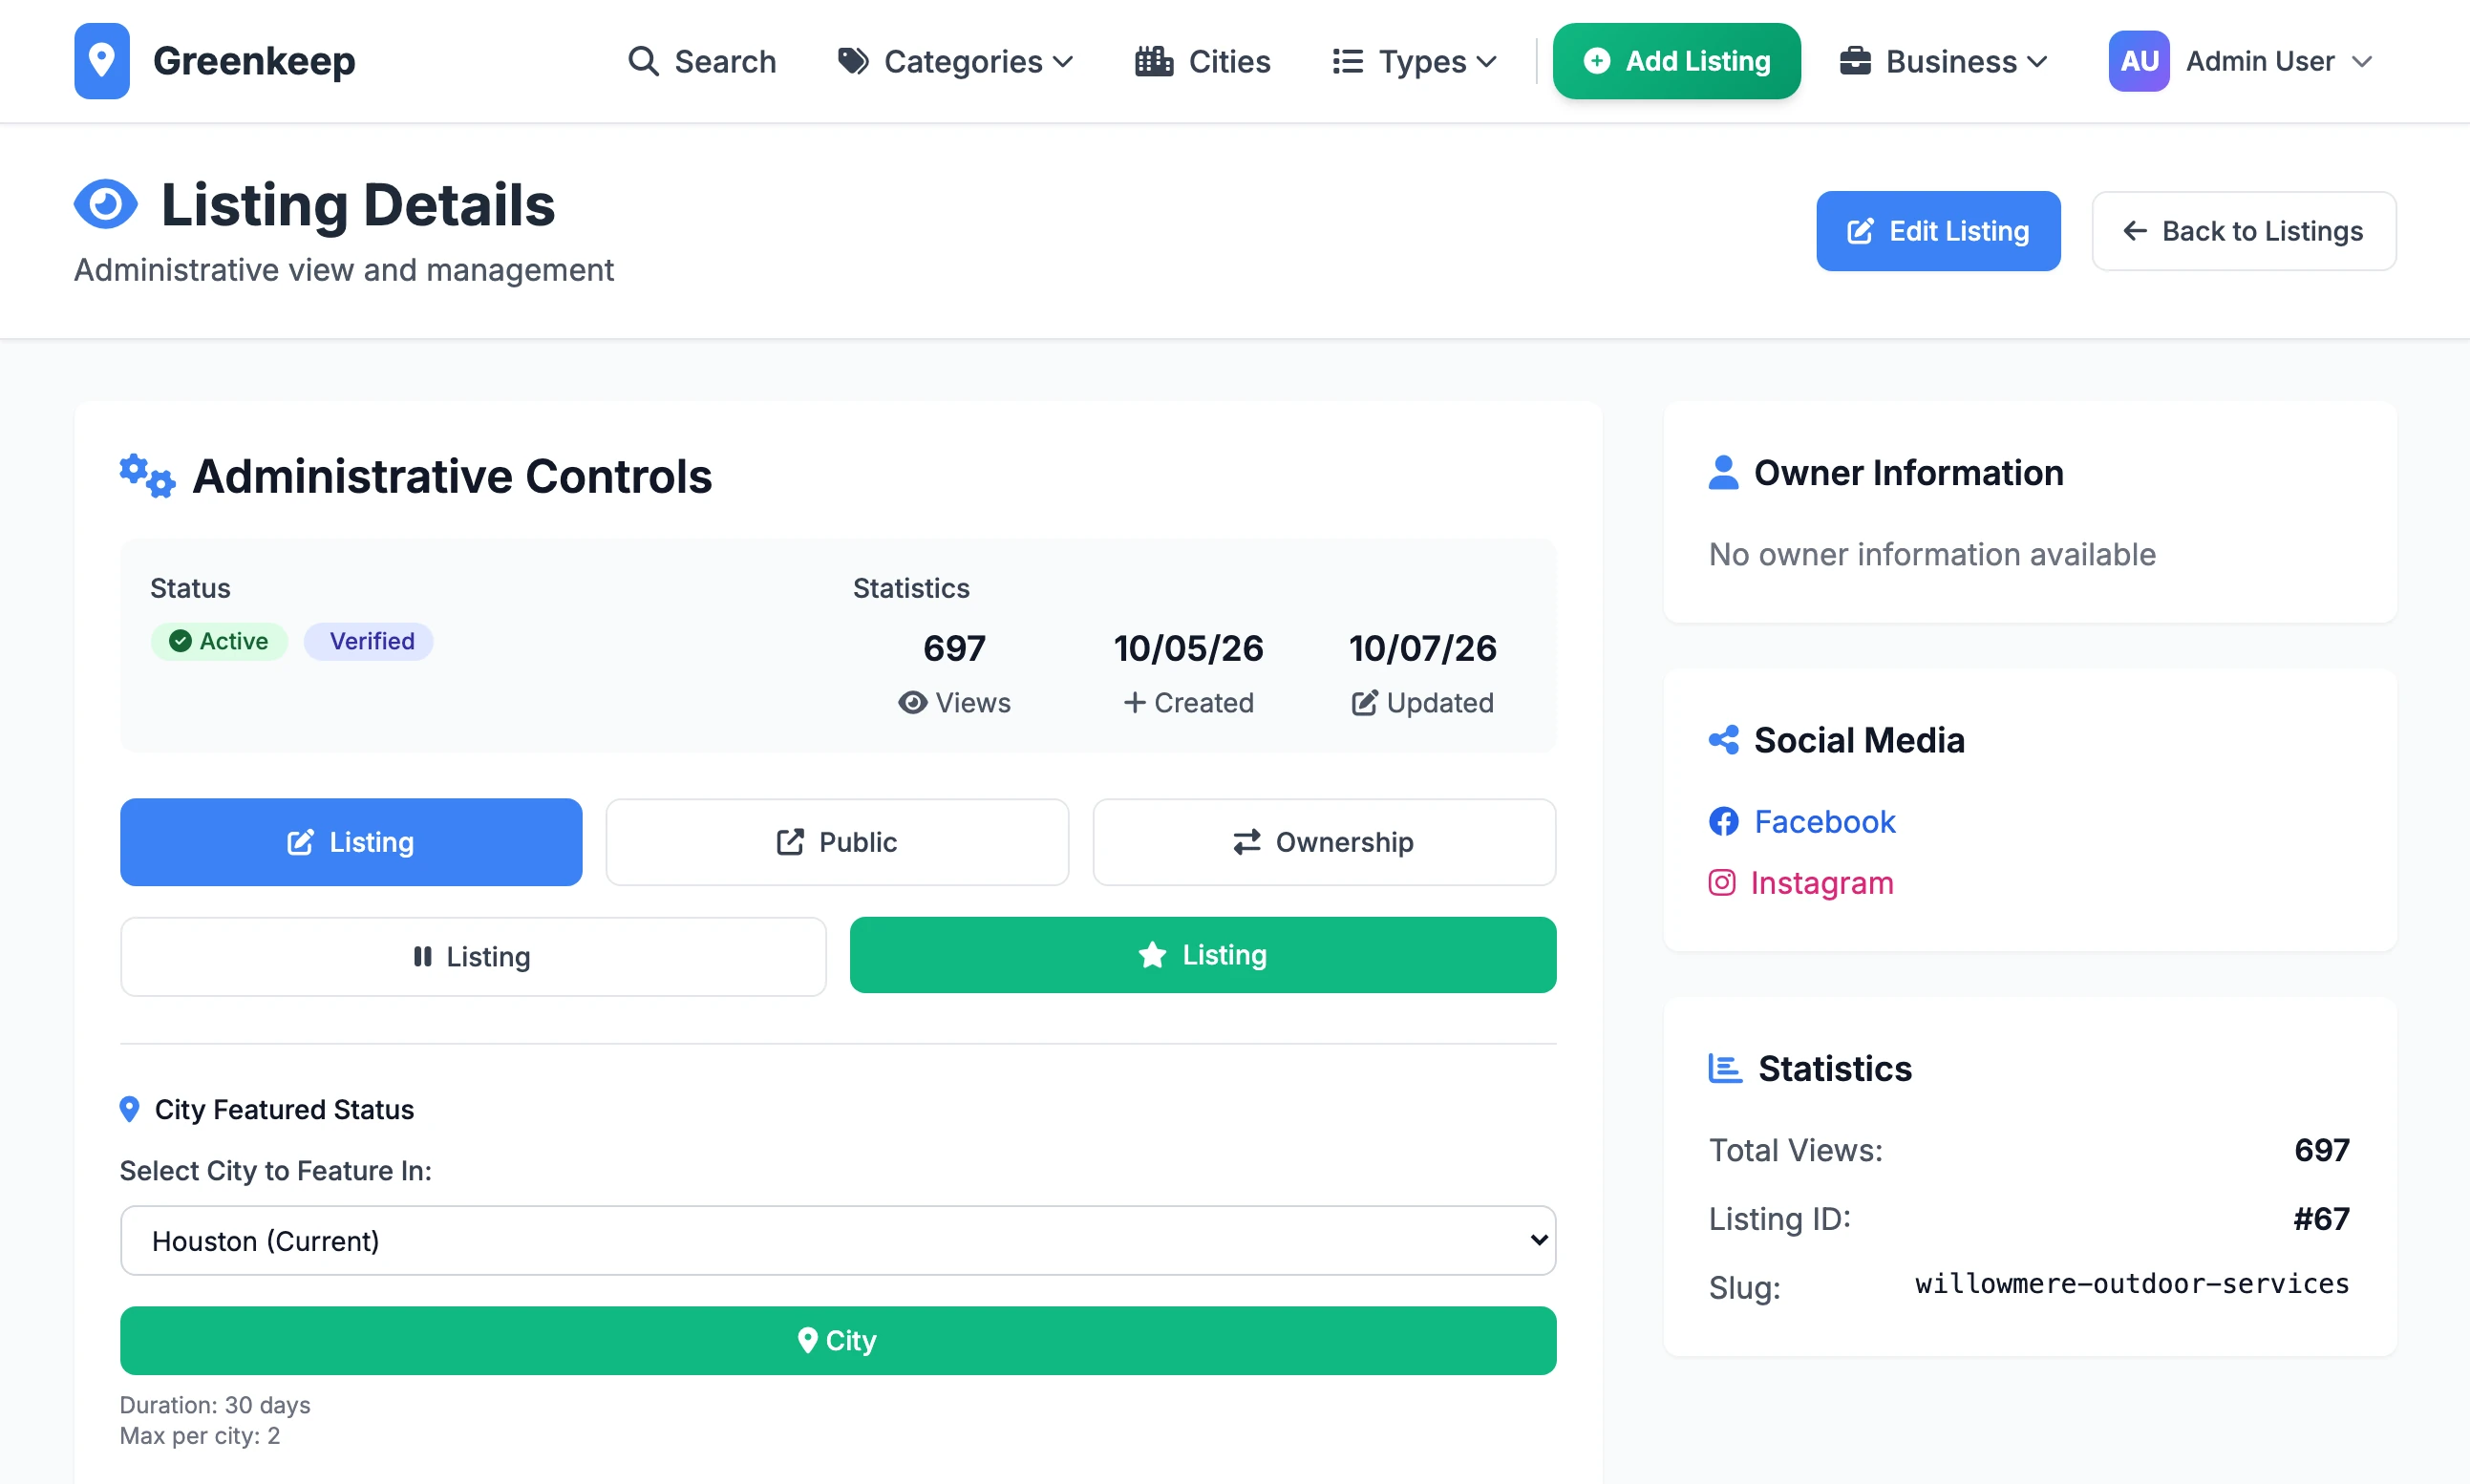
The green button with a star features it on the home page. Its label should read Feature Listing, but in version 1.2.1 the first word is cut off at every screen width, so it reads Listing. It gives a homepage placement for your configured number of days and uses one of the places. If they are all taken you are told to remove one first.
City Featured Status, underneath, features the listing in a city you pick, with the same limit per city.
With category featured switched on, a Category Featured Status block appears as well.
A buyer sees "Payment configuration incomplete"
The Stripe price ID for that placement is empty. Paste it in on the Revenue tab. The same message for a city or category placement names it: "City featured payment configuration incomplete".
A buyer sees "Payment processing error"
Stripe refused the request. Almost always the Stripe secret key is missing or wrong. Check Stripe API Keys on the Revenue tab.
Do I need a Stripe webhook for this to work?
A one-time purchase completes as soon as the buyer returns to your site from Stripe. The webhook is what catches the rest: a buyer who pays and closes the tab, subscription renewals, and cancellations. Set it up before you sell subscriptions.
What stops the same listing being featured twice?
A listing that already has a placement is not offered it again. An owner whose listing has every placement you sell is told so and sent back to their listing.
Stuck on a step? Send a message.